experimenting with time-lapse photographyAs a photographer I've always been fascinated with how the camera can help to expand our vision and freeze a moment in time. But today's cameras can do far more than that. They can capture a long sequence of 'moments' that would be difficult for the human eye to really notice. Time lapse photography has a long cinematic history. As a child I was always enthralled by the time lapse sequences that I would see produced by Walt Disney (Sunday evenings at 6 - anyone else remember those?!). Now, with your camera, some patience and a computer, anyone can capture a sequence taken over minutes, hours, days or weeks and speed up time. 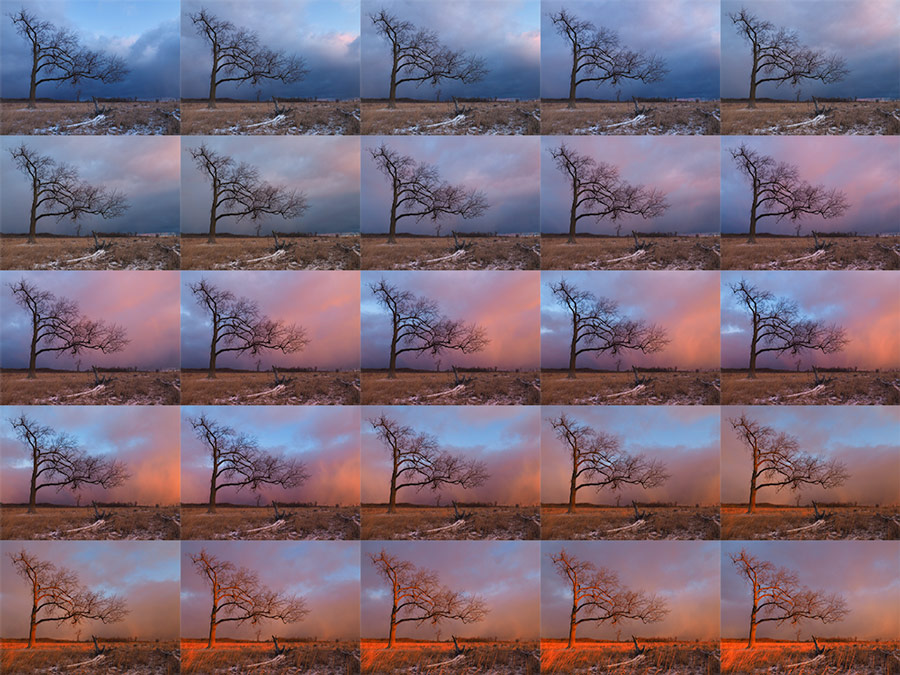 Twenty-five photos from a sequence of 192 images taken over the course of 26 minutes.
31 Comments
Here's a cool (or rather cold) photo experiment that might help you embrace some of the coldest days that winter brings your way. Create some frozen bubbles! 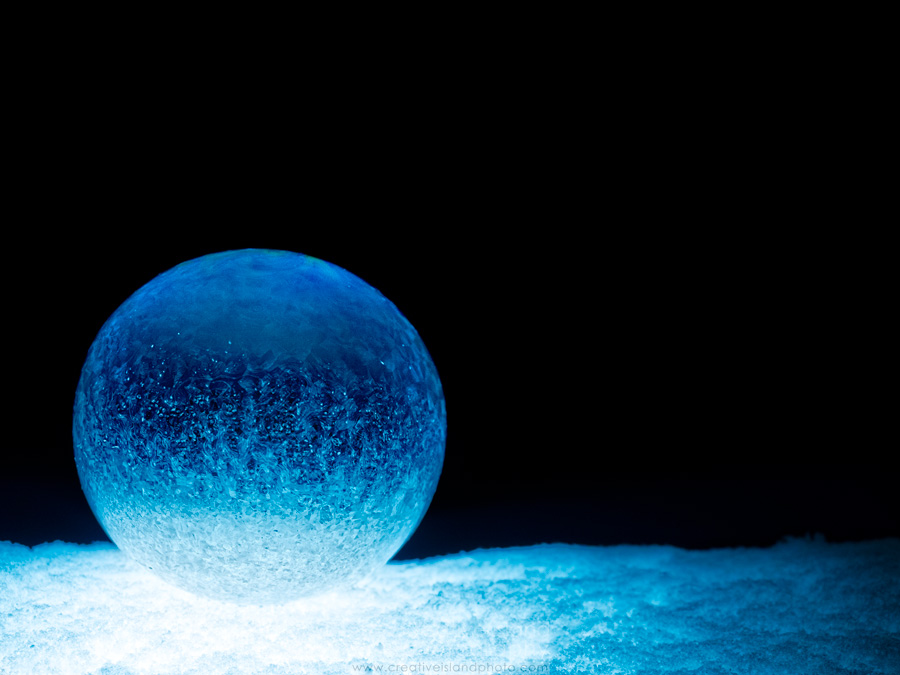 "Crystal Ball" (ISO 400, 0.5s @ f/4.5) Winter can be a great time to get out and do some shooting, but it comes with challenges (and opportunities) that you won’t find in any other season. Here are some thoughts that might help improve your winter-shooting experience. 
Like most photographers I am always excited to try out a new lens, but the new 300mm PRO lens from Olympus is one that I’ve been eagerly looking forward to for over two years. I had the opportunity to shoot with the lens for a few days before the official announcement. Here are my thoughts, but be forewarned, this is not a technical review, rather more of an information piece with some of my first impressions thrown in.
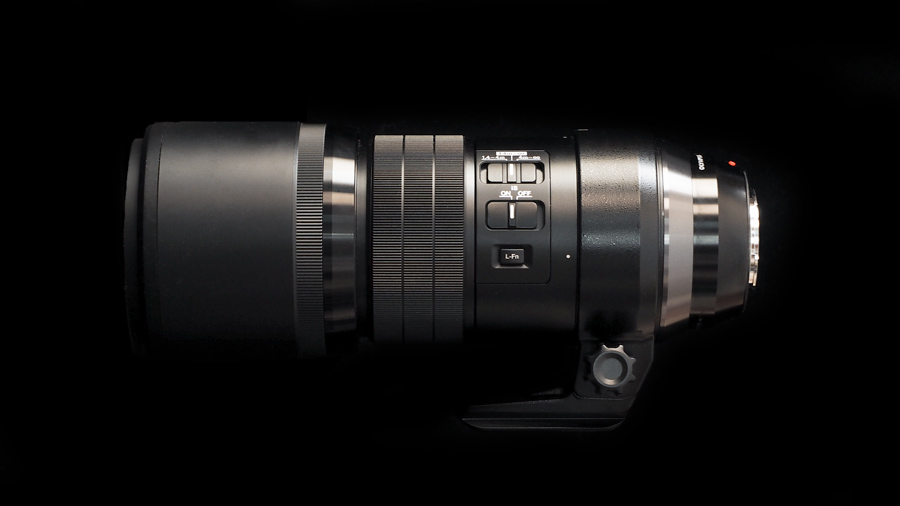
The new M.Zuiko Digital ED 300mm f/4.0 IS PRO is an impressive offering from Olympus.
For aspiring wildlife photographers who don’t want to go traipsing into the winter wilderness, setting up a bird feeder in your yard can provide great photo opportunities to capture the smaller members of the avian community. With a bit of planning and the right camera settings you can capture some great bird images, all while remaining within quick reach of a warm cup of cocoa. The Feeding Station When autumn hits I turn my attention to prepping my yard for winter and one of those chores includes setting up a few bird feeders. Like most people I set them up in front of my larger windows so that I can enjoy the various birds that frequent the Northern Ontario winter. Although I love watching them, my real aim is to photograph them. 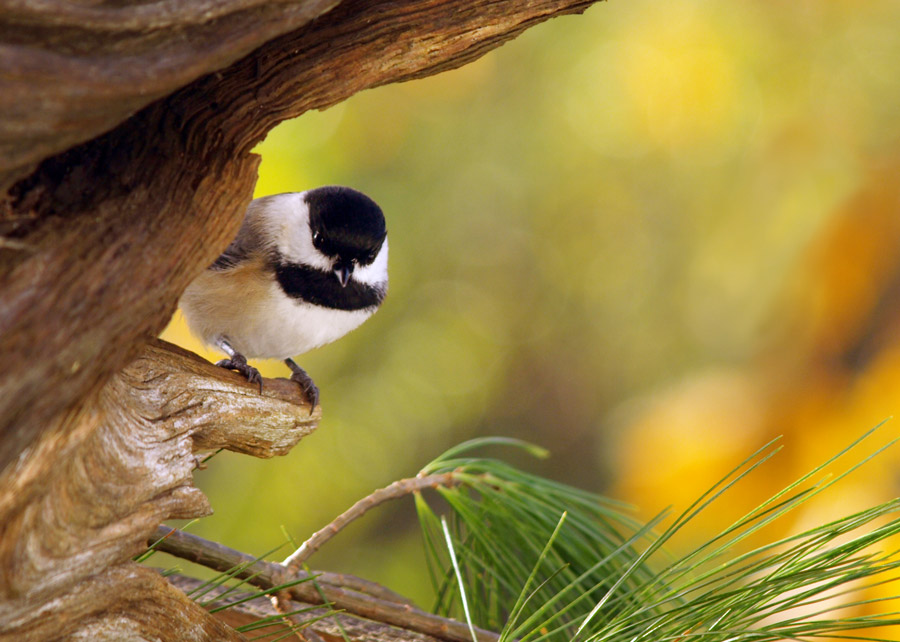 Figure 1: An old stump and a few pine boughs can make for an interesting setting close to your feeder. It also provides a number of options for placing seeds. Once a month, as inky darkness settles across the land, and the creatures of the night begin to stir, I get the urge to howl at, no sorry, photograph the full moon. As simple as it may seem, taking photos of the moon can be challenging. If your full moon images look like a glowing white dinner plate in the sky, you are not alone. Let's find out why that is, and then work to fix it. 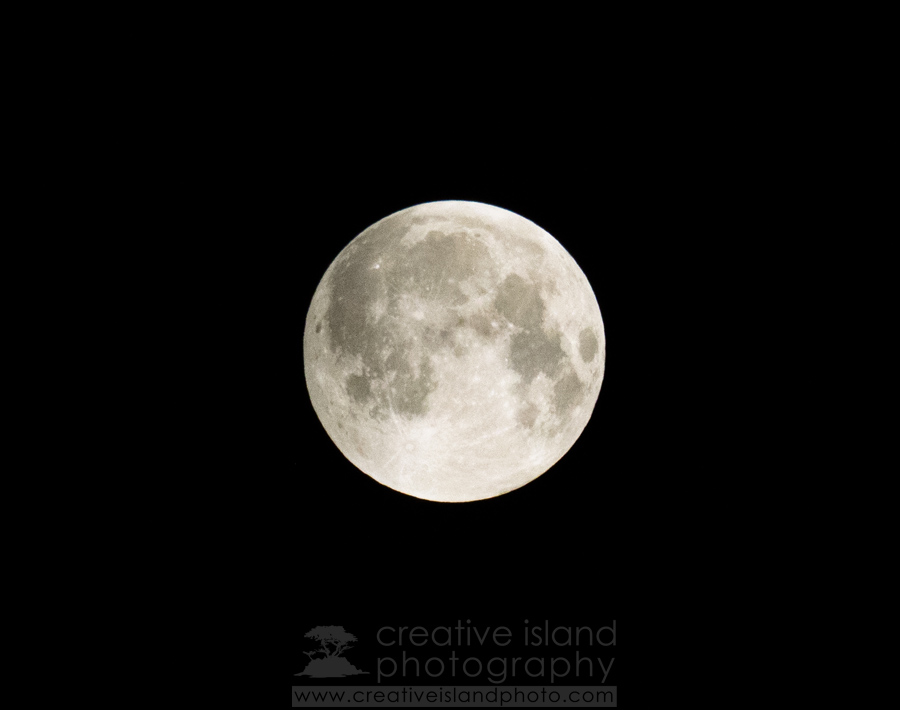 Let's start by saying, "I don't write camera reviews." I leave that to the more technically inclined. This post is more of a "camera impression" and the reason I write it is because a few nights ago I was at a get together with some friends. I pulled out my TG-4, immersed it in my friend's pool and began shooting. Most of the people at this shindig had never seen a camera that could do this. When I showed them the resulting images they were quite impressed. I am also impressed with the new Olympus Tough TG-4 - the company's latest flagship drop-proof, dust-proof, freeze-proof, crush-proof, water-proof, life-proof camera. 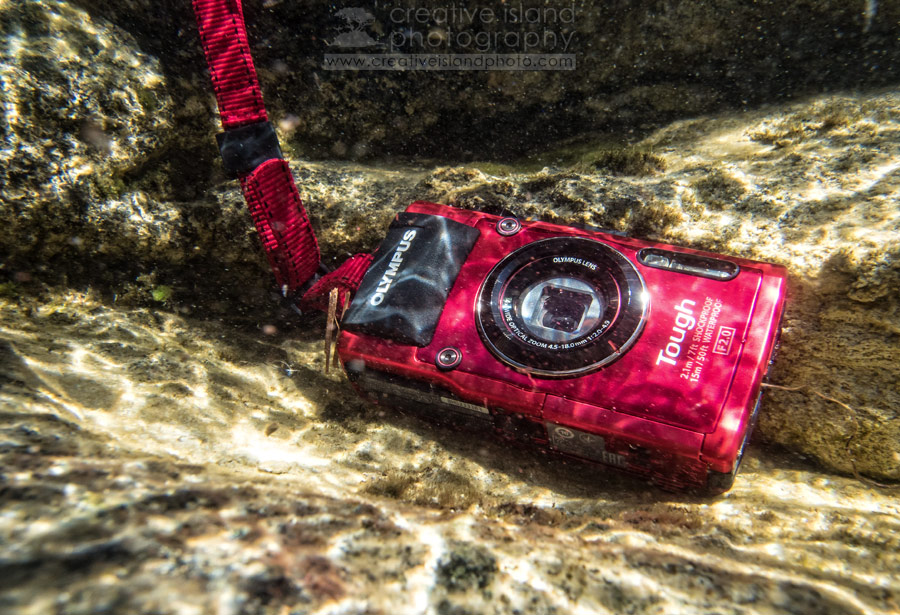 My Top 10 Reasons for being impressed
At the end of January I received a phone call from Richard Pelkowski, Product Manager at Olympus, asking if I would be interested in shooting with a mockup of the new 8mm f/1.8 fisheye lens that Olympus would be releasing this summer. “Of course,” I said enthusiastically! Who wouldn’t agree to that request?
A week later it arrived at my doorstep and several things were immediately noticeable:
I can't resist a great sunrise or sunset. I'm a real sucker for those amazing colours at the bookends of the day. But the reality is that sunset shots are a dime a dozen. So how do you get yours to stand out from the rest of crowd's. Here are some tips that work for me. 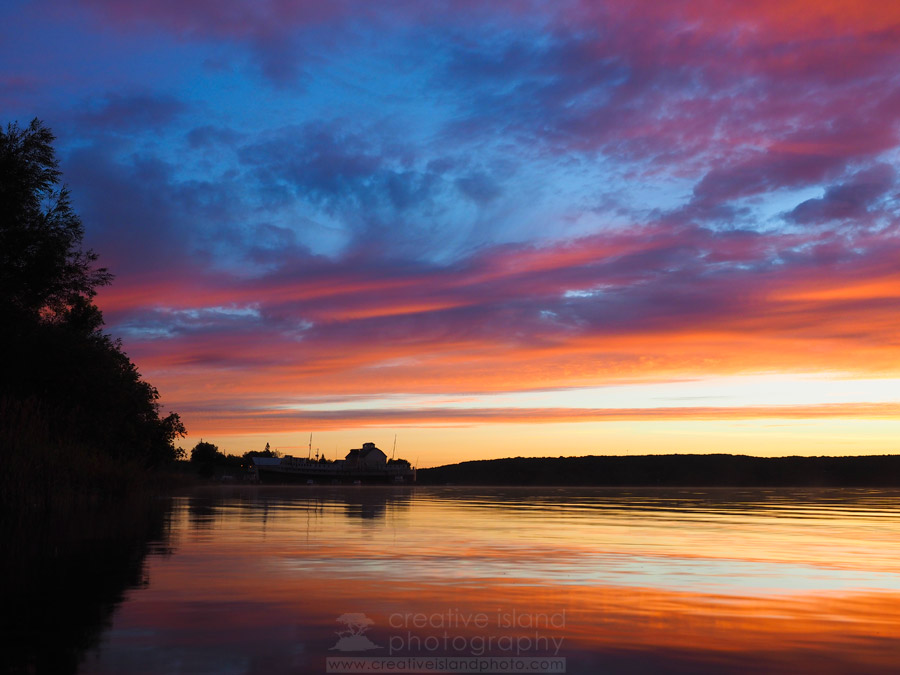 In this image the horizon is in the bottom third of the photograph. As well the silhouettes of the trees and buildings are in the left third of the frame. It's Not About the Sunset "Hold it a second. I thought this post was about sunsets!" Well, it is and it isn't. Gorgeous sunset colours are certainly appealing, but they are definitely not enough to maintain your viewer's interest. Think of the sunset as the backdrop to your photograph. What you place in front of those colours is the important thing. Let's look at an example. 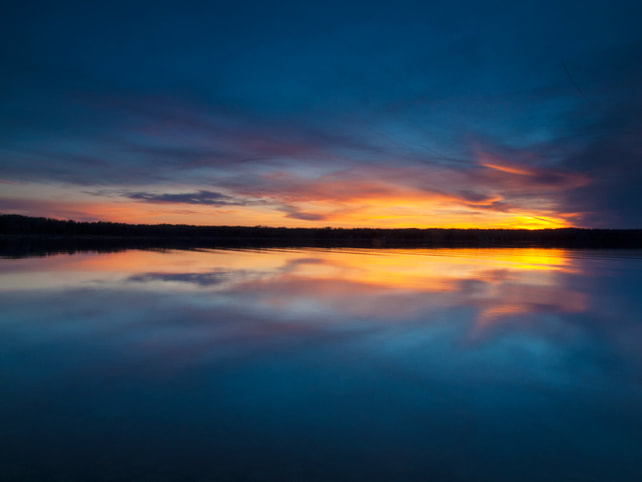 I don't think that anyone would argue with the fact that those are some pretty cool colours and cloud formations in the above image. As well, the almost perfect reflection helps add some interest to this photo, but for me, something's missing. I like the symmetry of this shot, but it didn't keep my interest when I took the photo and it still doesn't. When I arrived at this shoreline earlier that evening I did a bit of scouting around. I came across an old license plate close to shore. I fished it out and recomposed the shot. 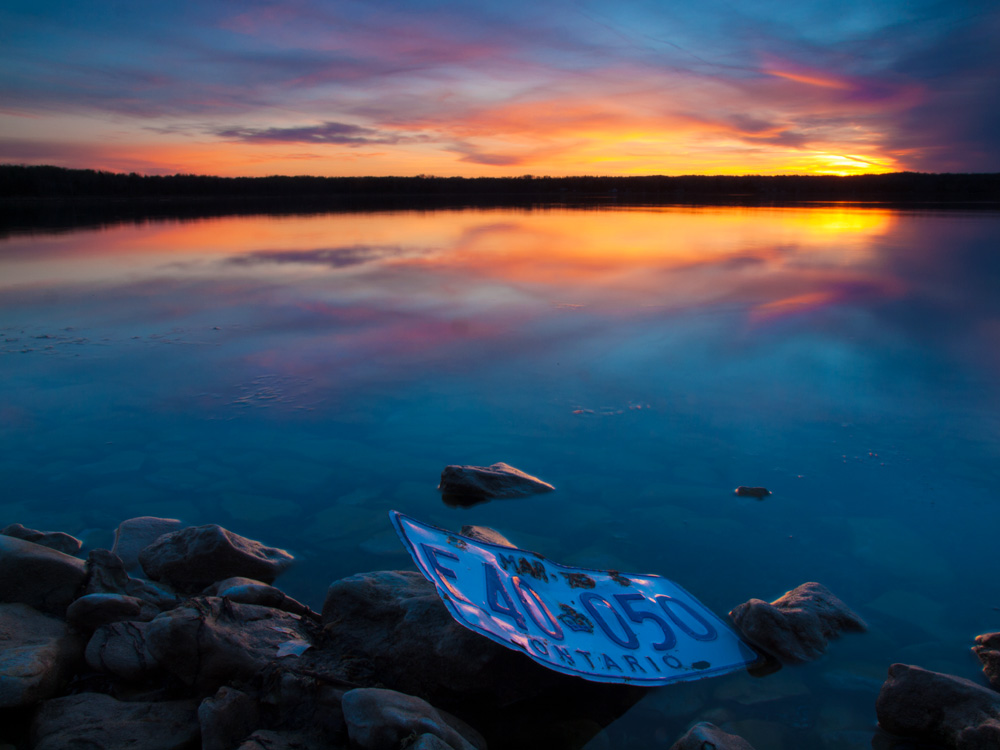 The rocky shoreline helps to anchor the shot and makes the image less abstract, while the license plate adds a unique point of interest.
What the electric toaster did for breakfast, the Live Composite feature on recent Olympus cameras has done for capturing star trails and other long exposure photographs. Putting a slice of bread on a stick and holding it over an open fire can still yield a great piece of toast, but it's challenging, time consuming and very inconvenient. Taking a hundred photographs, uploading them, adjusting exposure and stacking them to create a star trail image is pretty much the same - challenging, time-consuming, and to me, very inconvenient.
Enter, Live Composites. If you are unfamiliar with the technology let's break the idea apart (sorry if this reminds you of your high school English teacher);
Therefore a live composite image is one made of several separate photographs that are combined in the camera over a period of time. You can find this feature on the following camera models; All of the images in this blog post were shot using the E-M1 and the E-M1 Mark II. 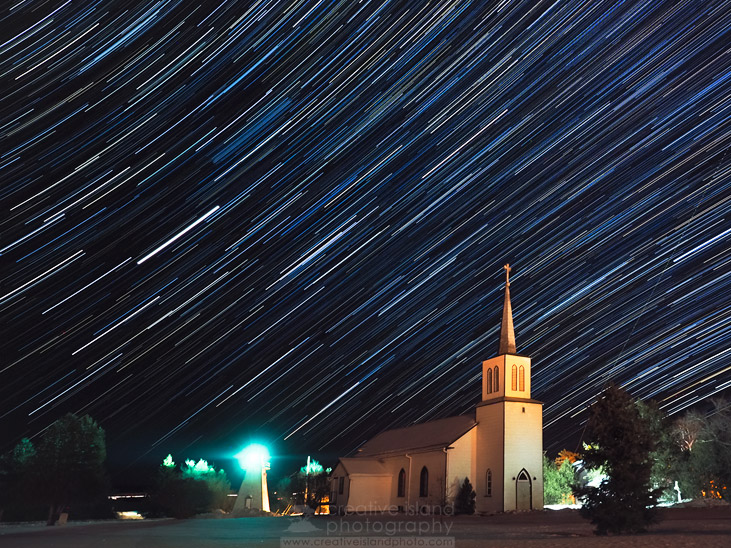
|