|
As a photographer who primarily shoots landscapes I am often focused on the 'big picture'. Normally, I want the viewer to see the subject for what it literally is, a mountain scene, an autumn forest, or waves crashing on a rocky shoreline. My job is to present that scene in an artistically pleasing way using various compositional strategies. There are times however, when a small piece of that landscape catches my eye and I try to present it in a more abstract, rather than literal, way. 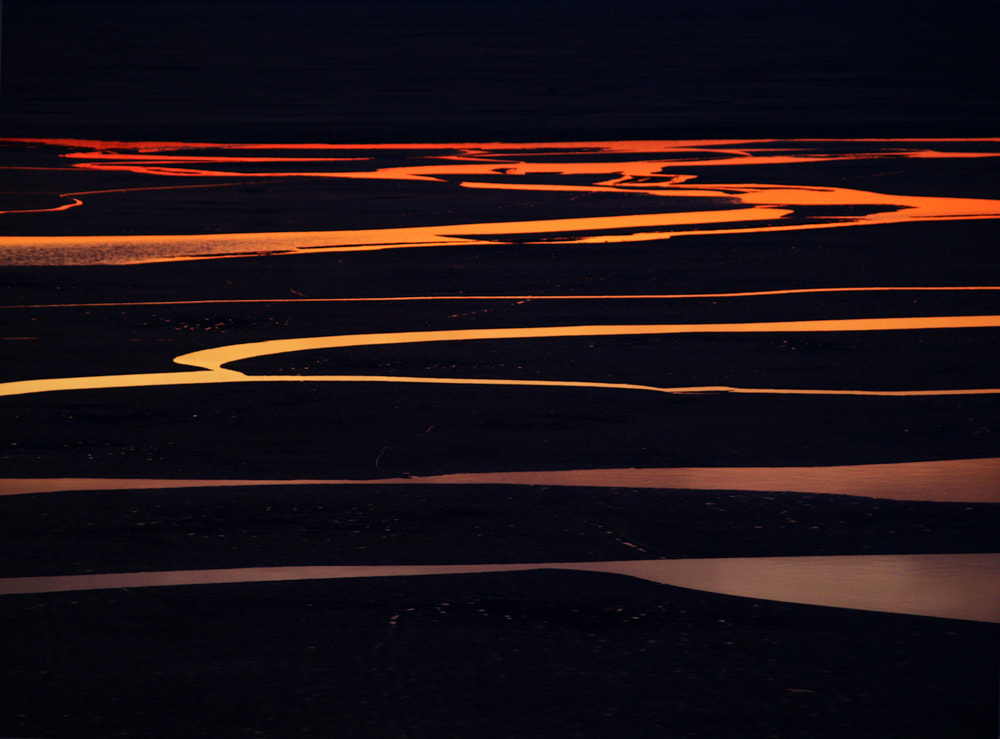 The strong linear elements and colour contrast pulled my attention from the 'big picture' that I was originally intending to shoot. Creating an abstract made for a more interesting image. Can you identify the 'literal' components in this shot? In some abstracts it's obvious and in others it is less so. (E-510, 40-150mm F3.5-4.5, ISO400, 1/6s, f/4.1) What is a Natural Abstract?
By its strictest definition abstract art "does not depict objects in the natural world, but instead uses colour and form in a non-representational way." Well, as a nature photographer that definition is a bit rigid. It can be rather difficult to photograph objects in the natural world and have them completely lose all of their literal references. Even an abstract image involving a tree will likely still be recognizable as having been photographed using that tree. The challenge in abstract photography is to move from the literal presentation of the subjects in your image (trees, rocks, waves, etc.) to creating images that are more impressionistic. There are also degrees of abstraction. Some of the images in this article are more abstract than others. There are no strict rules. The goal is not to create a purely abstract image, but to create an aesthetically pleasing photograph that allows for greater interpretation by the viewer. It's about trying to see the real world in new and interesting ways.
9 Comments
Getting in Close from Far Away Okay, bring your camera in close... Closer... A bit closer... There! Perfect! When you want to get in real close to your subject, you are entering the realm of the macro photographer. Usually this means you need a specialized macro lens, one that allows for extremely close focusing distances and provides a reproduction ratio of at least 1:1. For some subjects this may be your only choice, for example, capturing the minute details of an insect. For situations like that I will grab my Olympus 60mm f/2.8 macro lens. But often I want to capture a great close-up of my subject, giving it the macro 'feel' without actually being all that close. That's when I put on a longer lens and turn to telephoto macros. 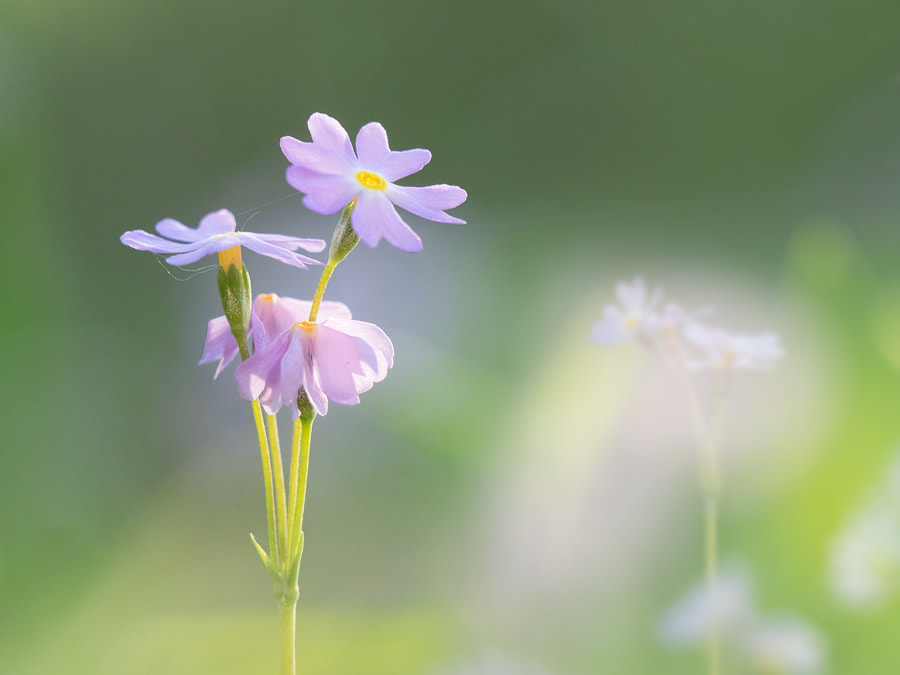 I used the Olympus 40-150mm f/2.8 PRO to capture these flowers. I zoomed in to 105mm (210mm equivalent) and was several feet away from the subject. (E-M1, ISO640, 1/125s @ f/5.6). Using Focus Bracketing and Stacking in Landscape PhotographyFocus bracketing and stacking is often considered the purview of the macro photographer since macro lenses have notoriously shallow depths of field. It is used far less often by landscape photographers and that is unfortunate since it can allow you to present the scene in front of you in ways that you could never really see with the naked eye. It is a technique that I am using more and more often in my landscape work. When composing many of my landscape images, my goal is to draw the viewer into the photograph by having multiple subjects framed in such a way as to provide strong foreground and background elements. The image below is such an example. The main subject is the waterfall, while the leaves, log, and rushing water are secondary subjects that add interest to the shot and hopefully lead the eye toward the main subject. 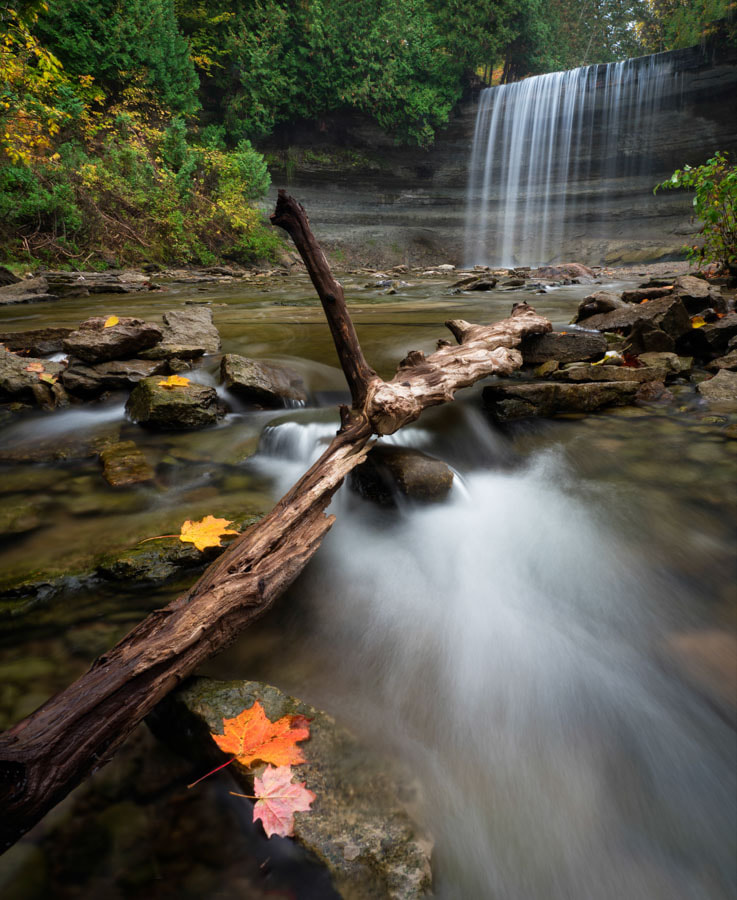 Olympus E-M1 Mark II, 12-100mm f/4 PRO, ISO64, 1s @ f/13 It was important to have sharp focus throughout the image so I positioned my camera about a meter from the foreground elements, focused about 1/3 of the way into the frame and used a relatively small aperture. This gave me the depth of field I needed. But what if I wanted to put my camera much closer to my foreground, let's say a few inches from the leaves. Would I still be able to achieve sharpness throughout the image? Nope! Not in a single shot, even when shooting at the smallest aperture. This is when I turn to focus bracketing and stacking.
I have a love-hate relationship with winter. I won't get into why I hate winter (too cold, short days, high heating bills, driving sucks... okay, so I got into it a bit). For photography however, I love winter. Once the autumn leaves hit the ground and everything looks dull and grey, I find myself dreaming of winter. There's nothing like a fresh blanket of snow to brighten up a landscape scene. And that same landscape can look quite different from day to day considering how variable the weather and lighting can be during the winter. Is winter photography really any different from that of other seasons? Yes, and no. The basics of landscape photograph apply regardless of the season, but my approach and preparedness can be different in the winter. Here are some tips that might help you improve your winter compositions; 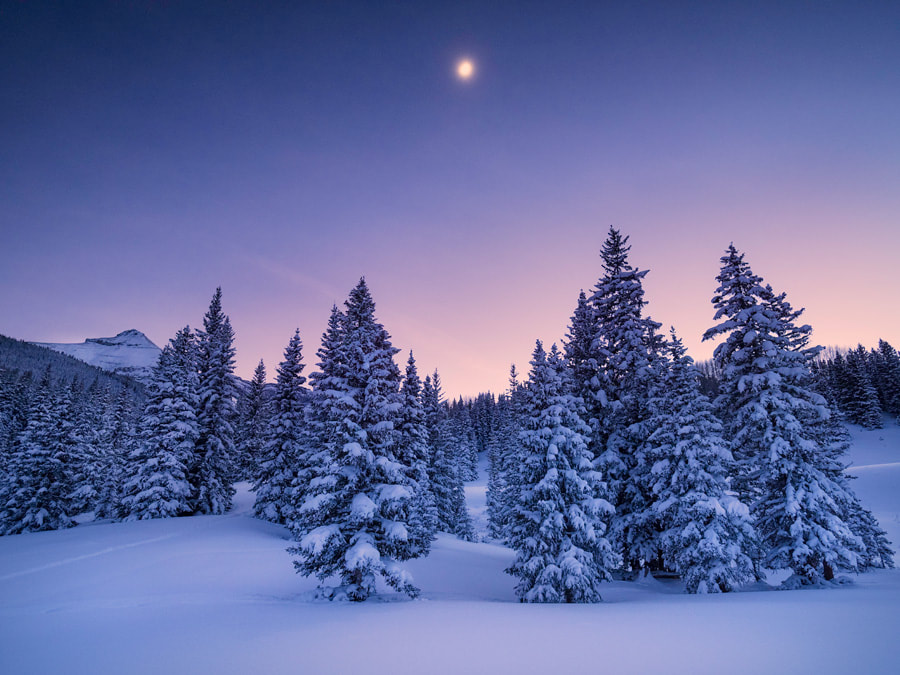 Olympus E-M1 Mark II, M.7-14mm f/2.8, ISO640, 3.2s @ f/3.2 Achieving More Accurate HDR Images HDR, or high dynamic range images were all the rage a few years ago. Generally speaking, I see far fewer photographers posting images with that distinctive (and in my opinion, overly processed) look. For those not familiar with it (and there can't be many), the concept is a fairly simple one. Take several photos of the same subject at different exposures and let photo-editing software merge them together so that details can be seen in both the darker and lighter regions of the photo. Like many, I also experimented with creating that style of imagery. I don't anymore, and here's why...
 Like most people, I own a smart phone. And, like most phones it has a built-in camera. But, unlike most people I never use my phone for selfies. As a matter of fact, I don't think I've ever photographed myself with my phone. That's mainly because I look far better behind the camera than in front it. So why am I writing an article on selfies? Because this post isn't about snapping a shot of yourself in front of the Grand Canyon or with your friends at the mall. It's about creating a photographic work of art that just happens to include you. 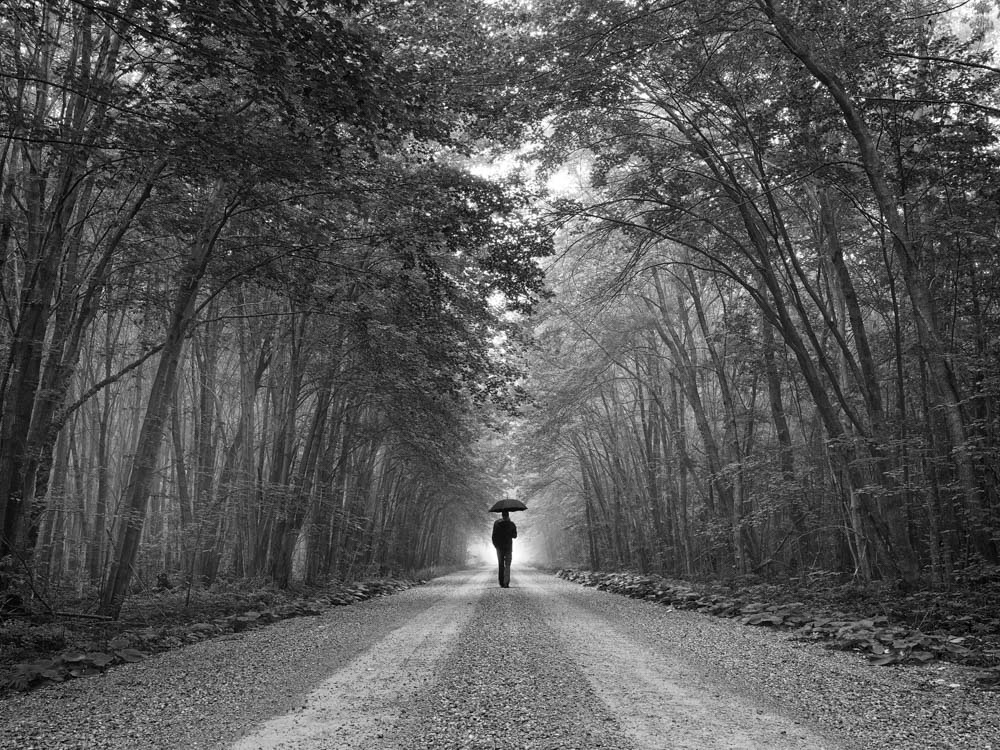 Olympus E-M5 Mark II, M.Zuiko 12-40mm f/2.8, ISO800, 1/6s @ f/10 Why a Selfie?
Regardless of the style of photography you engage in, a good image should trigger an emotional response. It could be wonder, intrigue, sadness, joy, calm, curiosity, or the myriad of other emotions that exist. As a landscape photographer I try to keep this in mind and present a final image that will attract and maintain the attention of anyone who sees it. One way of doing this is by including people in your shot. Adding the human element to one of your landscape images can draw the viewer in and tell a more complete story. So why do I include myself and not someone else? The main reason, but certainly not the only one, is that most of the time, I'm the only person around. I am usually out shooting at odd times of the day and in locations that are very much off the beaten trail. As well, I can usually visualize the image before the shutter is released and know exactly what I'm looking for. Stepping into the frame can sometimes be easier than giving instructions to your model. As an Olympus Visionary, this article references a number of Olympus products and uses screenshots from the Olympus E-M1 Mark II. The ideas behind the images however, can certainly apply to any brand of camera. Landscape photography is perhaps the easiest style of photography to get into. All you need is a camera body and a wide-angle lens. That's it. With those two pieces of gear you can start photographing urban, rural and wilderness landscapes. When I was twelve years old, that's what I started with. Of course, you will eventually want to build up your list of equipment to include a tripod, filters, a telephoto lens and a few other items. The one thing that you might overlook however, is the fisheye lens. And that would be a mistake. 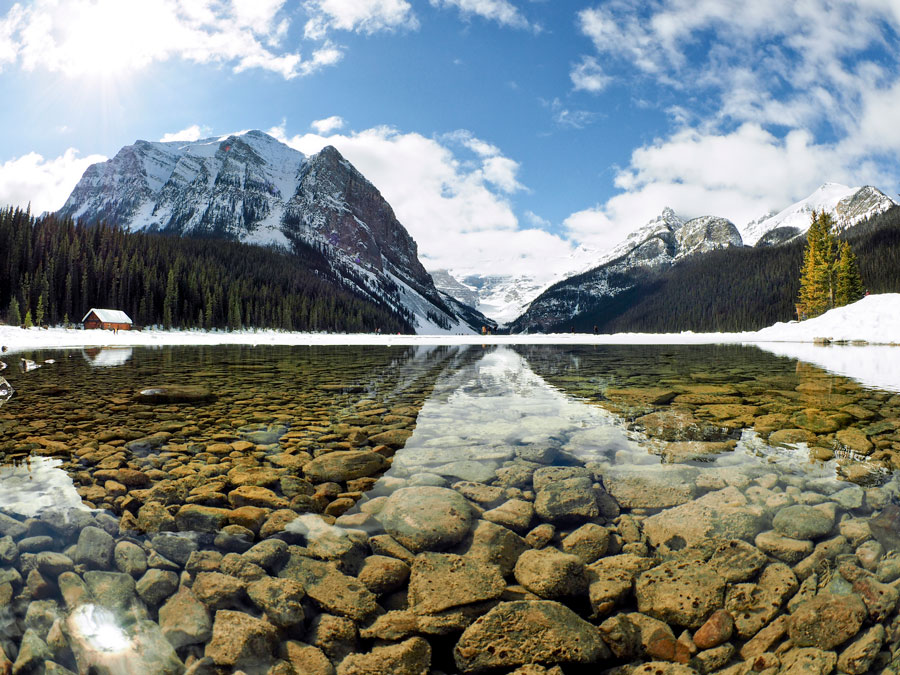 Lake Victoria in Banff National Park, Alberta. Photographed with the Olympus OMD E-M5 Mark II and m.Zuiko 8mm f/1.8 fisheye lens (ISO200, f/8, 1/500s) Photographing Elegant Still Life Images As a nature/landscape photographer the quality of my images is very much dependent on the whim of mother nature and the light she decides to present to my lens. It can be a real disappointment to head to a great location only to have poor quality light spoil the scene. I've grown to accept that and cherish those moments when the light is perfect. There are times however when 'bad' light seems to lead to the best results. This 'black velvet' project is one of those cases. 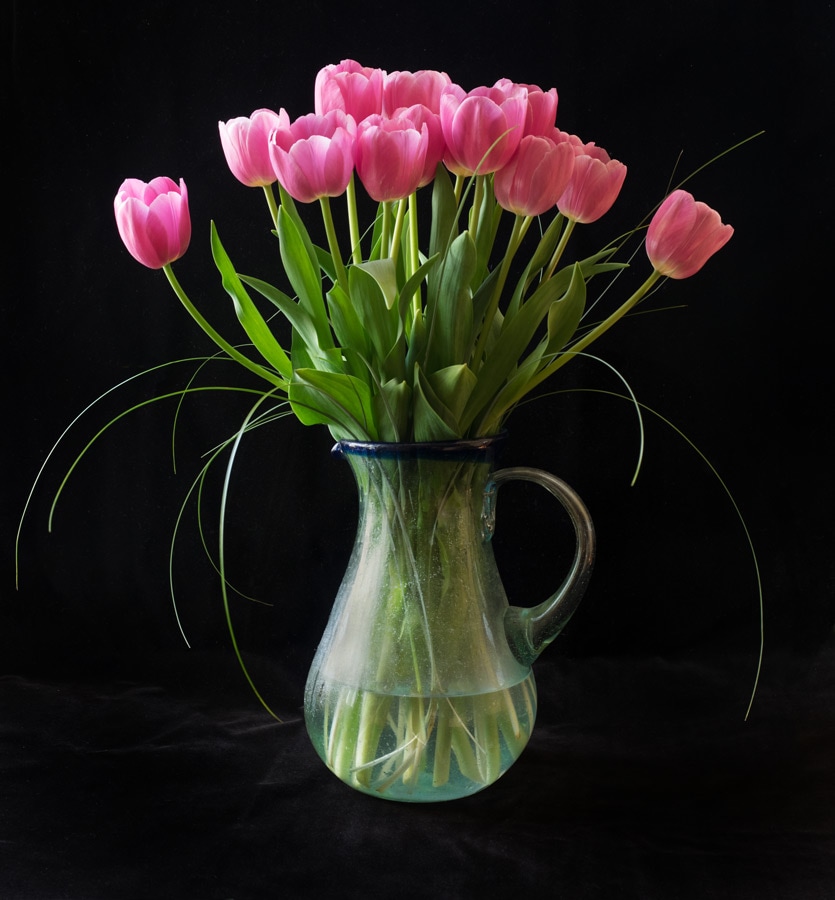 The key elements are quite simple; a still life subject, muted natural light and a piece of black velvet. Although other fabrics will work, black velvet absorbs almost all light and has little to no sheen. It tends to pick up lint easily so having a lint roller handy will save some post-processing work later. Practically any subject will do but I tend to like using natural subjects from my garden. It's a nice change to be able to have greater control over the elements in your photograph. As far as lighting your subject, it may seem counterintuitive, but I find I achieve the best results under rather dull, early evening, overcast lighting - the type you would normally avoid.
Every autumn, in the forests near my home, a massive reproductive event takes place that I just can't ignore. It starts during the warm days of summer when long tendrils of mycelium digest their way through the rotting corpses of fallen forest detritus. When autumn arrives, an asexual explosion erupts from the earth, as the fruiting bodies strive to spread their genetically identical spores throughout the forest floor. We're talking mushrooms here, people! And I love to photograph them. Mushrooms grow remarkably quickly and decay even quicker. But if you time it right they can be quite photogenic. Many species are so small that a macro lens is an absolute necessity. Anyone who has worked with a macro lens recognizes that it can be a real challenge to achieve a sharp subject from front to back and still maintain a nice, soft, defocused background. In fact, with most subjects it's an impossible task. Enter focus stacking or focus bracketing. 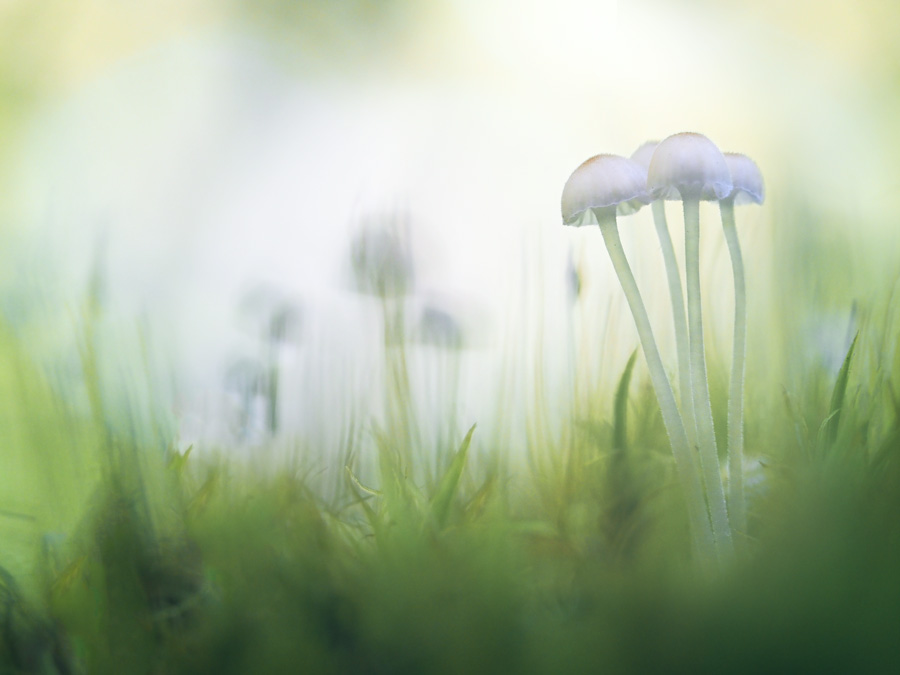 Olympus OMD E-M1 Mark II, 60mm f/2.8 macro, ISO640, 1/200s, f/3.5, +0.3EV, focus differential 4
If the camera was invented for only one of the four seasons, it would have to be autumn. The colours, cooler weather and threat of the long winter ahead inspires countless photographers to get out and photograph the beauty of fall. If you are one of those photographers, here are a few tips and techniques that I use.
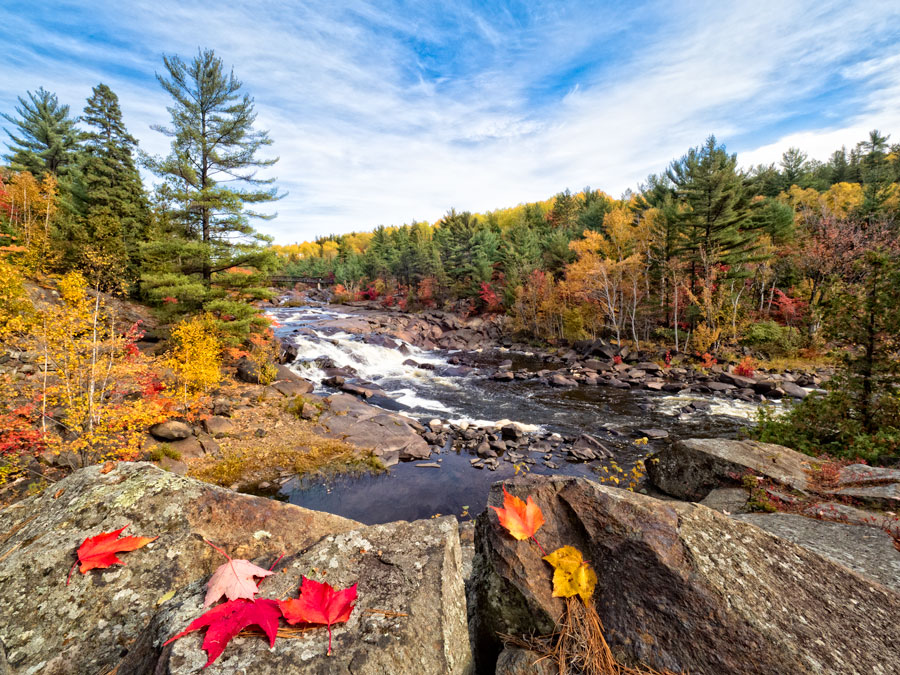
Autumn is perhaps the most picturesque time of the year. Get outside and capture it! (Camera: Olympus OMD E-M5 II, Lens: M.Zuiko 7-14mm f/2.8 PRO, ISO400, 1/80, f/16)
|