|
Like most people, I own a smart phone. And, like most phones it has a built-in camera. But, unlike most people I never use my phone for selfies. As a matter of fact, I don't think I've ever photographed myself with my phone. That's mainly because I look far better behind the camera than in front it. So why am I writing an article on selfies? Because this post isn't about snapping a shot of yourself in front of the Grand Canyon or with your friends at the mall. It's about creating a photographic work of art that just happens to include you. 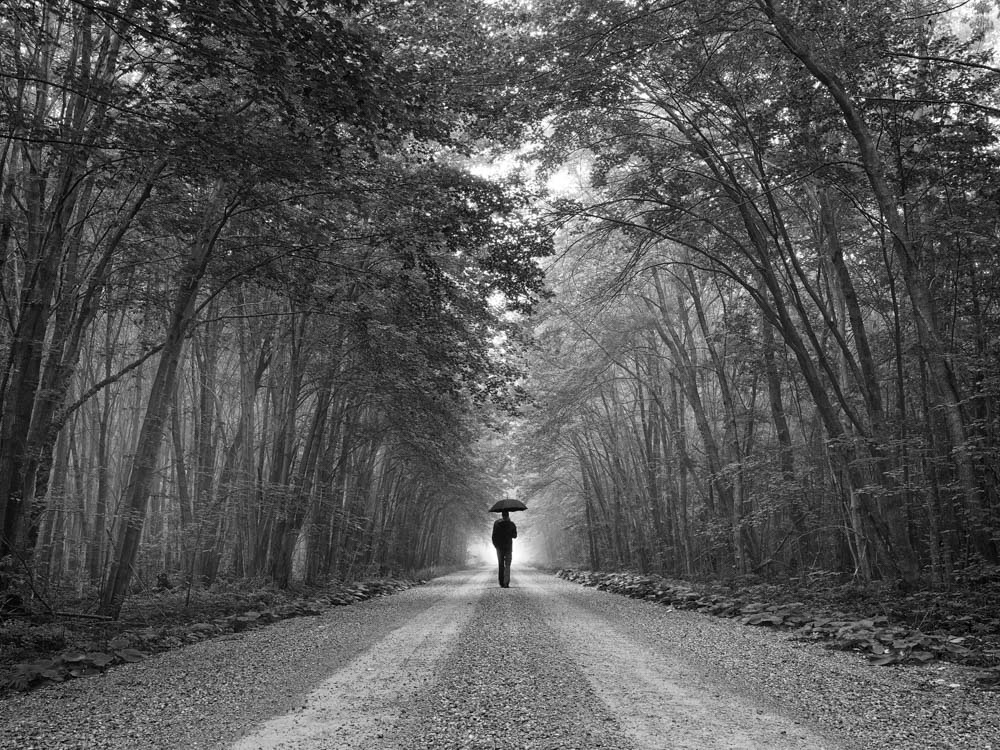 Olympus E-M5 Mark II, M.Zuiko 12-40mm f/2.8, ISO800, 1/6s @ f/10 Why a Selfie? Regardless of the style of photography you engage in, a good image should trigger an emotional response. It could be wonder, intrigue, sadness, joy, calm, curiosity, or the myriad of other emotions that exist. As a landscape photographer I try to keep this in mind and present a final image that will attract and maintain the attention of anyone who sees it. One way of doing this is by including people in your shot. Adding the human element to one of your landscape images can draw the viewer in and tell a more complete story. So why do I include myself and not someone else? The main reason, but certainly not the only one, is that most of the time, I'm the only person around. I am usually out shooting at odd times of the day and in locations that are very much off the beaten trail. As well, I can usually visualize the image before the shutter is released and know exactly what I'm looking for. Stepping into the frame can sometimes be easier than giving instructions to your model. As an Olympus Visionary, this article references a number of Olympus products and uses screenshots from the Olympus E-M1 Mark II. The ideas behind the images however, can certainly apply to any brand of camera. Triggering the Camera Once you step away from the camera you need to have some way of releasing the shutter in order to include yourself in the image. There are three ways of accomplishing this task with each having some advantages and disadvantages. Self-Timer - Using the built-in self timer is certainly the easiest method of triggering the shutter. Cameras have had self timers for decades. Newer models, like the OMD series from Olympus now allow you far more control.
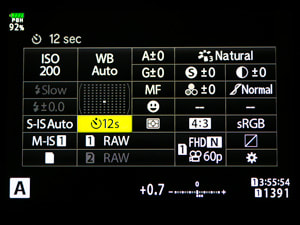
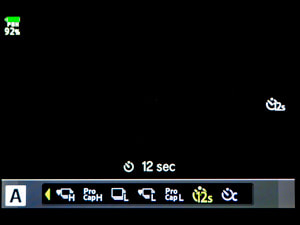
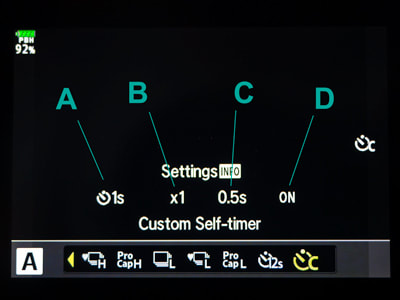
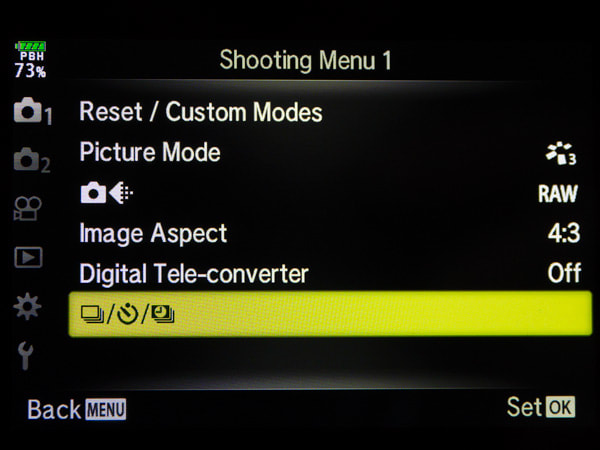
Although the timer function can be accessed via the menu, the easiest method is by using the Super Control Panel. For the screenshots above the delay has been set to the 12-second option. After pressing the shutter release you have twelve seconds to get into position. An orange LED lights up on the front of the camera and with two seconds left begins blinking, indicating the shutter is about to be released. The disadvantage here is that you only get one shot, and must return to the camera in order to trigger it again.
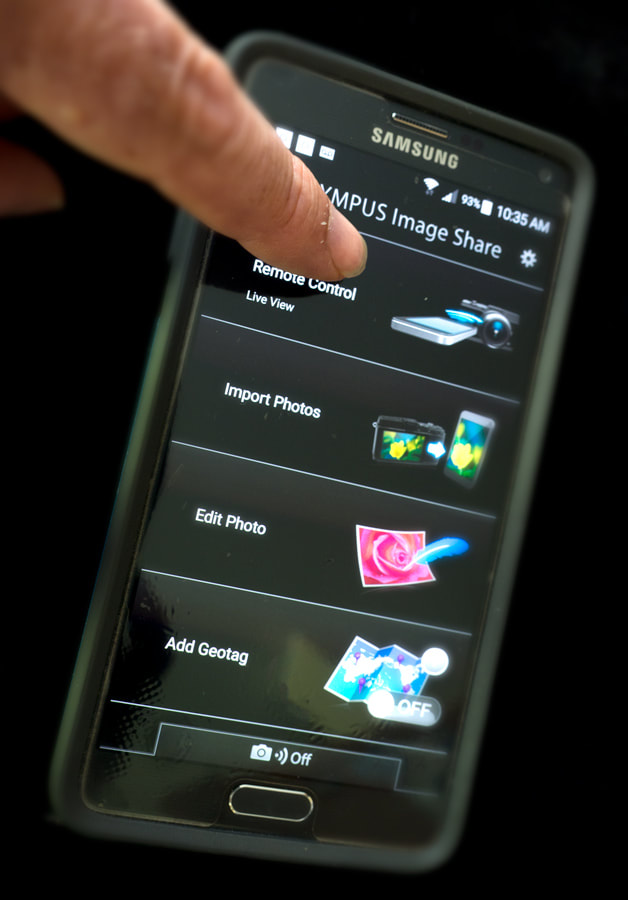
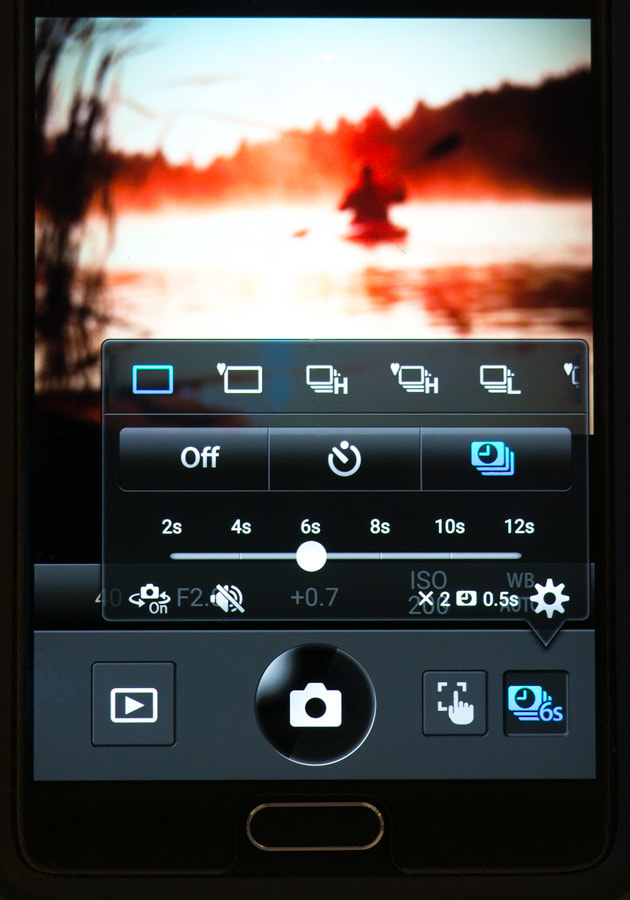
Remote Shutter Release - OI.Share - With their own Wifi hotspot, the OMD line-up of cameras can be triggered remotely from your smart phone using the OI.Share app which can be downloaded free from Google Play or the App Store. Once the camera and phone are paired, you can control practically any setting directly from your phone. The app also displays a live view of exactly what the camera sees. The big advantage here is that it makes composition of your selfie relatively easy since you can see yourself once you step into the frame. Under most circumstances you would want to engage the self-timer so that you have time to hide the phone before the photo is taken. The main challenge with the app is maintaining a solid connection between your phone and camera as distance and obstructions can impede the signal.
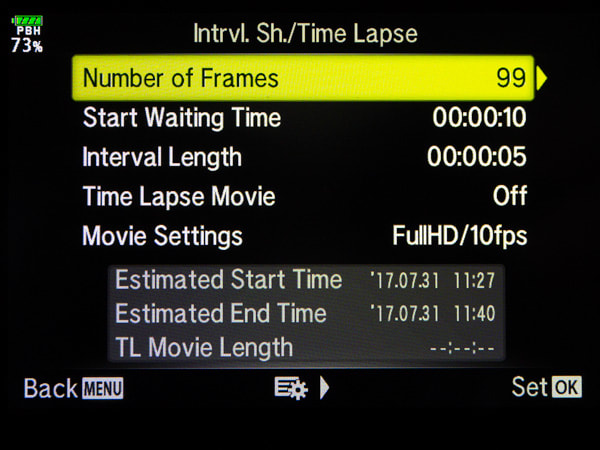
Time-Lapse - Although I have used the built-in camera timer and the OI.Share app many times, I have to admit that I rarely use them to take a selfie. I much prefer the time lapse feature. It's easy to set up, flexible enough to allow for just a few photos or hundreds of them, and is equally effective regardless of how far you are from the camera. Depending on the type of selfie that I am aiming for I will usually set the time-lapse for approximately 100 photos, shot at a 2-6 second interval. On most occasions I will stop the sequence long before the camera reaches the maximum number of images.
The images below show some of the results from a time-lapse sequence that I photographed of myself canoeing on a beautiful misty morning. After returning to my camera I had a few dozen images from which to choose from. 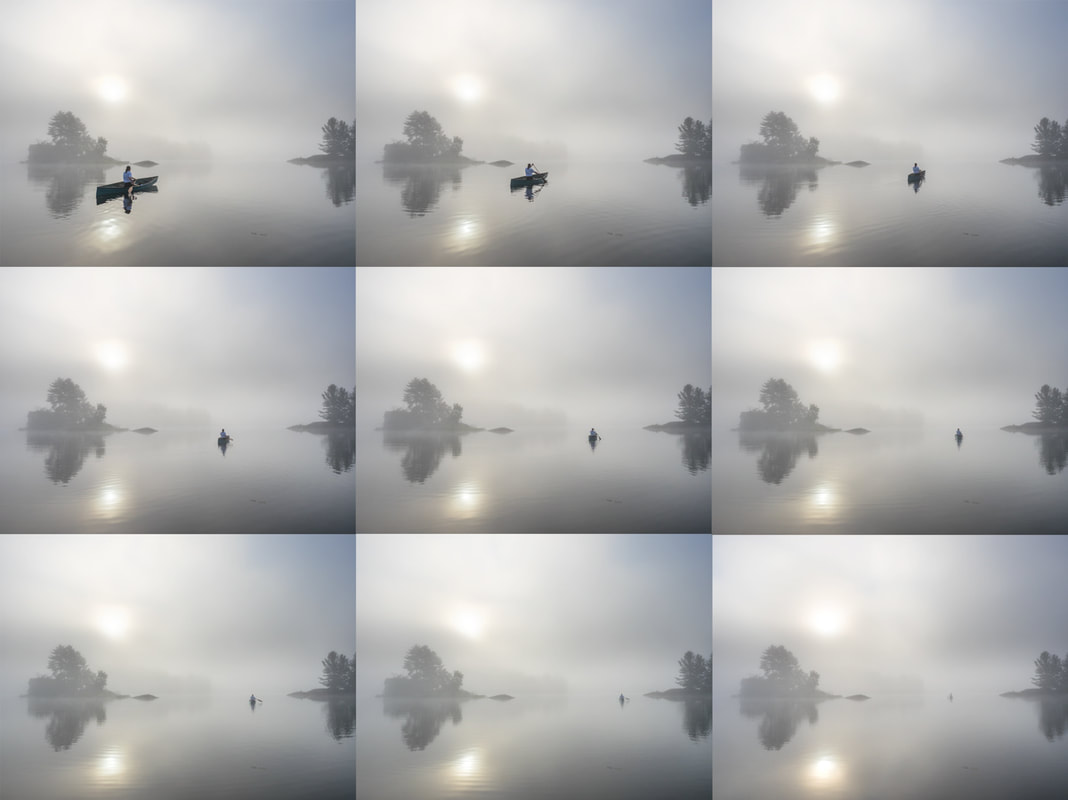 The time lapse sequence above was set at 6-second intervals. The time lapse sequence above was set at 6-second intervals. 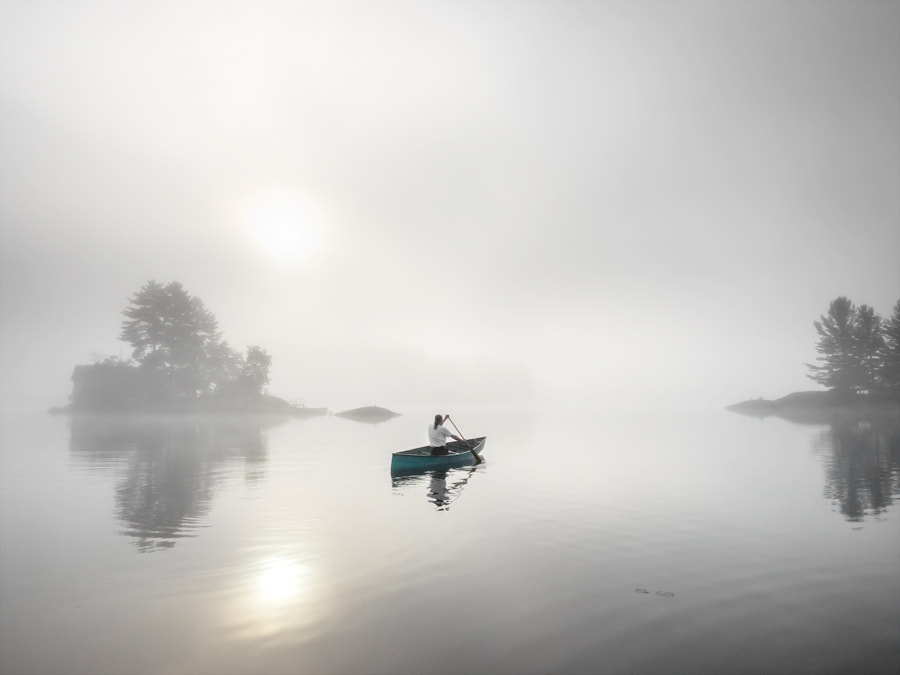 Olympus E-M1, m.Zuiko 12-40mm f/2.8 PRO, ISO200, 1/800s, f/9 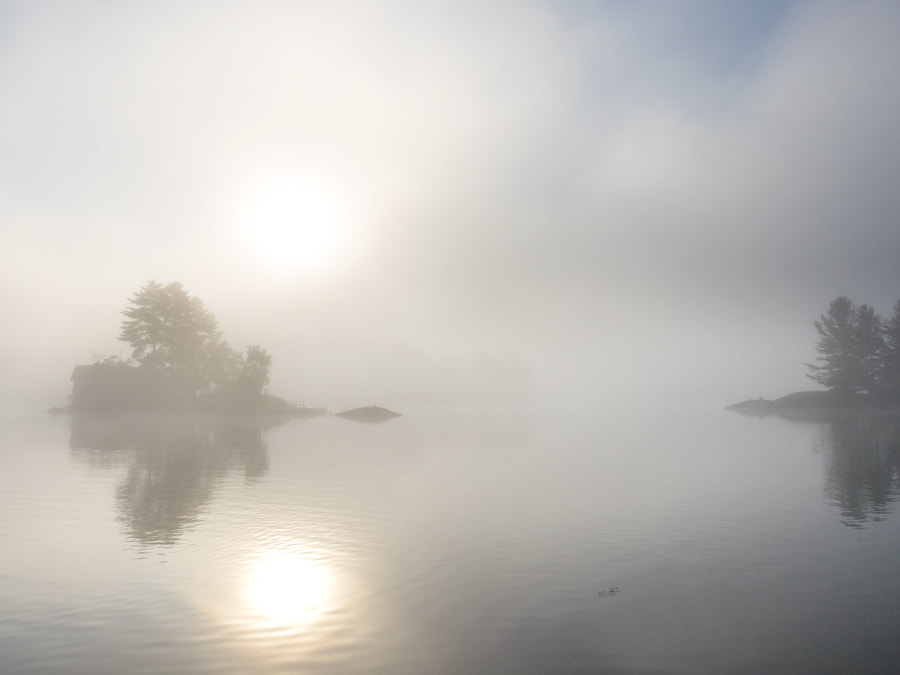 Prior to entering the frame I was able to capture a few landscape images sans self. Tips for a Successful Selfie
Let's revisit the first photo in this article to see how it came to be. I was out exploring on a rather grey, misty morning when I drove down a side road lined with tall maples that created an interesting tunnel effect. I liked the look, so I pulled over and took a few shots. The images had some appeal, but I was left wanting. So I decided this was a good time to experiment with a selfie. 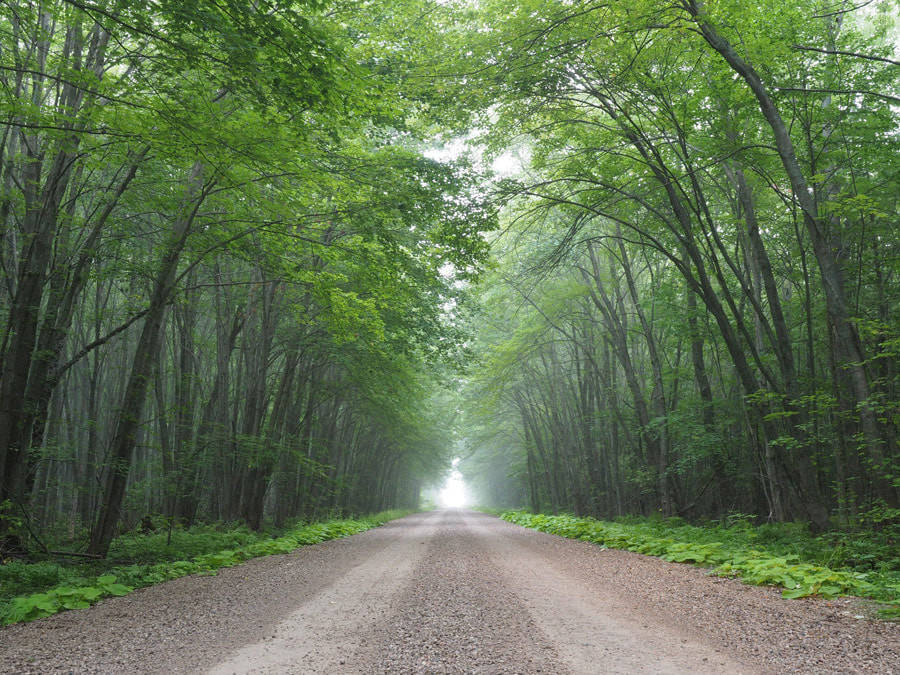 This was the pre-selfie scene that caught my attention and caused me to pull over. I set up the tripod fairly low to the ground in the middle of road, attached the camera and set the time-lapse interval to 3 seconds. Then I started walking away from the camera for about 50 meters and turned around and walked back. I looked at a few of the images on the LCD and wasn't happy with them. The reason was that I was walking on the left side of the road (like my mommy taught me) and the composition looked out of balance. I decided to do it again by walking in the centre of the road. I also grabbed my umbrella out of the car to help emphasize the conditions in which I was shooting. This time I was much happier with the result. From start to finish the process took about 20 minutes. Thankfully, not one other car came by during that time. 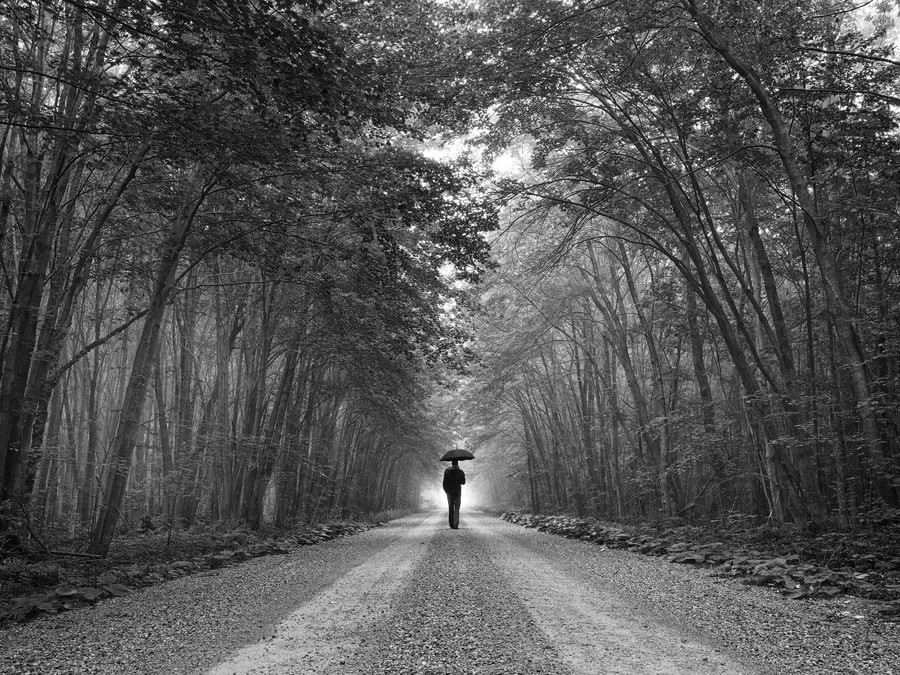 My Favourites As I looked through my favourite selfie shots I realized that they could be divided into three categories - landscape, astrophotography, and what I call, stylized. The first two are just natural extensions of the type of photography that I normally engage in. Landscape I rarely go out with the intention of shooting a selfie. It is usually a spur-of-the-moment idea that occurs after I've shot several images and am looking for the human element to invade the photo. The first photo below is an exception. This was a planned shot. Following a fresh snowfall I thought it would be interesting to capture a winter hiker traipsing through the snow toward the rising sun. 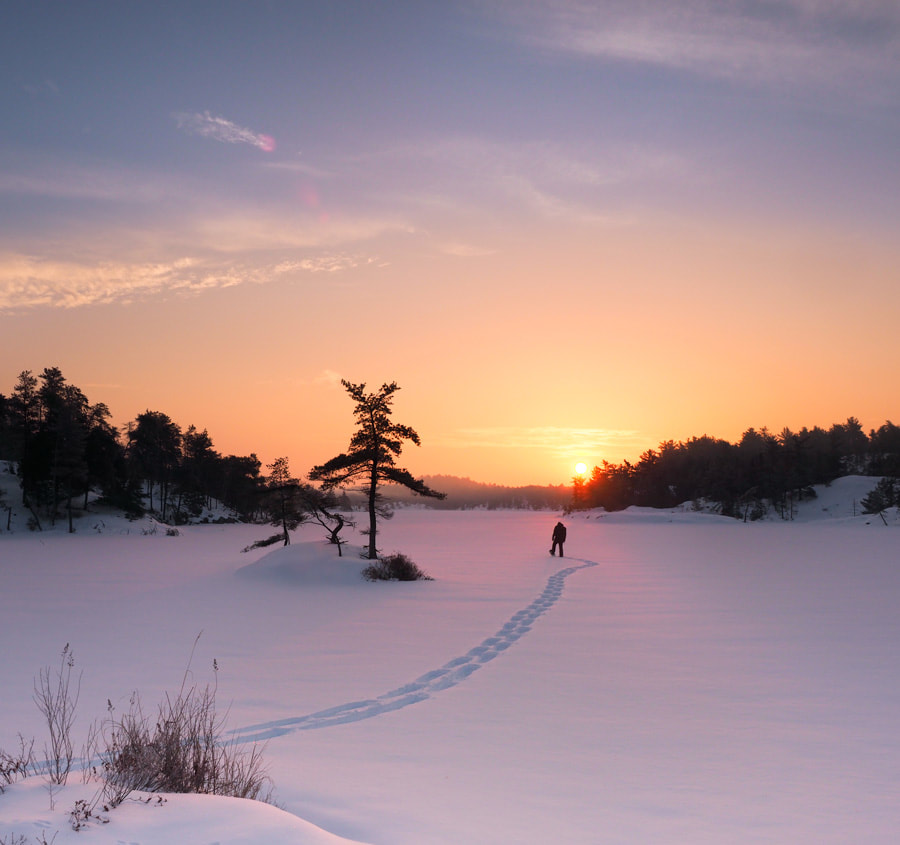 Olympus E-M1 Mark II, m.Zuiko 12-40mm f/2.8 PRO, ISO200, 1/200s, f/8 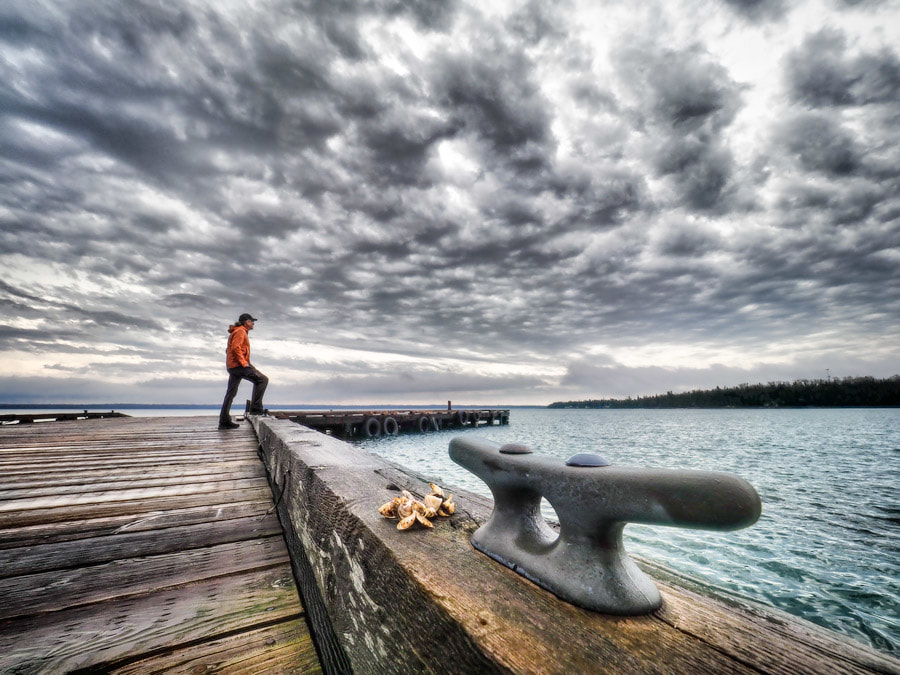 I opted to use the Dramatic Tones Art Filter for this shot, but still felt the scene was missing something. That's when I stepped in. Olympus E-M1 Mark II, m.Zuiko 7-14mm f/2.8 PRO, ISO 200, 1/400s, f/7.1 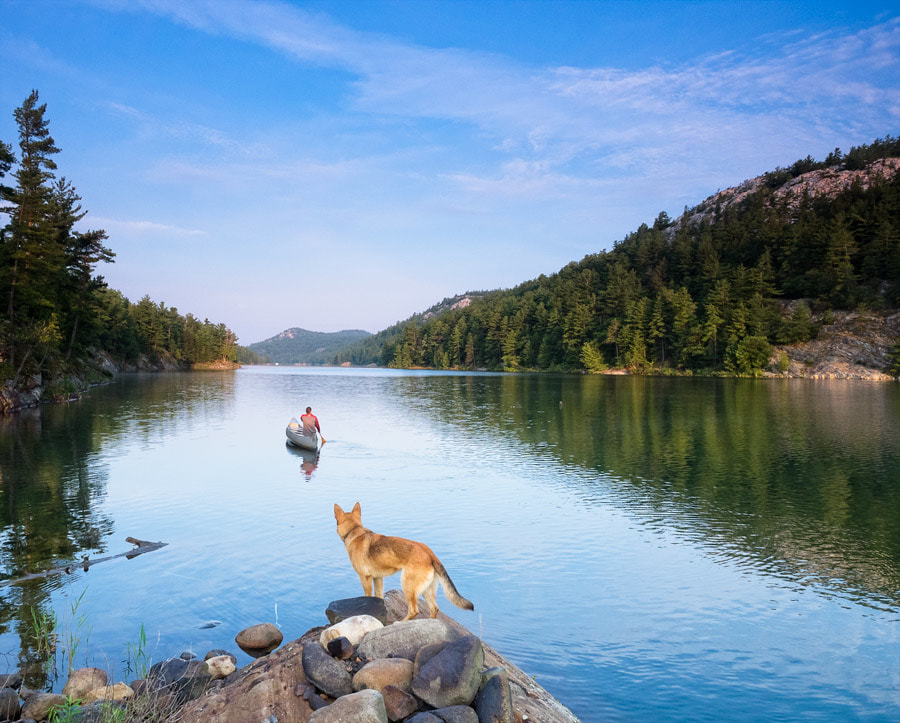 Having my nephew's dog step into the frame while shooting this image at our cottage was a nice bonus and added to the story. Olympus E-M1, m.Zuiko 12-40mm f/2.8 PRO, ISO 400, 1/60s, f/8 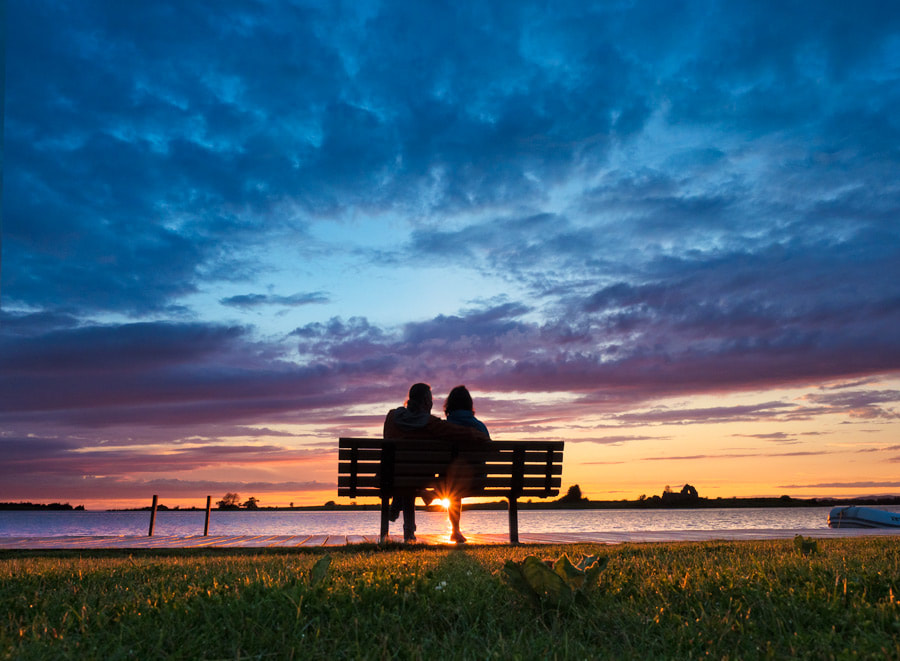 During an evening walk at the waterfront, my wife sat on the bench and I started to photograph her. Having both of us on the bench told a better story, but I didn't have my tripod with me so I placed the camera on the ground, propped up the lens, engaged the time-lapse settings and sat on the bench to enjoy the sunset with my wife. Olympus E-M1 Mark II, m.Zuiko 7-14mm f/2.8 PRO, ISO 200, 1/125s, f/8 Astrophotography I'm always looking for interesting ways to photograph the night sky. Sometimes that means including myself in the image. The real challenge is keeping perfectly motionless for the duration of the long exposure. 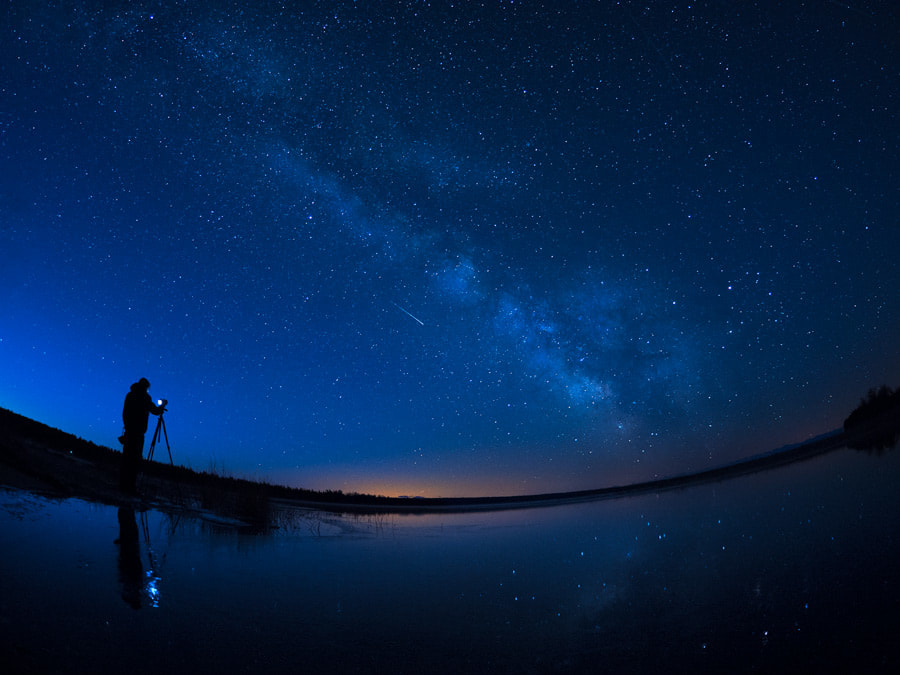 A shot like this requires a bit of extra equipment since you need two tripods, two camera bodies and two faster lenses capable of night sky photography. The payoff is that I ended up using photos from both cameras. E-M5 Mark II, m.Zuiko 8mm f/1.8 PRO, ISO1250, 25s, f/1.8 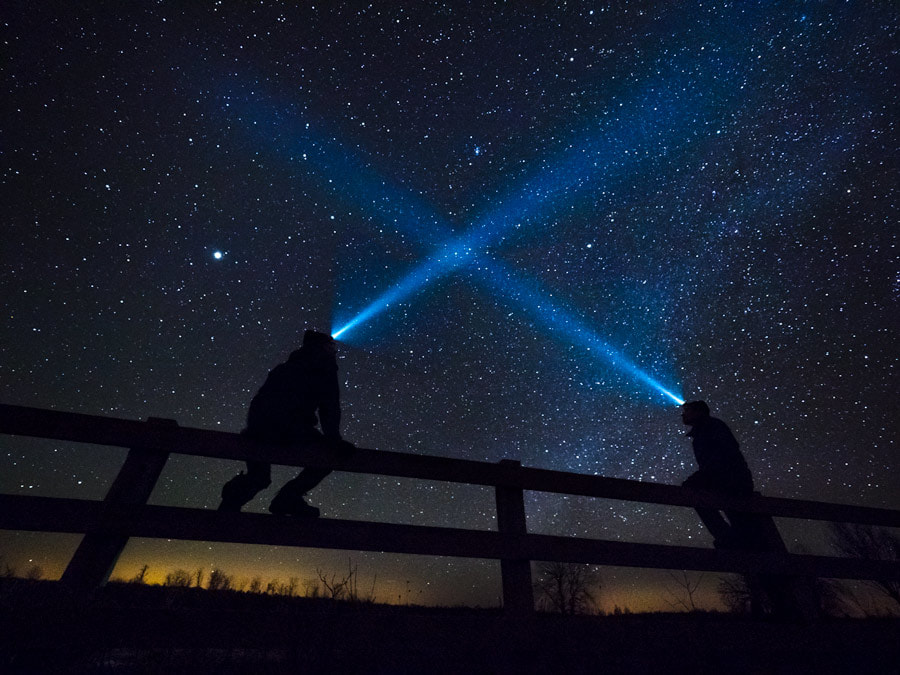 For this image I switched positions on the fence in between shots and then blended them together in Photoshop. Olympus E-M1, m.Zuiko 7-14mm f/2.8, ISO1250, 20s, f/2.8 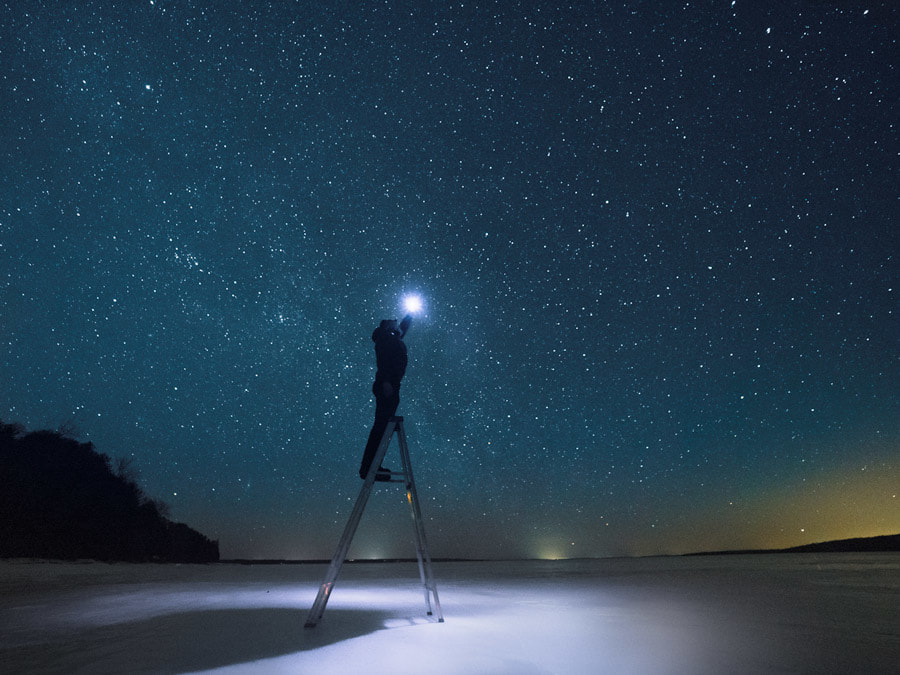 Olympus E-M1 Mark II, m.Zuiko 7-14mm f/2.8 PRO, ISO3200, 25s, f/2.8 Stylized Creative Selfies There are times when an idea for a more creative selfie enters my mind - a more artistic selfie per se. The three images below are examples. They all required a fair amount of planning and definitely some visualization ahead of time.  Olympus E-30, 14-54mm f/2.8-3.5 II, ISO 100, 0.8s, f/5.6 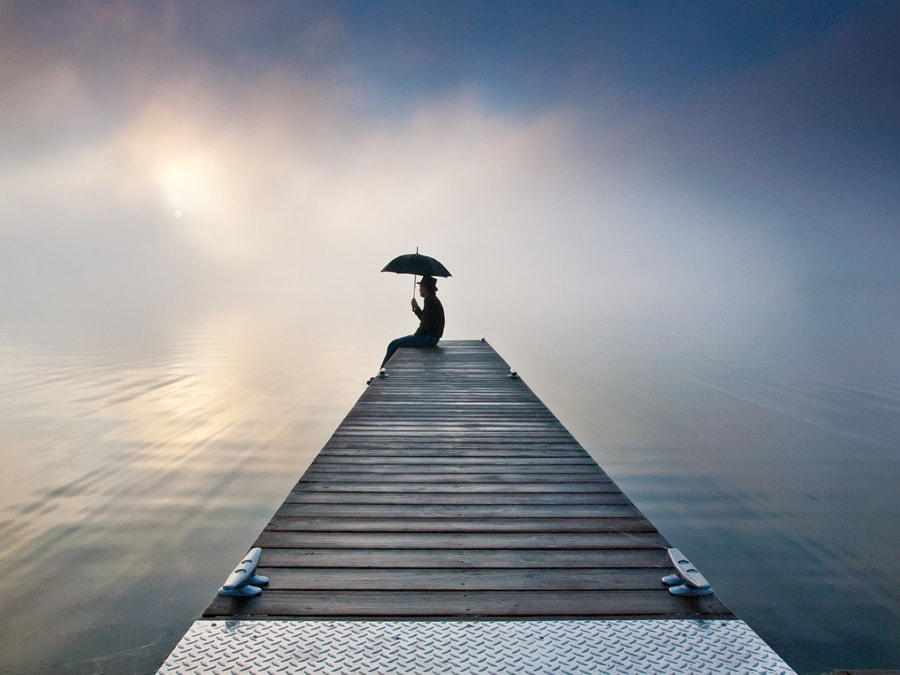 The idea for this photo arrived long before the morning on which I shot it. I live close to this dock and when the conditions were right I grabbed the chance to make the idea come to life. Olympus E-30, 14-54mm f/2.8-3.5 II, ISO 200, 1/160, f/11 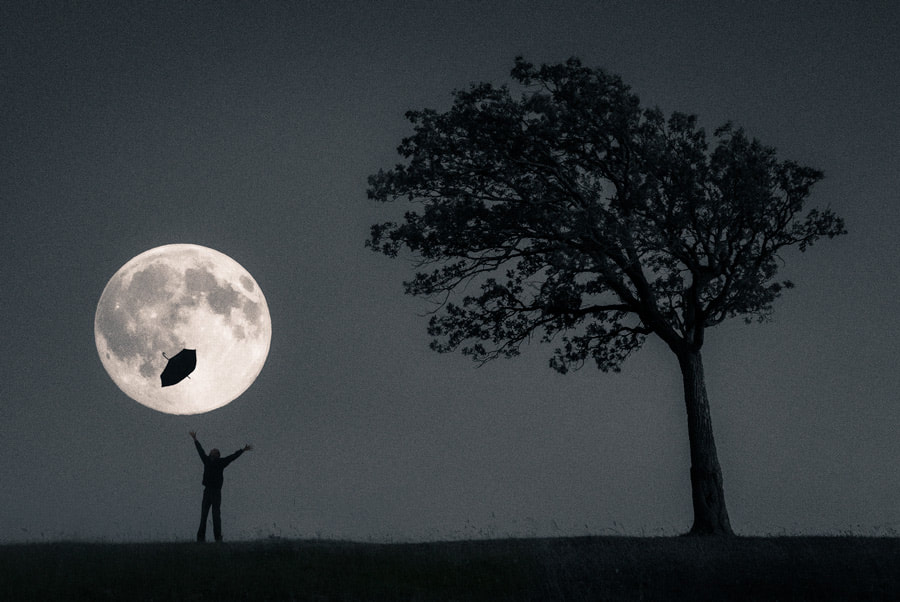 Olympus E-M1, m.Zuiko 12-40mm f/2.8 PRO, ISO 1000, 1/4s, f/6.3 Final Words Within my collection of thousands of photographs, I only have about two dozen creative selfies. It is certainly not my primary photographic interest, and besides I am far more comfortable behind the camera than in front of it. That said, including myself in the image is definitely an important way of expressing my creativity.
7 Comments
8/1/2017 08:12:06 am
Thank you Peter! After all of these years, I have never even thought of doing an environmental "selfie", but now it is something I must try! Yes, throughout the years I have sat in front of my camera as a test dummy prior to shooting for a client (when I don't have an assistant) to check the lighting. You have lit a new creative flame for my own story telling, and I shall be in your debt! Cheers!
Peter
8/1/2017 08:47:47 am
Thanks for the great compliment, Stan. I'm always looking for inspiration from others and am happy that I could provide some for you.
Craig Pickles
8/14/2017 07:50:58 am
It has been far too long between this blog and the previous, which is sad for us readers, but this one kind of takes a bit of the sting away. Very detailed notes and simple in design and execution... but getting it right is tough and I appreciate your noting a lot of failures that needed tweaks. Gear is one thing, but vision and execution is a key. Thanks for the post and inspiration, but when in the field, I never think clear and that is my issue. 9/21/2017 07:19:38 pm
Peter,
Ab de Graaf
1/3/2018 02:01:50 am
Peter, another great article. I've just discovered your site and it really helps me exploring my new E-M5 II. Very creative! Thanks a lot from the Netherlands.
Frank R. Allocca
4/18/2018 05:54:46 pm
My first time reading your blog, enjoyed the Selfie article..I’m a true novice and was attracted to the Pen F.Would this be a wise choice and if so what lenses would you recommend? 9/26/2018 11:59:42 pm
All of us have our own choices. If you prefer not taking selfies on your phone just because you look good in your second camera, then I will give it to you because that is your choice. But in all fairness, I just have to commend you for being such a great photographer. You have what it takes to be a great one someday because you have the eye for it and you know the right and ideal color for a certain photo. That's a rare talent, I must say! Leave a Reply. |