|
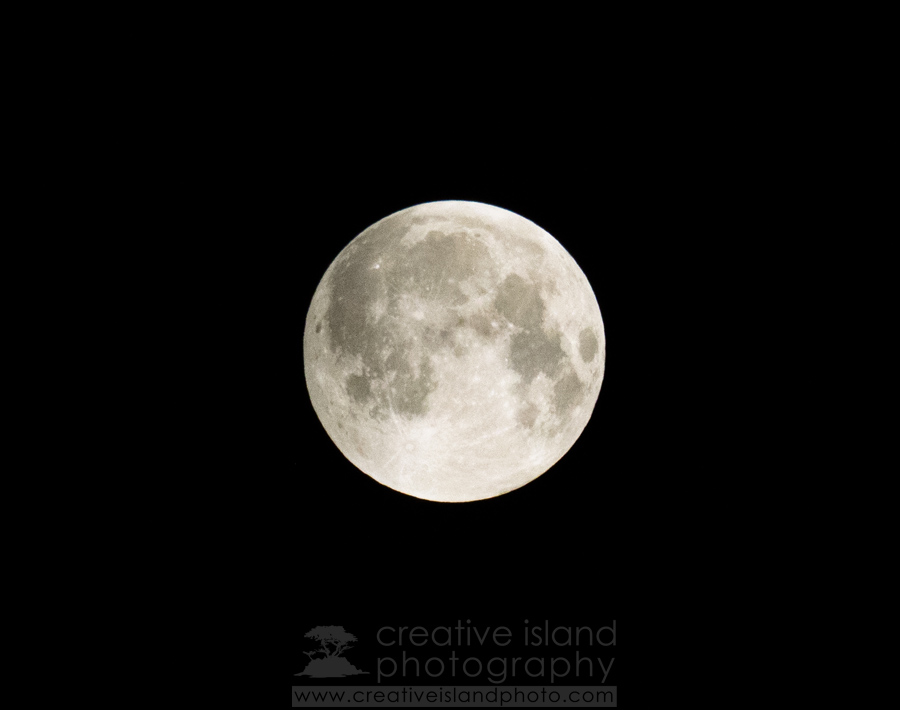
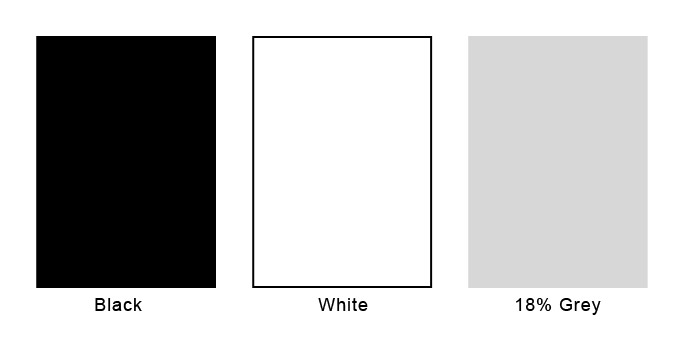
Once a month, as inky darkness settles across the land, and the creatures of the night begin to stir, I get the urge to howl at, no sorry, photograph the full moon. As simple as it may seem, taking photos of the moon can be challenging. If your full moon images look like a glowing white dinner plate in the sky, you are not alone. Let's find out why that is, and then work to fix it. Exposure 101 The moon is not a completely featureless orb and to capture some of those formations requires an understanding of how your camera sensor determines exposure. Your camera contains a built-in light meter that reads the entire scene in the frame and averages the lights and the darks to arrive at, what it thinks, is the proper exposure. This averages out to be 18% grey. This works well for most scenes especially when photographing things in the mid-tone area - trees, grass, blue sky, etc. or when the scene is uniformly lit. Unfortunately, the full moon is a very bright object set against a sea of inky blackness. In an effort to compensate for all the darkness in the frame, your camera automatically overexposes the moon - resulting in that white dinner plate. 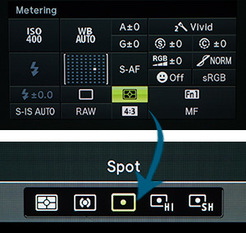 Spot metering bases the exposure on a very small area of the scene. By default it is the very centre of the frame. Spot metering bases the exposure on a very small area of the scene. By default it is the very centre of the frame. Capturing Just the Full Moon If you are out during the next full moon and want to capture it with no other points of interest in the frame, the exposure issue is relatively easy to solve. Here are two methods to experiment with.
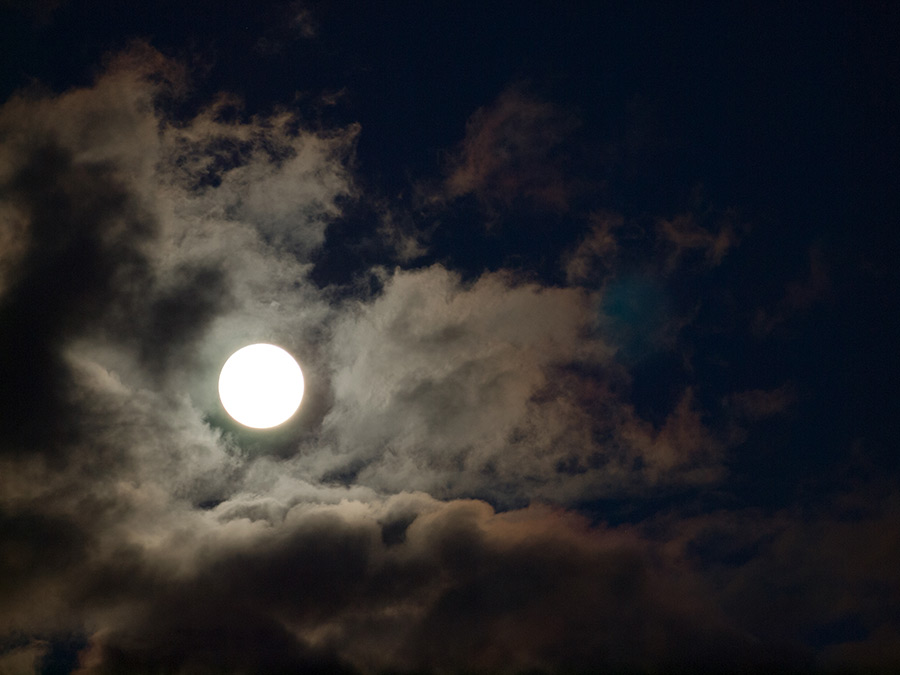
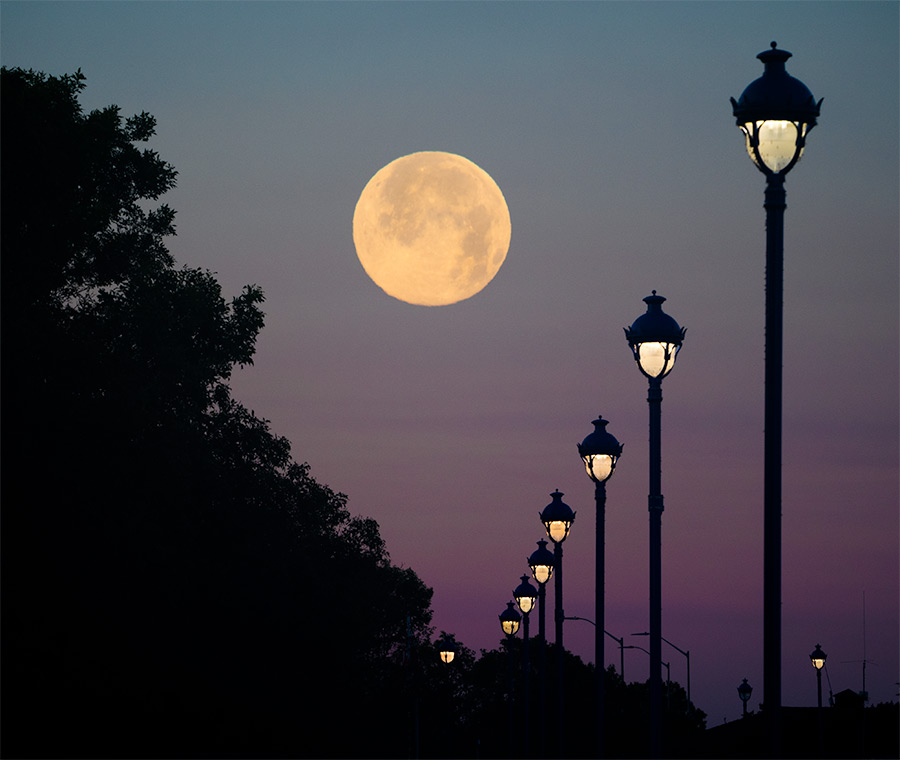
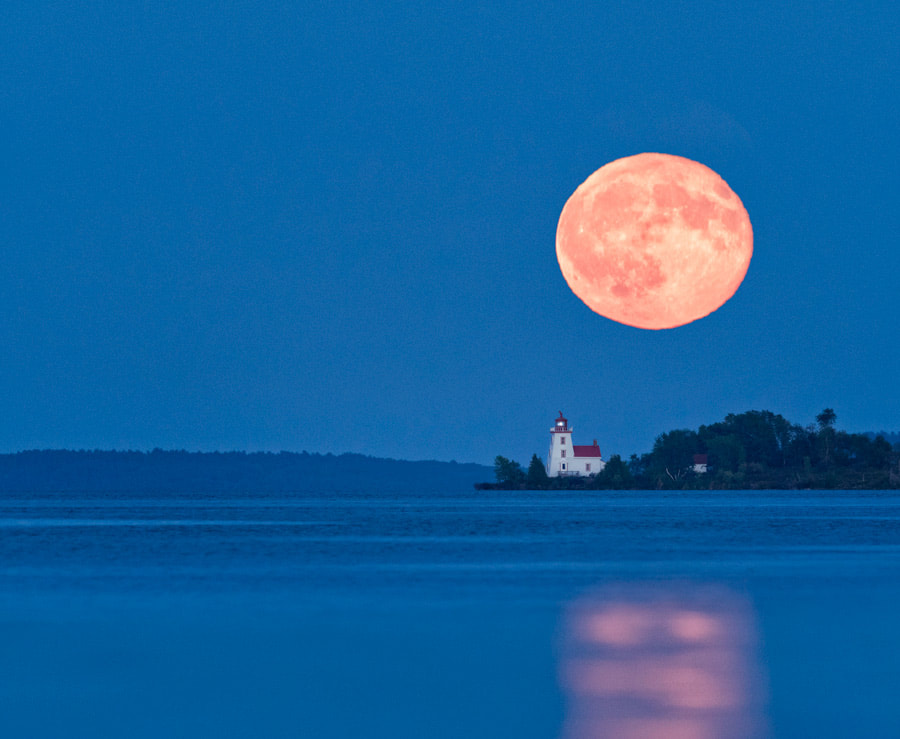
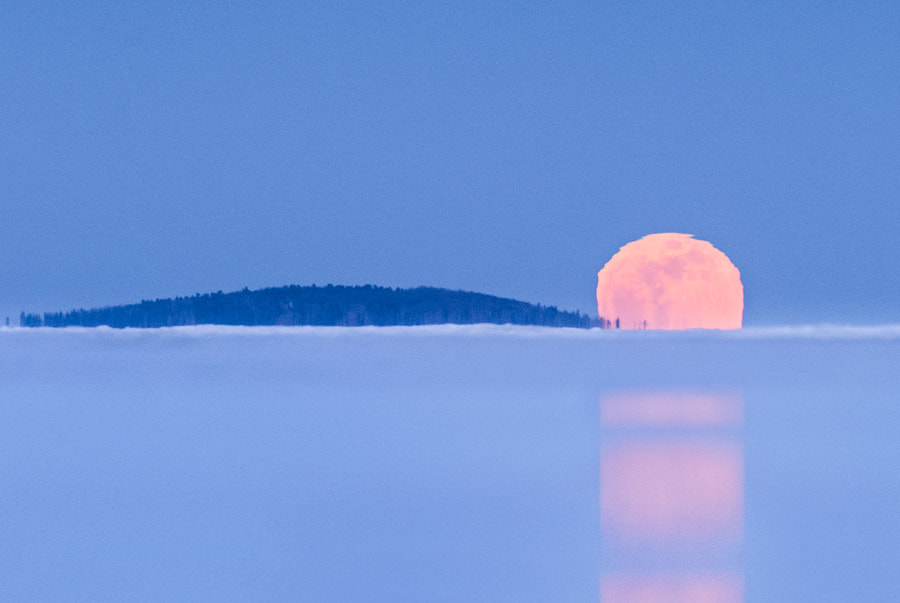
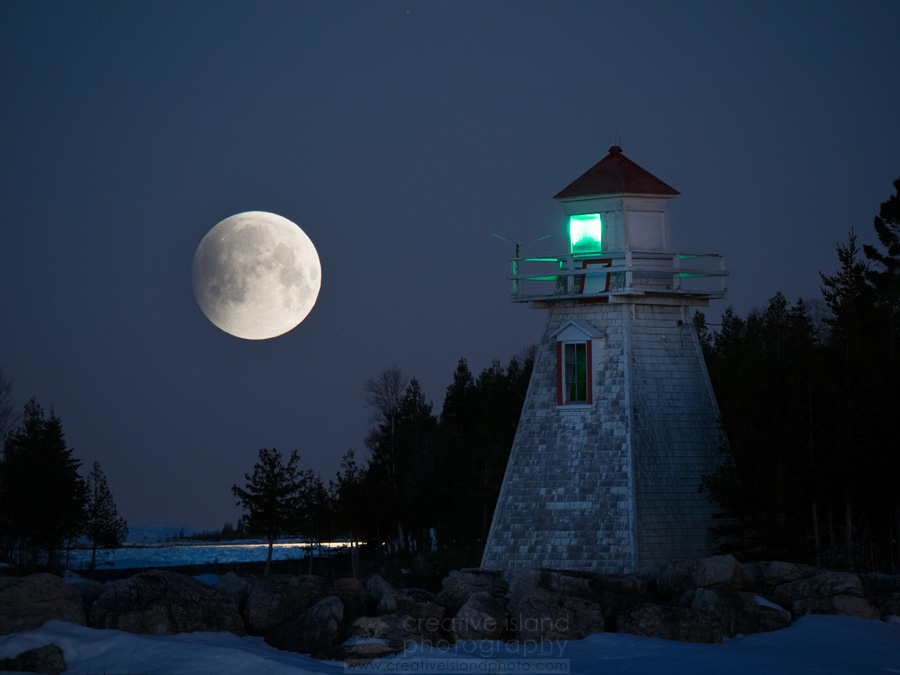
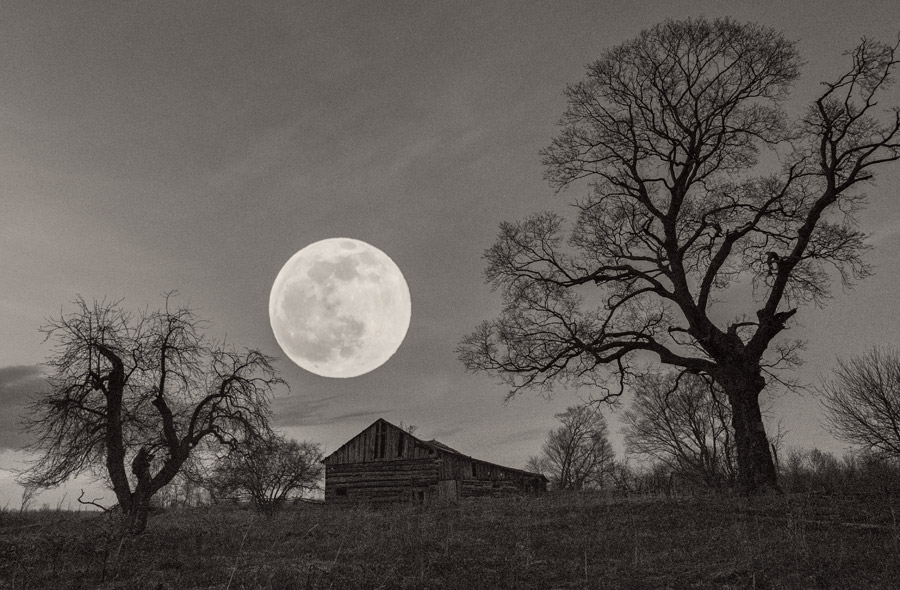
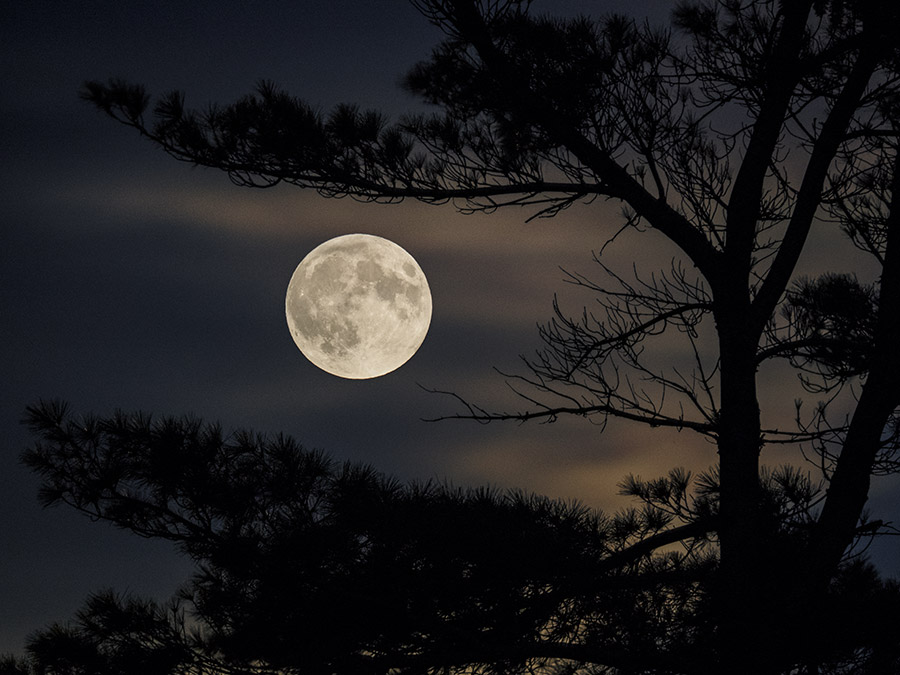
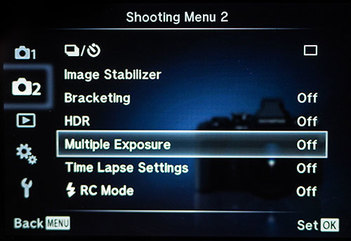
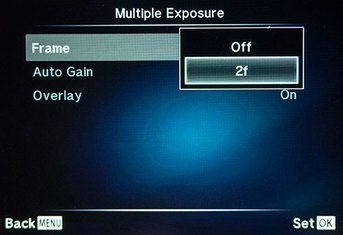
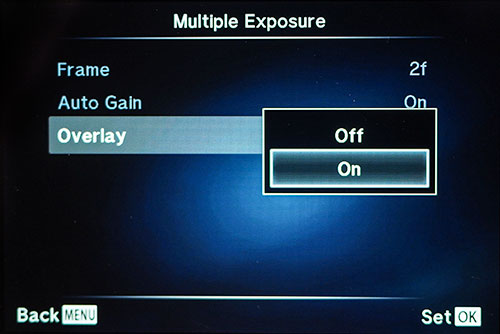
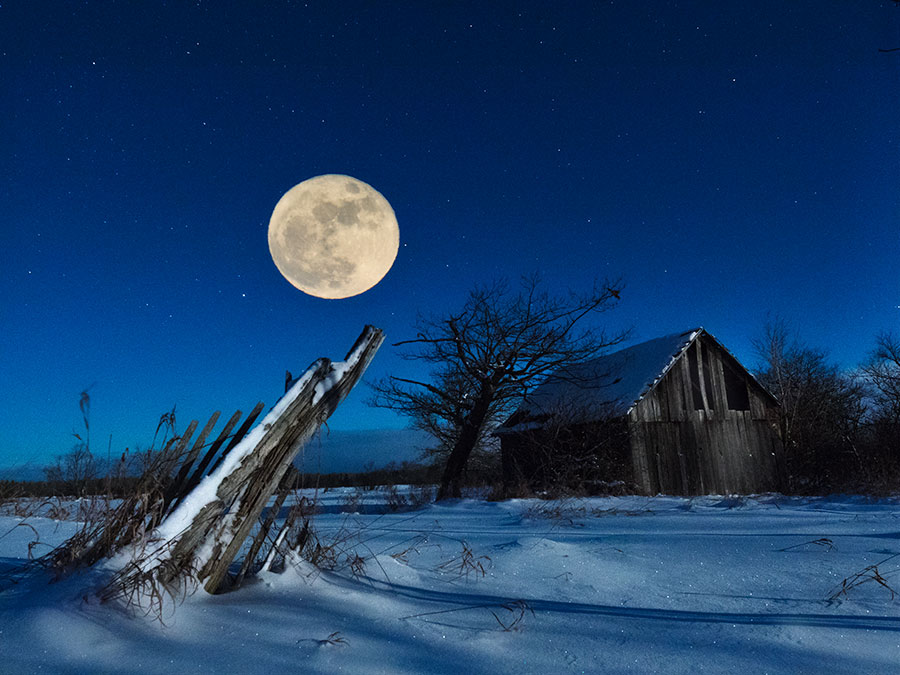
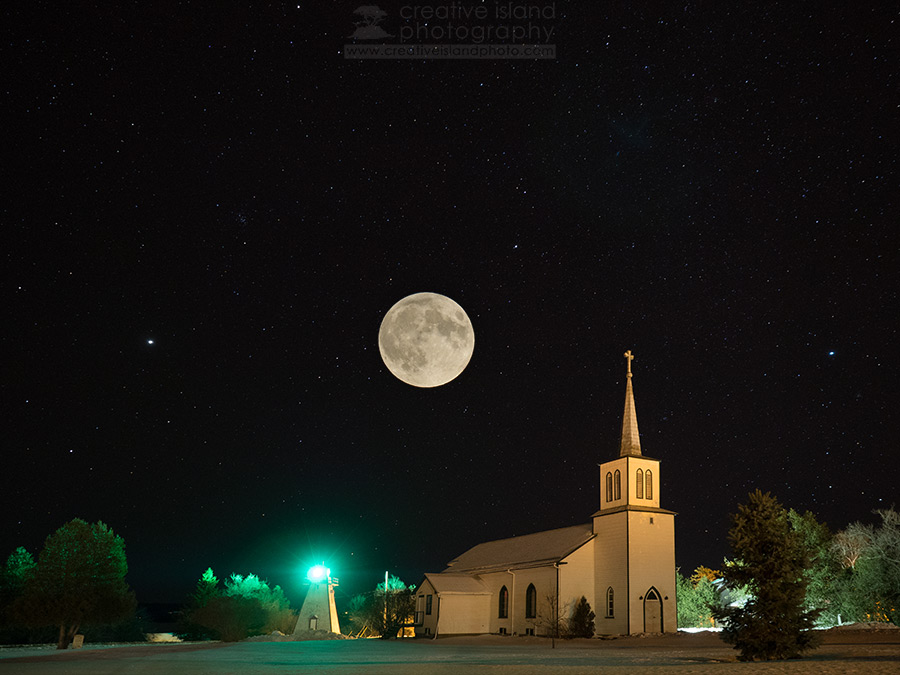
Camera: Olympus OMD - E-M1 Lens: Olympus 75-300mm f/4.8-6.7 II Shooting Mode: Aperture Priority Metering: ESP Focal Length: 300mm (35mm equivalent - 600mm) Aperture: f/6.7 ISO: 1000 Shutter Speed: 1/4000 s Exposure Compensation: -5 EV Two things are worth noting with regards to these settings. 1. The shutter speed is so fast that a tripod was not needed. I could have reduced my ISO significantly and still been able to hand hold the camera. Normally I always use a tripod when composing night sky shots. This illustrates just how bright a full moon is. 2. More importantly is the exposure compensation. In order to bring out the details in the surface of the moon I dialled down the exposure by a full 5 stops of light. Exposure compensation is a way for you to override your camera's natural tendency to search for middle grey. Although spot metering seems easier, I usually find myself sticking with matrix metering and using exposure compensation. With the ergonomics of the Olympus E-M1 it takes no time to dial down the exposure compensation a few stops and the electronic viewfinder shows me the exact results I will I get. Photographing a Full Moon Scene The real problem comes when trying to incorporate the full moon into a landscape scene. Now you have multiple objects to expose for. The situation is quite manageable if you are trying to photograph the moon as it rises. Most of the time the full moon rises just as the sun is setting. Therefore, there is enough light in the atmosphere to achieve a decent exposure setting and still capture some details in the moon. One issue that can creep into your moonrise shots is atmospheric distortion. The closer the moon is to the horizon the more atmosphere the light has to cut through. This creates a noticeably orange moon under many circumstances but also leads to significant distortion of the moon itself. The image below is an extreme version of this. Using multiple exposuresThis leads me to the real purpose of this blog post - using the multiple exposure feature to create an impressive, and well-exposed image of the full moon. Why multiple exposure? Simple - it is next to impossible to create a balanced exposure of both the moon and the surrounding landscape once the sky darkens and, you can create a composition that places the moon where you want it to be. The following two images illustrate the results you can achieve using this technique. Before we get too technical, be aware that almost all modern digital cameras have the ability to create multiple exposures. For all of the multiple exposure images in this post I used the Olympus OMD E-M1. There are a few ways of achieving the above results, but the technique that works best for me is... 1. Photograph the moon with no other distractions in the frame. 2. Set the camera to multiple exposure mode. 3. Compose the second frame by placing your moon wherever you'd like and click the shutter. Those are the condensed steps. Let's look at the more detailed procedure with regards to how I created the photograph below. 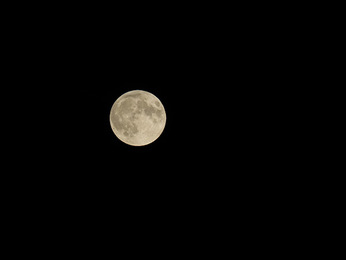 Settings - 300mm, 1/800s at f/6.7, ISO 800, -2 3/10 EV Settings - 300mm, 1/800s at f/6.7, ISO 800, -2 3/10 EV Steps Photograph the Moon
Compose Your Second Frame
Auto Gain? You may have noticed the Auto Gain setting within the Multiple Exposure menu. What is it? Auto Gain is a built-in form of exposure compensation to help prevent overexposure of your final image. Essentially it cuts the exposure of both frames in half. For each of the images posted in this blog I left auto gain in the default ON position but feel free to experiment by turning it off. Avoid the Edges! When I first started using this technique I discovered one important issue that you should also be aware of. For each of my double exposure images above, you may have noticed that I positioned the moon near the center of the frame. This isn't simply an artistic choice. There is a very good reason for this. I like to switch lenses between frames. I will use my longest telephoto lens to capture the moon and then switch to a wide-angle lens (like the 12-40mm PRO) in order to capture a wider field of view and create a more interesting landscape image. The above image illustrates this well. The problem occurs when you position the moon in one of the corners of your frame or too close to the edge. The photos below illustrate what happens if you position the moon in a corner and switch focal lengths. Placing the moon that you shot at a long focal length into a second frame taken at a short focal length, distorts the moon. Essentially it becomes a stretched oval. This is not an issue if the focal length remains the same for both frames as was the case for the lighthouse photo and the white pine photo above. And Now, Experiment! The ability to create multiple exposures is certainly not new to photography and definitely not propriety to Olympus cameras. Most newer models of digital cameras have this setting and they all work in basically the same way. If you are looking for a way to add interest to your next shot of the full moon, try experimenting with multiple exposures. One Final Note There is one other technique that you can use to achieve well-exposed landscape shots that include the moon and that is bracketing. This involves taking several photographs at different exposure values and then combining them in Photoshop or other editing software. This is a common technique for creating HDR images during the daytime. Once I experiment with this technique a bit more I might write another post.
62 Comments
Nicholas
12/10/2015 02:37:17 am
Extremely great article my friend! Very well written and explained. I ordered the Olympus E-PM2 Sunday and in preparation of it being here tomorrow or Friday, I've been reading up. This will be my first Olympus camera. I have a LUMIX G5 and a Sony A6000!
Reply
Peter Baumgarten
12/10/2015 07:11:23 pm
Hi Nicholas. Thanks for the compliment! It is much appreciated. I hope you enjoy your new Olympus camera and have some good success with the multiple exposure feature.
Reply
Sherbi
4/26/2021 05:42:10 am
This is really awesome information ; I recently started experimenting with multiple exposure and love it . I love the part about switching to a wide angle lens fir a better field of view . Thank you for that information . I will definitely try this tonight . I’m hoping to get a few good shots . I have the 12-40 pro and the 40-150 pro lens also 2x teleconverter . Thanks again . I found you through the latest Photo News magazine, and I'm glad I did. I've always wondered where to go shooting up around the Manatoulin Island area and I see you've done a lot of that. Thanks for a very thorough tutorial! I never thought of using the multiple exposure feature on my camera. It will be something new to play with this holiday season. :)
Reply
Peter Baumgarten
12/16/2015 07:30:26 pm
Thank a bunch, Taku. I hope you have some good success experimenting with the multiple exposure feature. Cheers!
Reply
Arthor Wright
1/7/2016 12:21:10 pm
Good article. Perfectly instructive. More, please :)
Reply
J.R. Hoff
4/18/2016 09:28:41 am
Hello Mr. Baumgarten,
Reply
Peter
4/18/2016 01:19:09 pm
Hello J.R.
Reply
J.R. Hoff
4/18/2016 09:58:43 pm
Thanks for the reply Peter. I was shooting in the manual mode.
Reply
David
4/4/2021 09:17:07 pm
Another consideration is whether you have a UV filter mounted? I'm not suggesting you should, but rather that it is common to use these as "lens protectors", but depending upon quality, etc., at the very least they can create unwanted reflections in high contrast shots. I'm too much of a wuss myself to take mine off when I should, and have the "shots that are almost good" to prove it!
Kleijn
1/5/2021 04:19:31 pm
That is a setting you can change, so it is follow your focus point. Robbie Wong have make a video on that
Reply
Peter Bye
4/24/2021 08:39:21 pm
The moon does not have to be in the center of the image. With spot metering, at least with the E-M1 Mk III, you can move the auto-focus spot over the moon, wherever it is in the image area, and the spot meter uses the same spot for metering.
Reply
Ronald I Philbrook
5/22/2016 03:29:35 pm
Hello Peter i was trying to take some moon shots with my new OMD em-10 Olympus and got the great Dinner Plate In The Sky . i was using Shutter priority and got disappointing results no matter the shutter speed setting . I took other pictures using my E-500 camera and got great picture results . Having just read your blog on Moon Shots , i have made some adjustments to the metering system and will try again . Would it be better to go Manual Setting or stay with the Shutter Speed Priority ? i will keep you posted on the results ! Cheers : Ron Philbrook
Reply
Peter Baumgarten
5/23/2016 07:59:14 am
Hi Ron,
Reply
Caleb
6/15/2016 11:54:16 am
Hello! This is an awesome post!!
Reply
Peter Baumgarten
6/15/2016 03:59:01 pm
Hi Caleb,
Reply
Patty Campbell
6/20/2016 05:39:44 pm
Hello Peter,
Reply
Peter
6/21/2016 06:43:59 am
Hi Patty,
Reply
Terry
6/25/2016 06:19:58 pm
I believe you may need raw images to do an overlay. Check if you are just shooting pegs. I had the same problem at first.
Terry
6/25/2016 06:17:15 pm
Thanks for the great post. You inspired me to try it out. Great fun !
Reply
Nelson
8/12/2016 12:21:04 pm
Hello Peter, thank you so much for the guidance. I just learned about spot metering from you. However, the Overlay function in my Olympus e-Pl 6 seems to be disabled. Is the function not available for this model?
Reply
Dens
8/28/2016 10:34:26 am
Hi Peter,
Reply
Dens
8/29/2016 12:24:41 pm
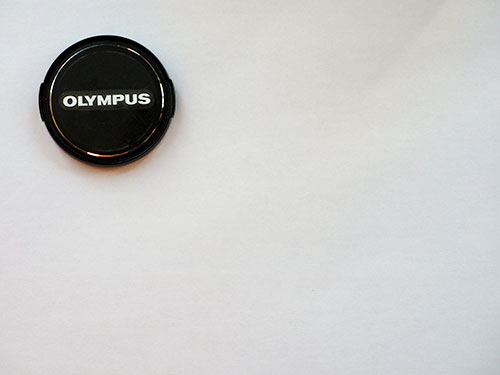
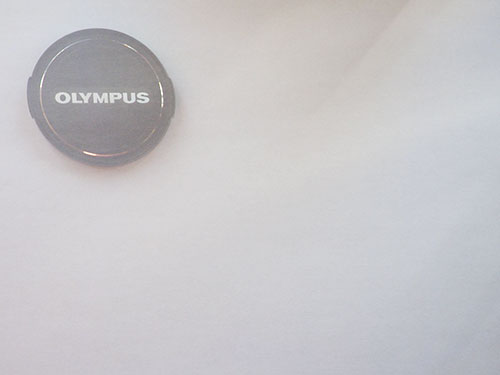
Peter, just tried this function at home with lens' cap put on another background. The cap is covered by white mask - like on your pictures... How to make it 100% visible?
Reply
Pamela
9/14/2016 01:24:43 am
Peter, I wonder if you can help me take better pictures of the Moon, Sunset or just about, anything. I got my camera recently as a gift ( it is an E-PL1, I also received an M. Zuiko Digital ED 40-150 mm lens, for my Birthday. Please help me to take better pictures. I am trying, but seem to be taking a lot of blurry ones. Thanks for your feedback !!!
Reply
Peter
9/14/2016 08:22:59 am
Hi Pamela,
Reply
Christy Joel
11/12/2016 03:23:23 am
A very simple and precise article. Tried the settings on Omd Em1 . I learned. Thanks for helping.
Reply
Peter
11/13/2016 08:17:28 am
Hi Christy,
Reply
J.R. Hoff
11/12/2016 07:13:48 am
Reply
11/13/2016 08:28:47 pm
Hi Peter, i was suffering from "dinner plate syndrome." I followed your instructions using my 40-150 with 1.4x teleconverter and voila, I can now actually see detail in a shot similar to your first pic, handheld, with my omd em1. Can't wait to try the other tips! Thanks so much for sharing your expertise!
Reply
Peter
11/13/2016 09:13:47 pm
So glad it worked for you, Cindy.
Reply
Chris Evans
11/13/2016 11:55:58 pm
Hi Peter awesome useful article thanks very much. We have the big moon here tonight that I wanted to photograph and now I know how. Cheers Chris Evans
Reply
12/24/2016 08:09:43 pm
Peter
Reply
Greg Rubstello
1/1/2018 05:43:04 pm
I am wondering about what happens when you switch lenses between shots. Do you leave the camera on? Do you have too in order to maintain the multiple exposure setting?
Reply
Ann
1/5/2018 02:26:58 am
Thank you very easy to follow and very useful
Reply
ken
1/13/2018 09:07:51 pm
Hi Peter,
Reply
Santosh
4/2/2018 01:06:46 am
Ken,
Reply
urs wiggli
4/12/2019 04:07:28 pm
endlich sehr gute tips
Reply
10/21/2019 05:30:44 am
I’m impressed, I must say. Really rarely do I encounter a blog that’s both educative and let me tell you, you have hit the nail on the head. The issue is something that not enough people are speaking intelligently about. I am very happy that I stumbled across this in my search for something relating to this.
Reply
Les
4/5/2020 03:55:19 pm
Hi Peter,
Reply
Peter Baumgarten
4/6/2020 07:46:56 am
Hi Les,
Reply
Diane Lewis
4/5/2020 08:20:55 pm
I am most interested in trying the multiple exposure using overlay in aperture mode as you suggested in your article No shooting the moon. However, no matter what I do, "overlay" is grayed out & I cannot use it. In the manual, I also found instructions on page 107 for using image overlay by "editing" the picture and selecting image overlay, but there is no image overlay in my edit menu for a picture. Can you please tell me what I can do to get the overlay feature to work? I can't believe that this feature is unavailable in the Mark II camera, as it was available in the Mark I. Any aadvice you might have would be most appreciated!
Reply
Peter Baumgarten
4/6/2020 07:52:56 am
Hi Diane,
Reply
Diane Lewis
4/6/2020 02:07:25 pm
Yes, thank you for your response. However, I have selected 2f over and over and Overlay still remains greyed out. There must be a solution to this but I cannot figure it out! Thanks for any other suggestions you may have. I am most anxious to try this! I have written to Olympus, too, but have not heard back.
Peter Baumgarten
4/6/2020 02:28:52 pm
Hi Diane,
Les
4/5/2020 09:38:41 pm
I accidentally unsubscribed because I assumed the link in the first paragraph of the email I received would take me to the reply on the blog. Instead, it unsubscribed me. The third link in the email offered to unsubscribe me again That is too weird that two out of the three links would unsubscribe an unsuspecting user.
Reply
Jim Watkins
4/6/2020 11:45:59 am
Olympus had a link yesterday to this 5 year old post for shooting the moon. Was hoping to see an update on how the new Starry Sky AF functions in the EM1 MkIII would work with this?
Reply
Andrea de Polo
4/16/2020 01:23:06 pm
Hi, I have a Pen-F and a 100-300mm f/4-5,6 Panasonic OIS lens. When I try to shoot the full moon in manual mode, on a tripod, it is very hard to make the moon in focus. Trough the electronic view finder it is still seen way too bright (even if I low down the screen lighing in my Pen-F).
Reply
Jay
4/21/2020 07:32:01 am
Hi Peter,
Reply
vijay
5/7/2020 03:38:22 pm
liked ur article.
Reply
Ron B
5/8/2020 01:18:13 pm
Peter - I have a question about your 1st moon shot above. Your settings were:
Reply
Margaret W Lee
7/6/2020 11:35:16 am
Hi, Peter,
Reply
Larry Kurfis
3/26/2021 07:49:47 am
Thanks for a great article. I assume that when you change lens when multiple exposure you leave the camera on.
Reply
Virginia Reader
5/24/2021 01:33:04 pm
The moon is a highly detailed object. Why not put the camera on a *stable* tripod and use the high resolution mode to allow the full resolution of the lens to be seen? I will be using an E-M5mk2 and the 75-300 zoom, probably at about 250mm.
Reply
Peter Bye
5/24/2021 02:00:39 pm
Virginia Reader,
Reply
Virginia Reader
5/24/2021 02:08:56 pm
Thanks; it’s certainly possible that the moon moves more than the width of a pixel in the time it takes to shoot 8 frames. Although it wouldn’t be too hard to calculate how far it does move. I don’t have a star-tracking motor drive. I did once long ago.
Reply
Anne
5/24/2021 05:59:10 pm
Hi Peter,
Reply
Peter
5/24/2021 06:52:30 pm
Hi Anne,
Reply
Virginia Reader
5/24/2021 07:13:47 pm
I would use a tripod rather than hand-holding. No matter how good the IBIS is, a rigid tripod is better. And since the sharp edges of lunar craters are what will give the picture character, I find it’s better to stop down one or two stops, at least, and not to use an inexpensive zoom at its maximum focal length. 5/26/2021 02:45:37 pm
Hi Peter. I love your blog, this post in particular, which made me very keen to get out and shoot tonight’s blood moon, using the two shot exposure you outlined above. When I did, a couple of practical problems I wasn’t expecting arose:
Reply
8/27/2021 12:27:56 pm
Tinsel town celebrities have always been the trend setters to the common people. People, especially the girls always are inclined towards one or more actresses because of how they look and they also want to look the same. More or less everyone have a fashion idol.
Reply
Ward Wueste
7/15/2022 08:28:33 pm
Peter, I enjoy your tips and have found them useful. I recently acquired an 0M-1 and tried to do double exposure. The menu doesn't have an option for Frame and I was never able to make a double exposure. The shutter wouldn't work for the second image. I am wondering whether you have used the OM-1 for double exposures and had the same result.
Reply
Leave a Reply. |
AuthorPeter Baumgarten is a professional photographer and educator. He is also an Olympus Visionary and NiSi Official Photographer. Categories
All
|
