|
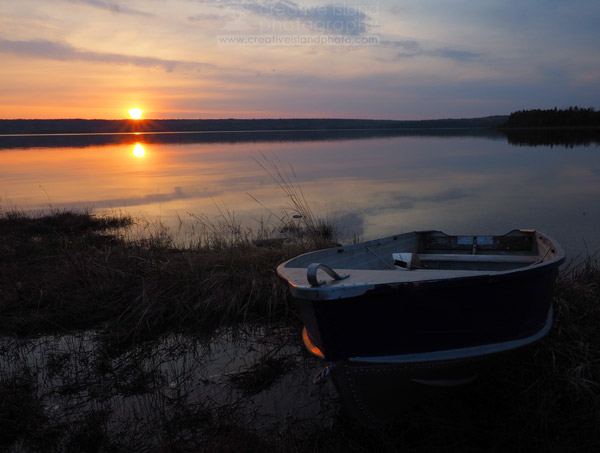
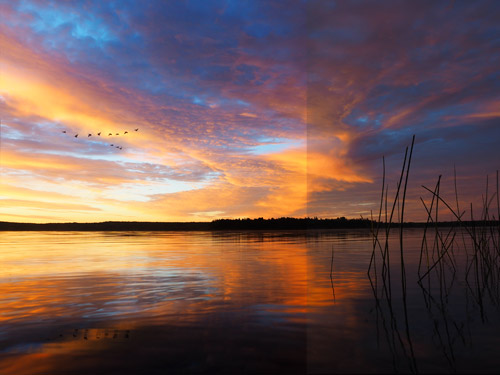
I can't resist a great sunrise or sunset. I'm a real sucker for those amazing colours at the bookends of the day. But the reality is that sunset shots are a dime a dozen. So how do you get yours to stand out from the rest of crowd's. Here are some tips that work for me.  In this image the horizon is in the bottom third of the photograph. As well the silhouettes of the trees and buildings are in the left third of the frame. It's Not About the Sunset "Hold it a second. I thought this post was about sunsets!" Well, it is and it isn't. Gorgeous sunset colours are certainly appealing, but they are definitely not enough to maintain your viewer's interest. Think of the sunset as the backdrop to your photograph. What you place in front of those colours is the important thing. Let's look at an example. 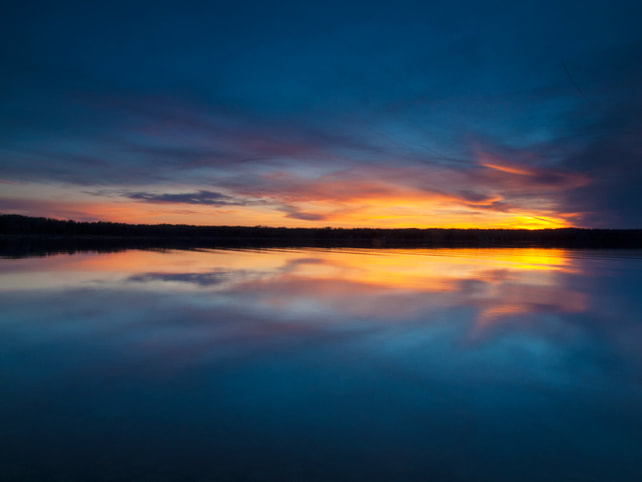 I don't think that anyone would argue with the fact that those are some pretty cool colours and cloud formations in the above image. As well, the almost perfect reflection helps add some interest to this photo, but for me, something's missing. I like the symmetry of this shot, but it didn't keep my interest when I took the photo and it still doesn't. When I arrived at this shoreline earlier that evening I did a bit of scouting around. I came across an old license plate close to shore. I fished it out and recomposed the shot. 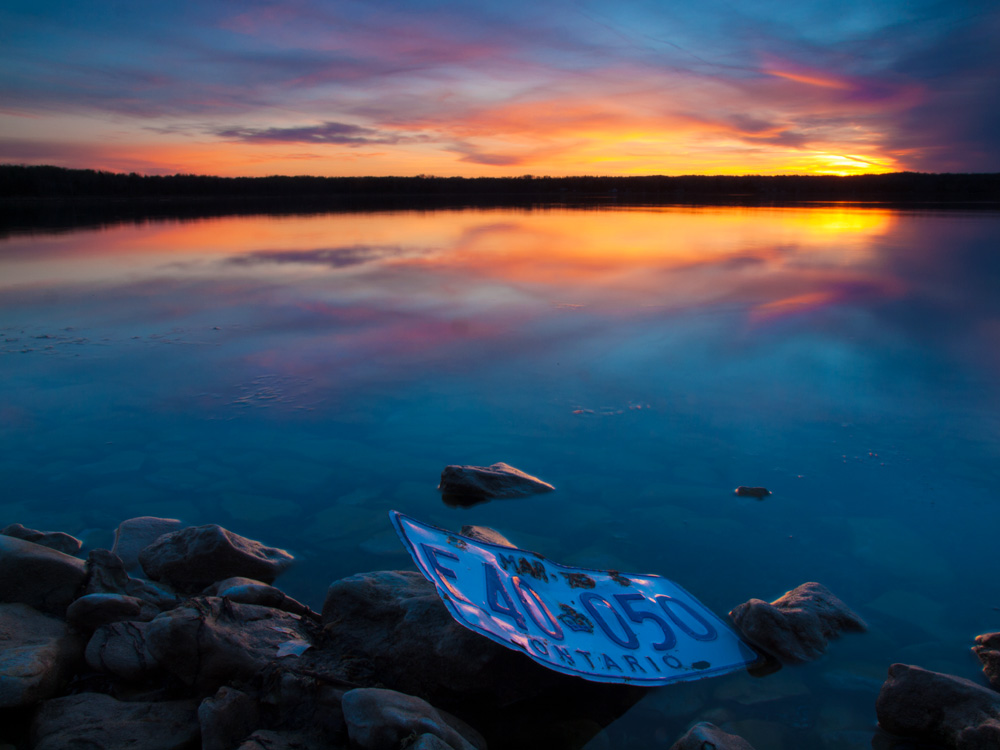 The rocky shoreline helps to anchor the shot and makes the image less abstract, while the license plate adds a unique point of interest. For me, the license plate makes the photo much more interesting. It may not be a photograph that you would want to hang on your wall but it does draw the eye in for some greater investigation and may leave the viewer with a few questions about the photo. I find photography to be a very thoughtful process. Good photographs don't just happen. They are a combination of four things,
Think Ahead As I drive around my local area I am constantly on the lookout for places that might make for good sunset shots. I file these away in my brain for future reference and then wait for the conditions to be right. Over the years I have gotten pretty good at reading the sky. If I see high, whispy cirrus clouds in the late afternoon, it usually means a good sunset is on its way. I will also check the weather forecast and view satellite images to see the sky cover that might arrive in the next hour or so. This may seem like overkill, but if I am investing my time (and gas money) to drive to a location then I would like to improve my chances of success. When you are ready to capture that amazing sunset, arrive early to the location you plan on shooting at. I usually try to get there at least an hour before the sun sets. This allows me ample time to
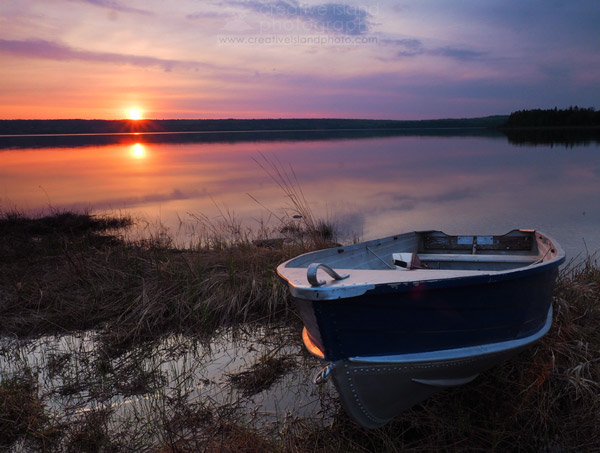
Composition is Key Being in a great spot doesn't mean you will get a great photo. Put twenty photographers on a sunset beach and you will get at least twenty different variations of the day's end - some good, others not. A good photograph takes time, an understanding of composition, and a creative spark. The Rule of Thirds This blog post is not about all of the elements of design and how they apply to photography, but one of those principles needs highlighting - the rule of thirds. According to the rule, your horizon should be in the bottom third or top third of the frame, not right in the centre. As well, avoid the centre of the frame for any point of interest that you are including. As a compositional strategy, this usually works really well. If you look back at the license plate photo you will see that the horizon is in the top third and the license plate is close to the bottom third. This forces the viewer to scan around the image and keeps their attention for a longer period of time. 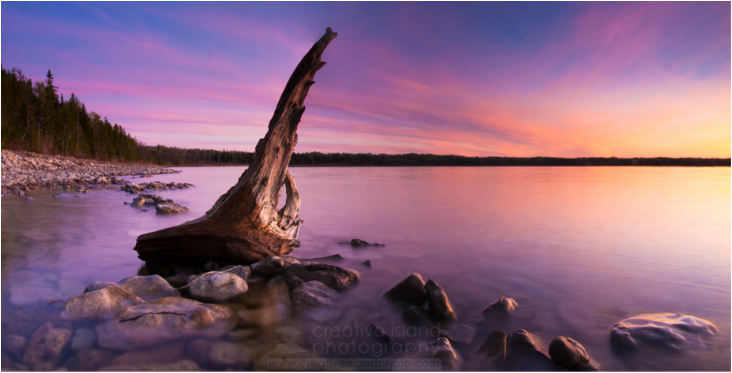 In this case the horizon is fairly close to center but the photo is still bottom and left-weighted which actually makes a more balanced image. Rules, of course are meant to broken and I will often find myself placing the horizon right in the center of the image. This is usually because I photograph around water and want an equal amount of sky and reflection in the final image. That being said, my point of interest will usually be offset from the centre. 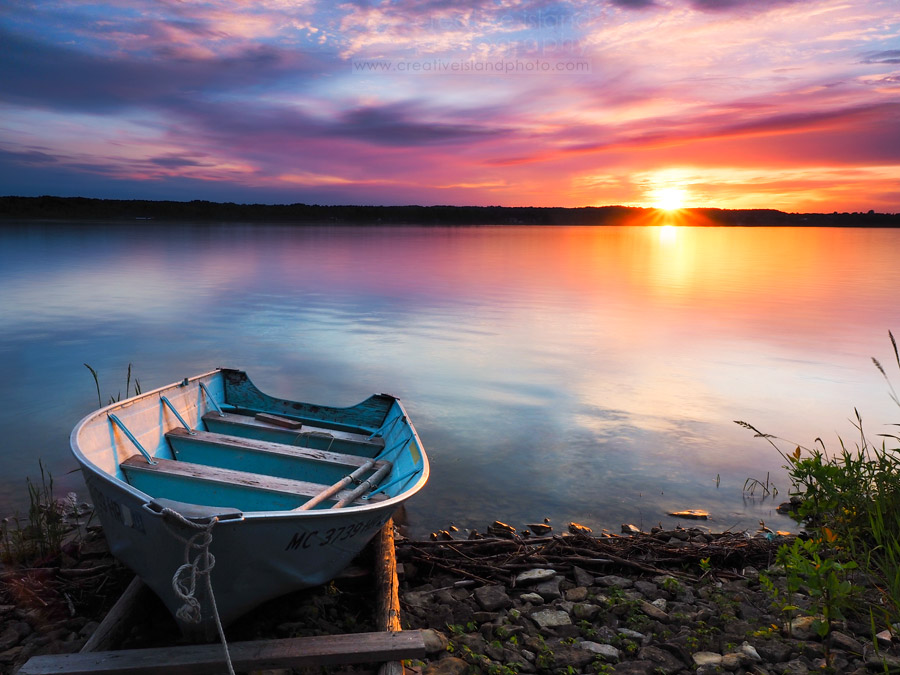 The rule of thirds presents itself in a number of ways. The rowboat is a great point of interest and I captured a few rays of sunlight just before the sun dipped below the horizon. Point of Interest Having a great point of interest is what will set your sunset shot apart from everyone else's. The concept is pretty simple - include something in your photograph that attracts the viewer's attention and keeps it there for a while. I couldn't even begin to list all of the points of interest you might include but for most photos it will be something already present in that location - a piece of driftwood, an interesting rock, the silhouette of a tree or building, people walking on a beach...I think you get the idea. Avoid Distractions One of the things that I love most about being a photographer is the power to control what other people see. As I compose my next shot I decide what to include in the frame and what to leave out. At times this is easier said than done, but if I can't eliminate a distracting element I won't take the shot. The worst distraction for me is power lines, but there can be many others - a parked car, people where you don't want them, branches in the way, and the list goes on. Arriving early can give you the time to adjust your vantage point and hopefully eliminate these unwanted elements. Framing Your Shot Including a natural frame in your image can add depth to the photograph and anchor your main subject. The examples below help illustrate ways of including a frame. 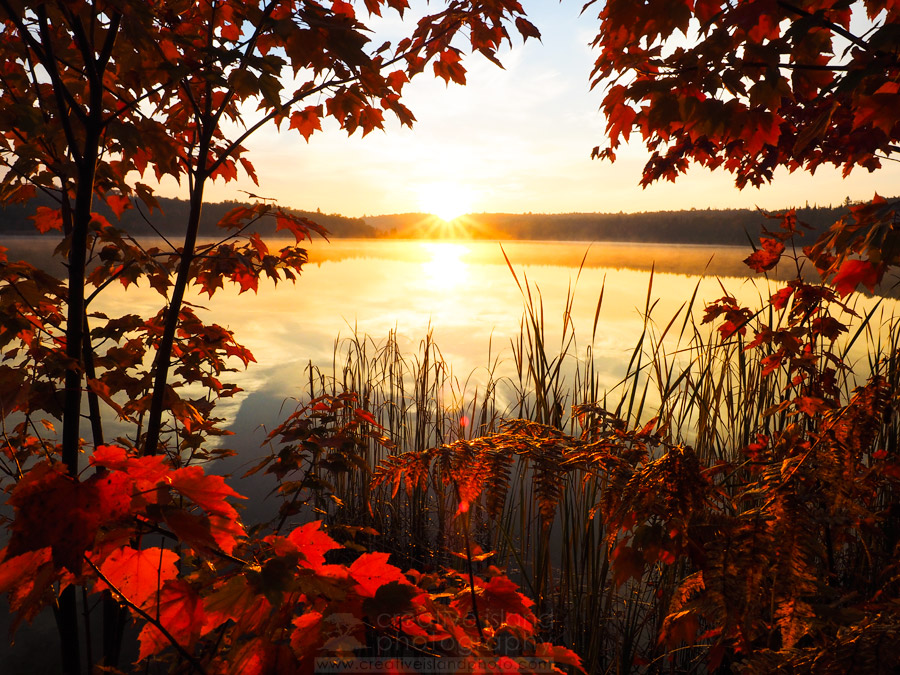 This opening in the branches, and the beautiful red leaves of autumn provided a perfect window through which to view the sunrise. 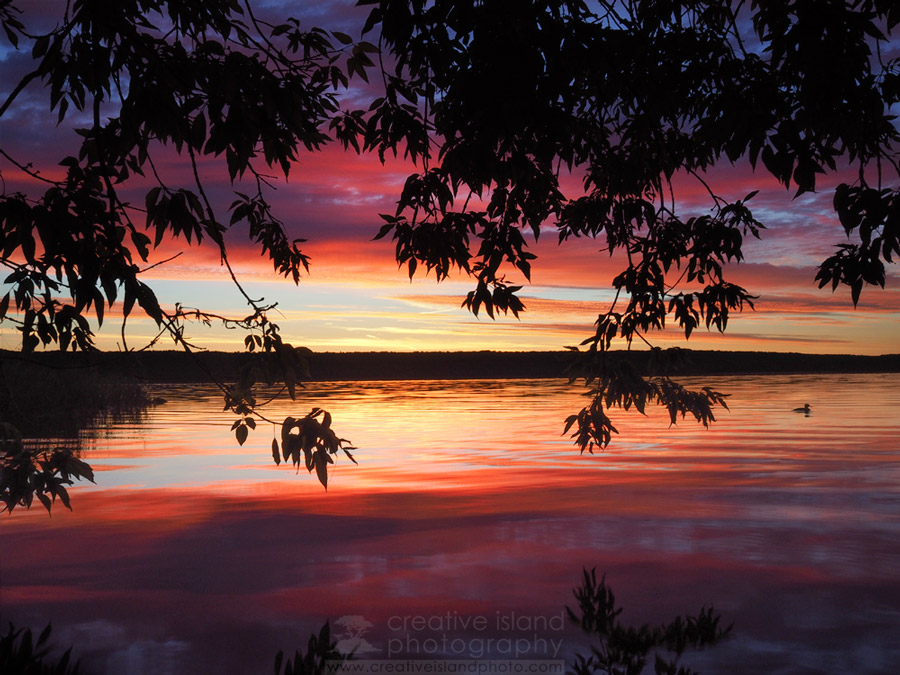 This canopy of branches adds depth and interest to the shot. I took several shots as the duck swam lazily by. 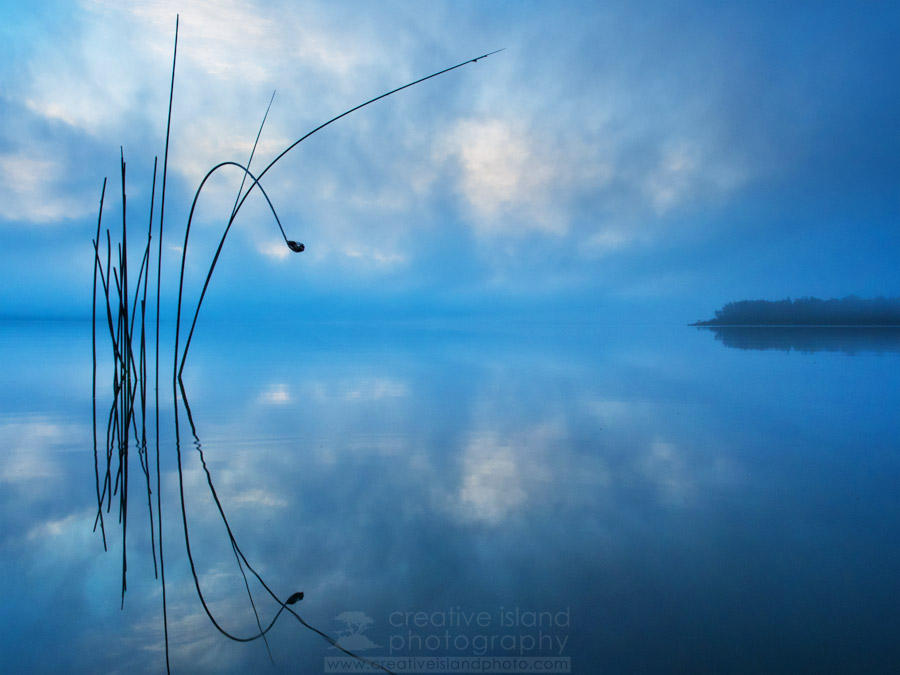 Sometimes the frame can be quite subtle as in the case of these reeds. On this particular morning the golden colours that I was expecting didn't materialize. Good composition can often outweigh poor light. 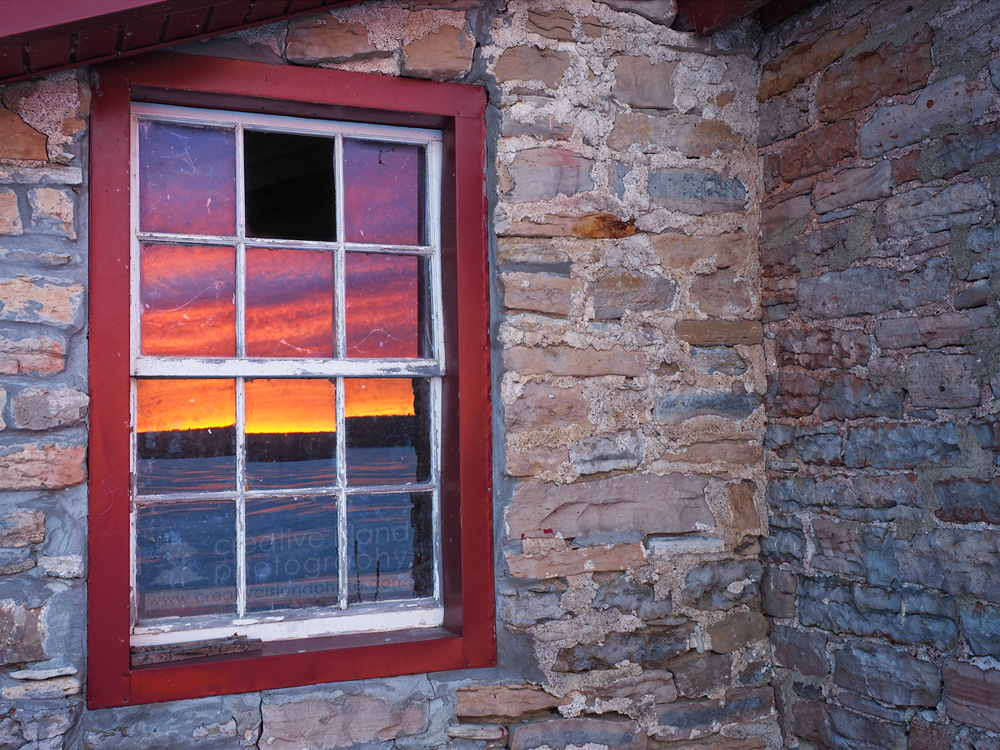 Get creative. The reflection of the sunrise on this old window adds an interesting perspective and a very different way to frame the shot. Go Auto If the settings I've mentioned in the above section make you break into a cold sweat, don't worry about it. Every camera has a Sunset Scene Mode that will do all the thinking for you. When I purchased my first digital camera I regularly relied on this auto mode and got some great results. As a matter of fact if you are new to landscape photography generally, I urge you to focus on the composition and let the camera worry about the exposure. Just don't use it as a crutch for too long. Push yourself to learn how to control the exposure. Get it in Focus Nothing is more disappointing than spending your evening shooting that amazing sunset, and then, upon uploading you discover that they are all out of focus (or at least parts of them are out of focus). Follow these steps to help avoid that disappointment. (I'm keeping this part brief. This section is worthy of an entire post on its own).
Camera Settings Steady as She Goes Once the sun goes down it is time to pull out the tripod. You are now entering the territory of slower shutter speeds. My Olympus cameras have excellent image stabilization capabilities and can cope with being hand-held at speeds as slow as 1/2 second (and I have held them steady for longer than that). But even so, I still use a tripod. I trust my camera to deliver good results hand held, but the real reason I use the tripod is to force me to slow down and focus on composition. That's what really matters. Of course some of the best colours occur 15 - 20 minutes after the sun has set when the sky has noticeably darkened. Now you might be using shutter speeds as slow as 30 seconds or longer. There is no camera that can be hand-held for that length of time. I also use a shutter release cable or if you have a wireless camera you can trigger your shot using your smart phone. This helps to avoid camera shake when you take the shot and ensures better clarity. Let's Get Specific This is the equipment that I shoot with and the settings I typically use.
Sometimes the situation can change and you may have to make some quick adjustments. The photo below helps illustrate that.  I was shooting this sunrise with ISO 200, at f/16 and 1/8 second. When I heard the geese approaching I knew that at that shutter speed they would be a complete blur. I quickly adjusted my Olympus E-M1 to ISO400, f/6.3 and 1/125 in order to freeze the birds in flight. Tricking the Light "My camera doesn't take good sunset shots." Sound familiar? We have all seen photos (and probably taken a few) where the foreground subject is too dark or the sky turns out much too bright. This is fairly typical for photos taken at the beginning or end of the day. The camera's sensor has a hard time adjusting for the difference in light between the sky and the ground. To help compensate for this difference use a graduated neutral density filter (GND). It is a thin piece of resin that transitions from neutral grey at the top to clear at the bottom. It helps to darken the sky and lighten the foreground giving you a much more realistic and pleasing image. There are also GND filters that are grey in the middle and clear at the top and bottom that are specifically designed to work with the challenging light conditions of sunsets. I have yet to invest in one of those.
Let's Get Closer Landscape photography is the easiest style of photography to get into. You really only need a camera and wide-angle lens. Throw in a tripod and perhaps a GND filter and you can capture some great landscape scenes. Although we typically want to capture a fairly wide expanse in our sunset shots, don't overlook the usefulness of a good telephoto lens (300mm or more) in your camera bag. Telephoto lenses are usually used for wildlife or sports photography. The ability of these lenses to compress space and enlarge features can also make them a useful option for sunset shooting. 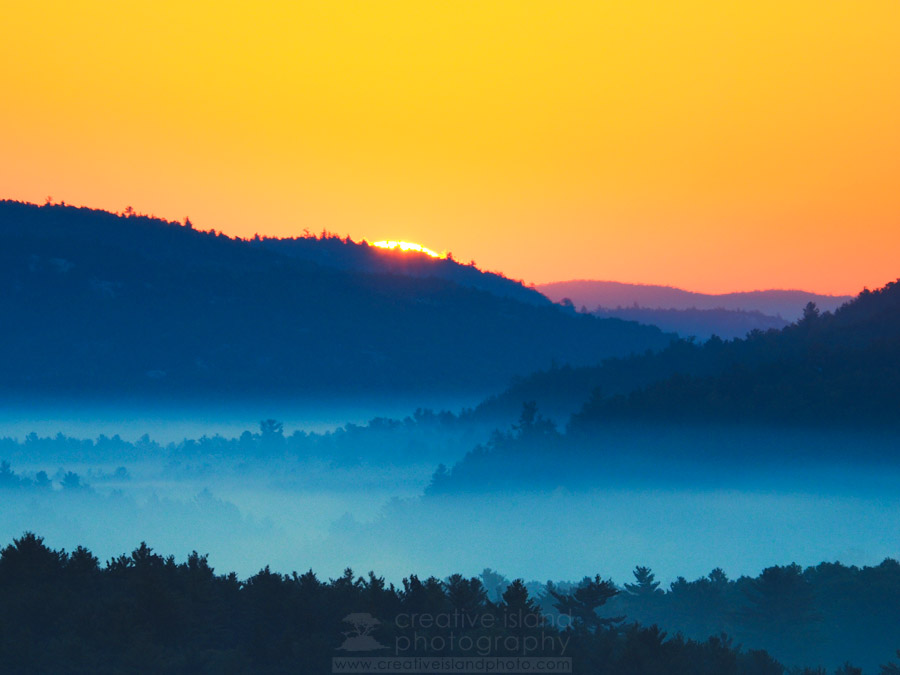   It's All About the Clouds...or Not Generally, I am not nearly as interested in going out to shoot a sunset when the skies are clear. For me a sunset is all about the clouds. Of course, there are always exceptions, as the photo below illustrates. 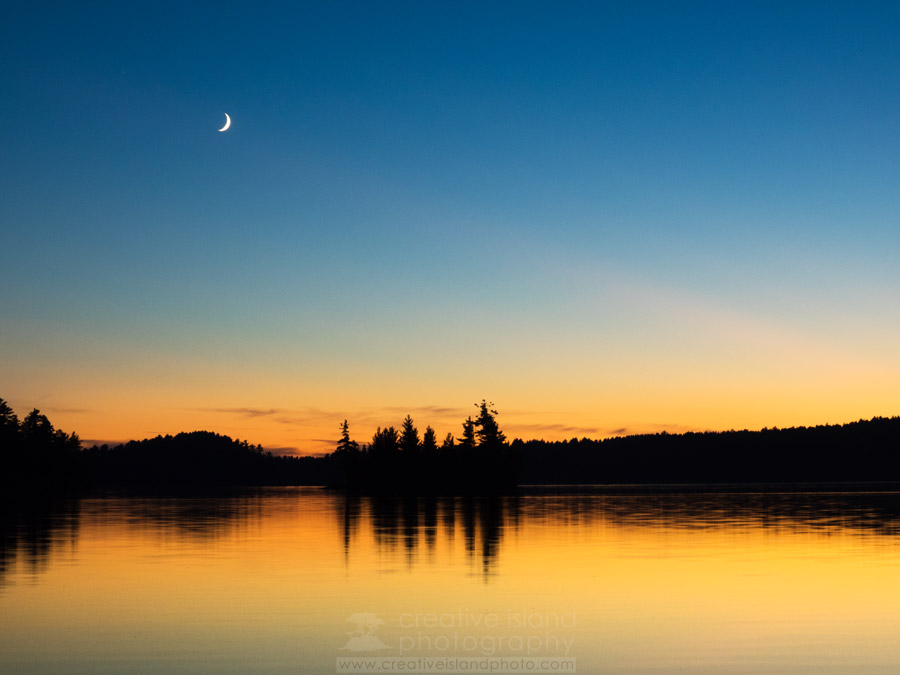 The silhouetted shoreline, the reflection and the crescent moon hanging in the sky create a nice evening landscape photo. Final Words
Like many things in life, a good end result is dependent on how much work you put into the front end of the project. A bit of planning and a good understanding of compositional techniques will go a long way to producing photos you will be happy with and that will attract the attention of others. Over the years I have produced far more poor sunrise or sunset shots than good ones. It is my passion for the craft and my love of the outdoors that keeps me looking for that next great shot. After all, the sun will rise (and set) again. (Boy, that last line sounded cheesy!)
9 Comments
Al Schryvers
9/18/2015 12:48:17 pm
Warm colors at sunset and sunrise is what keeps me coming back more than anything in landscape photography.
Wayne Knox
9/28/2015 08:52:10 pm
Hi Peter 7/6/2016 07:05:16 am
Fantastic advice, these really are some of the best sunset photos I've seen.
Peter
7/6/2016 07:48:43 am
Thank you for the kind words.
steve reed
2/27/2017 08:11:24 am
Hi Peter, great blogg i keep coming back here to get inspired, keep it up [please]. Steve
Prasetyo
4/20/2017 09:35:43 pm
Hi Peter,
Slava
10/2/2020 09:20:37 pm
Hi Peter, these are great pictures and tips! I am a big fan of your style and talent and really appreciate the how-to articles that you post here and on the Olympus site. I came across the article on the Olympus site first and noticed that you were recommending very small apertures (f8 to f22), which seems like an overkill for M43. I then followed the link to your blog and noticed that you have corrected the recommendation to f5.6-f13, which helps to limit diffraction and still obtain great depth of field on M43. Maybe Olympus can revise this article on their site to reflect your updates? Thanks again for your art and articles they are very inspiring!
Slava
10/2/2020 09:22:14 pm
Here is the link: https://learnandsupport.getolympus.com/learn-center/photography-tips/landscapes-nature/taking-a-great-sunset-photo Leave a Reply. |