|
For aspiring wildlife photographers who don’t want to go traipsing into the winter wilderness, setting up a bird feeder in your yard can provide great photo opportunities to capture the smaller members of the avian community. With a bit of planning and the right camera settings you can capture some great bird images, all while remaining within quick reach of a warm cup of cocoa. The Feeding Station When autumn hits I turn my attention to prepping my yard for winter and one of those chores includes setting up a few bird feeders. Like most people I set them up in front of my larger windows so that I can enjoy the various birds that frequent the Northern Ontario winter. Although I love watching them, my real aim is to photograph them. 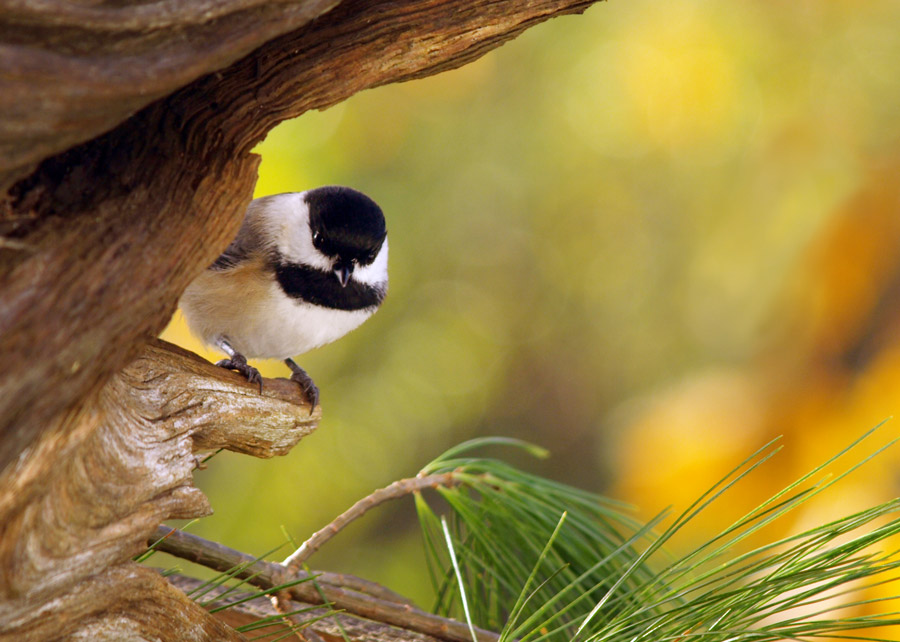 Figure 1: An old stump and a few pine boughs can make for an interesting setting close to your feeder. It also provides a number of options for placing seeds. My main goal is to make the final image look as though it really was photographed in the wilderness, not in my backyard. As such, the location chosen for your feeder will have a big impact on the quality of your bird photos.
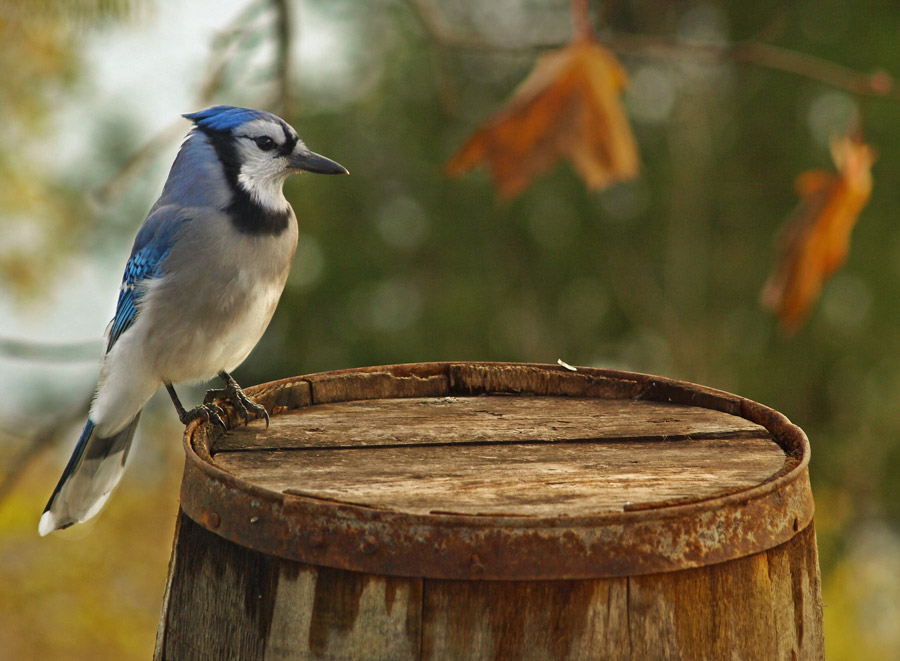 Figure 2: You don't always need a completely natural looking setting. This old barrel made a perch with character. Camera Settings The exposure triangle is never far from my mind when photographing wildlife of any kind. I am looking to balance a fast shutter speed with a narrow depth of field. Given the speed at which these feathered friends can move, I generally aim for a shutter speed of around 1/2000s or faster in order to freeze the action. As lighting conditions change or in recomposing a shot, I may have to adjust the ISO in order to maintain that speed. I shoot with the Olympus OMD line of cameras and the 2x2 switch on the E-M5 II and E-M1 are perfect for making quick changes to settings. I never have to take my eyes from the viewfinder. Although I am not a huge fan of shooting in bright sunlight it can be the perfect conditions for capturing the action around the bird feeder. Here are my typical settings; Camera: OMD E-M1 or E-M5 II Lens: 40-150mm f/2.8 PRO with the 1.4x teleconverter or 75-300mm f/4.8-6.7 II Mode: Manual Shutter Speed: 1/2000s or faster Aperture: f/4 or f/5.6 – A larger aperture will help to keep your background soft. ISO: I will adjust this to keep the shutter speed and aperture within the range mentioned above. Continuous Shooting Mode Focusing: S-AF EV: +0.3 - +1.0 in order to brighten colours and the snow The setting that seems to create the greatest number of questions from readers is my choice of focusing mode. "Why don't you use the C-AF (continuous auto focus) mode?" Simple - I am usually working in fairly close quarters with the birds around my feeder and they dart around too quickly for C-AF to be effective. When I am shooting wildlife from a greater distance or children playing sports I will often switch from S-AF to C-AF.  Figure 3: Olympus OMD E-M1, 75-300mm f/4.8 - 6.7 II, ISO 400, 1/2000s at f/6.7 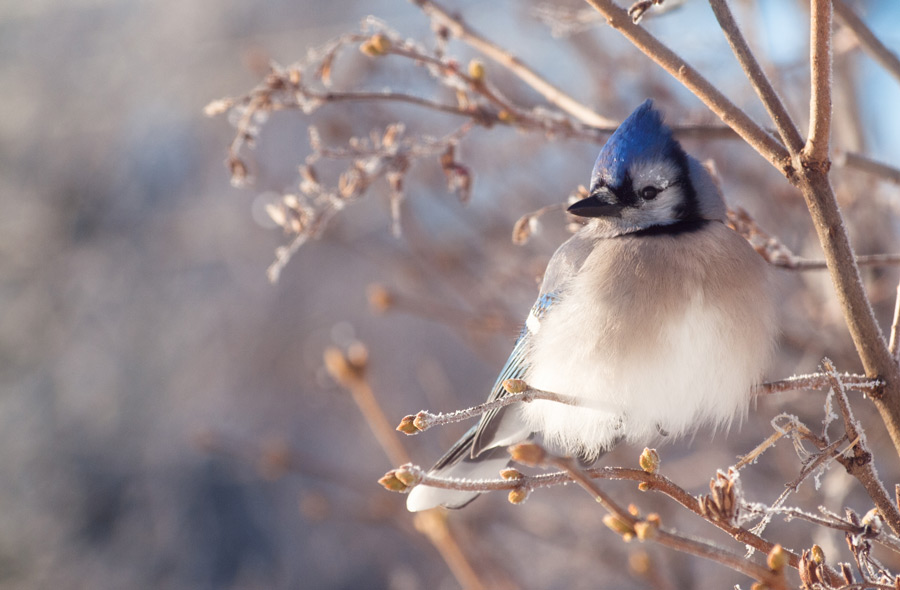 Multiple species of birds can usually be found visiting your bird feeder. Composing the shot Your goal should always be creating the best composition you can. You may notice the definite absence of the actual bird feeder in all of my images. This is a conscious decision.
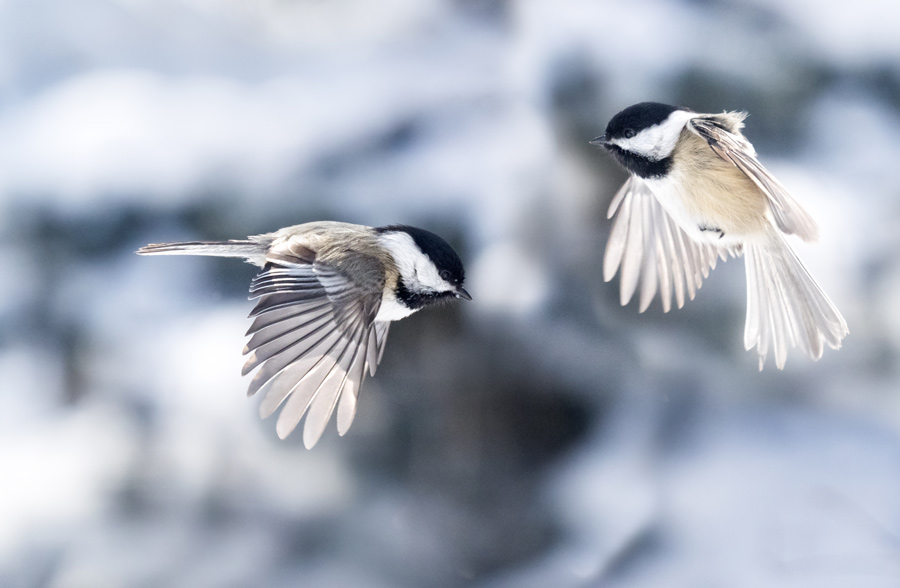 Figure 4: To create this shot, I manually focused on the birdfeeder (just slightly to the right of the photo), then turned the tripod head so that the feeder was not in the frame. (E-M1, 40-150mm f/2.8 PRO, ISO 1250, 1/6400s at f/4.0) 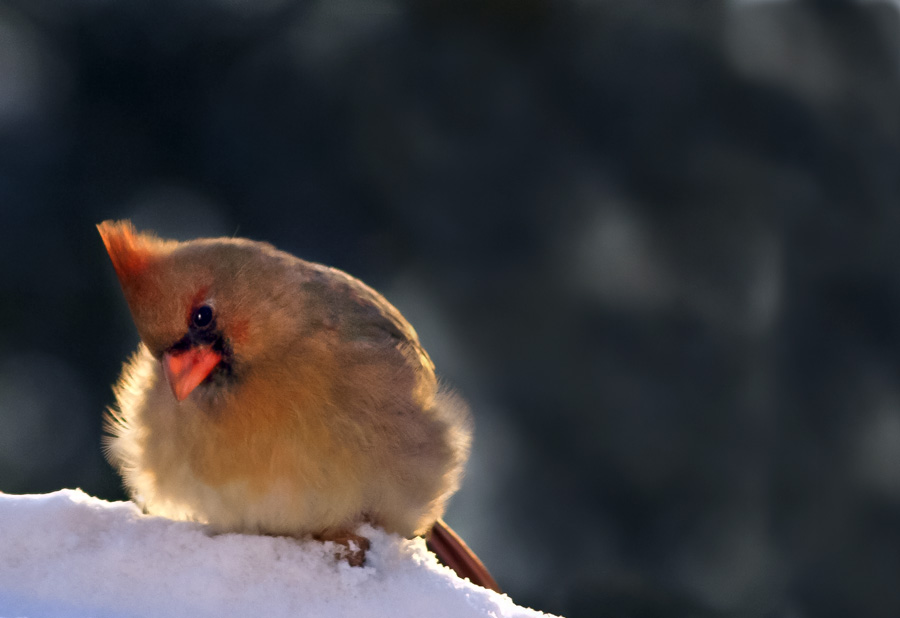 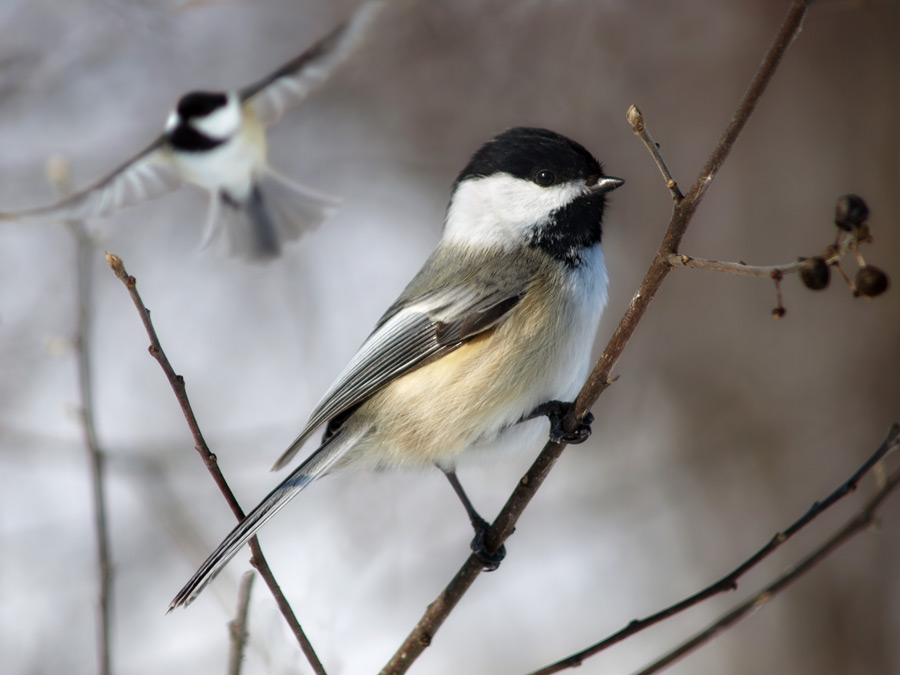 And Finally... A few years ago I was sick in bed with the flu and got up to get a drink of water. I looked out my dining room window and saw lots of activity around the bird feeder. Being a photography addict I couldn't resist taking some photos. I grabbed my tripod, set it up in the dining room and began shooting. The photo below is one of the images that came from that feverish photo shoot. 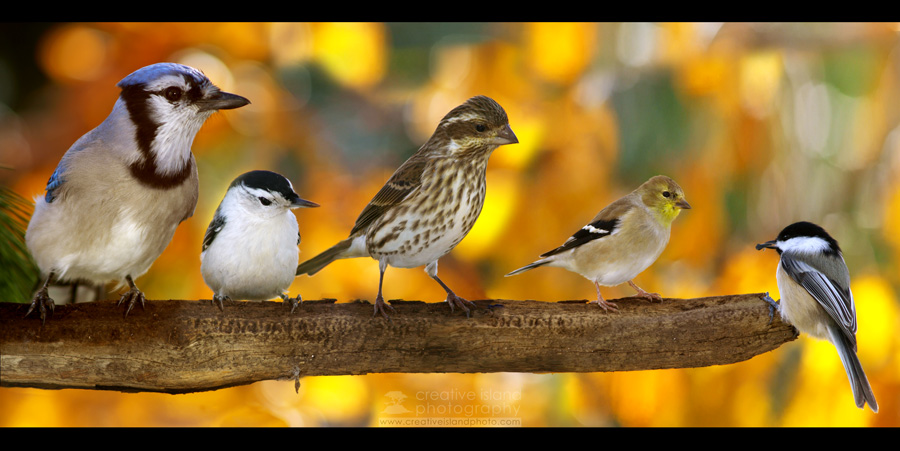 Were all of these birds really on that branch? Of course they were. Just not at the same time. Sometimes I just can't resist doing some compositing. For tips and tutorials specific to Olympus gear, check out the Olympus Learning Centre.
1 Comment
Photography during the Winter season can be really tough. There are a lot of elements of photography that can be hindered by the season. For instance, you can have problems focusing with all of the snow falling. There are also birds that do not go out during the entire Winter season. It is definitely a difficult time for all photographers, but it is a challenge that I am more than welcome to take. Photography is a challenge, and this is just part of it. Leave a Reply. |