|
The cold Canadian winter is filled with many outdoor pursuits beyond shovelling snow. There is ice hockey, skiing, snowshoeing, and of course, ice fishing. Drill a hole in the ice, drop your baited hook, and wait. Pull up a chair, a thermos of coffee (or perhaps something stronger) and it can be a very relaxing way to pass a winter's day on a frozen lake. Throw in some big prize money however, and you have the makings of a competitive fishing derby. The Wikwemikong First Nation, located on Manitoulin Island hosts one of the largest fishing derbies in the region. Manitoulin is the largest fresh water island in the world and is located at the top of Lake Huron. This year, Wikwemikong hosted its ninth annual derby on January 11, 2017 and had 440 participants from all over the province of Ontario, and beyond, all vying for over $30 000 in cash and prizes. Instead of a fishing rod, I grabbed my camera gear and photographed the event. 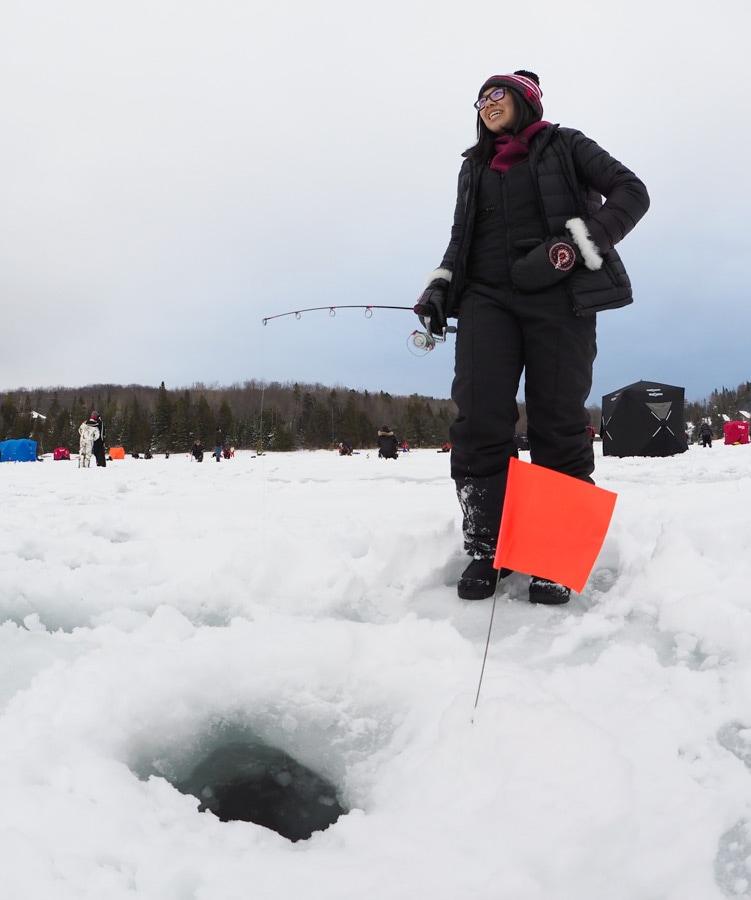
9 Comments
Looking for an interesting indoor photography project? Then break out the bubbly! Soda water, that is. Back in my youth, I was the kid who would stare at the glass of soda and watch the bubbles form on the side of the glass and rise in an endless stream to the surface. I was fascinated by it. How did the gas get into the soda in the first place? What caused the bubbles to form on the smooth glass? Why did they create this constant stream of bubbles? (We only had two television stations back then and no Internet, so it was easy to be fascinated by simple things.) As an adult (soft of), I now understand the scientific principles behind my fascination. I'll explain it in a moment, but first, let's have a look at how you can create your own bubbly photos. 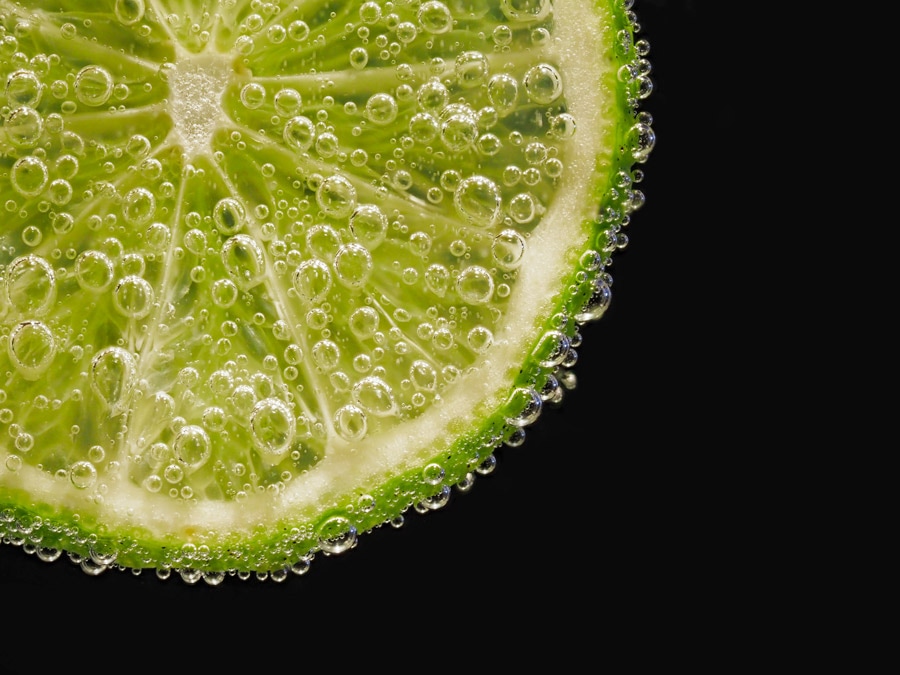 (ISO 800, f/4.5, 1/100s, -0.3 EV) I recently had the pleasure of conversing with Sonny Portacio of pocketlenses.com. His website is a fantastic resource for everything involving mirrorless cameras. On it he states, "You don’t need big, heavy camera gear to make great pictures. Mirrorless Cameras have forever changed the landscape of photography. You can learn to make stunning images with lightweight, agile, mirrorless gear. Size, weight, performance and capabilities are some of the many reasons people choose a mirrorless camera over a large, bulky DSLR."  I couldn't agree more. My Olympus gear is incredibly light, durable, and reliable - all without sacrificing image quality. During our conversation we chat about how I got into photography, why I shoot mirrorless, my primary subject matter and some of the tips and techniques that I use to try and create high quality imagery. Listen to Part 1 of my conversation with Sonny.  In Part 2 of the podcast, I discuss the backstory behind some of my images, give tips on how to improve your photography, and talk about some gadgets that I use to create my images.
Photographing Elegant Still Life Images As a nature/landscape photographer the quality of my images is very much dependent on the whim of mother nature and the light she decides to present to my lens. It can be a real disappointment to head to a great location only to have poor quality light spoil the scene. I've grown to accept that and cherish those moments when the light is perfect. There are times however when 'bad' light seems to lead to the best results. This 'black velvet' project is one of those cases. 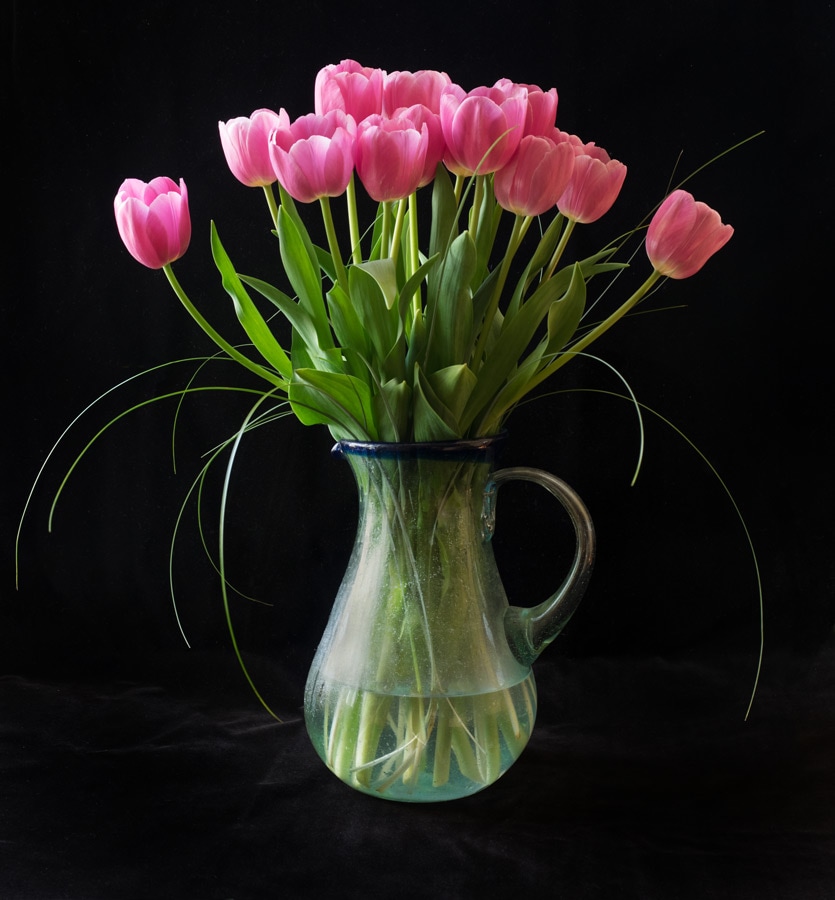 The key elements are quite simple; a still life subject, muted natural light and a piece of black velvet. Although other fabrics will work, black velvet absorbs almost all light and has little to no sheen. It tends to pick up lint easily so having a lint roller handy will save some post-processing work later. Practically any subject will do but I tend to like using natural subjects from my garden. It's a nice change to be able to have greater control over the elements in your photograph. As far as lighting your subject, it may seem counterintuitive, but I find I achieve the best results under rather dull, early evening, overcast lighting - the type you would normally avoid.
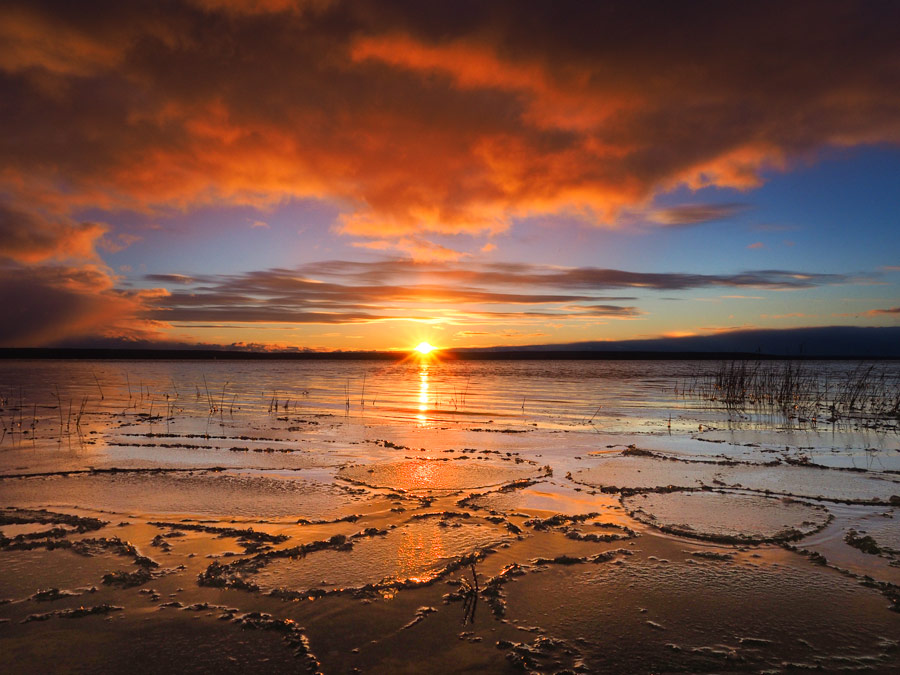
Photography is often referred to as the art of “painting with light”. In most instances that 'painting' happens in a fraction of a second. The Live Composite feature on Olympus cameras allows that light to be painted on the sensor for much longer periods of time without overexposing the whole image. When I first started using Live Composite I had one purpose in mind - to capture star trails. It is certainly ideal for accomplishing that task since the feature is designed to work in low light conditions, but now it's time to go beyond the stars. If you are new to Live Composite or want information specific to creating star trails check out my article, Olympus, Live Composite and Star Trails. 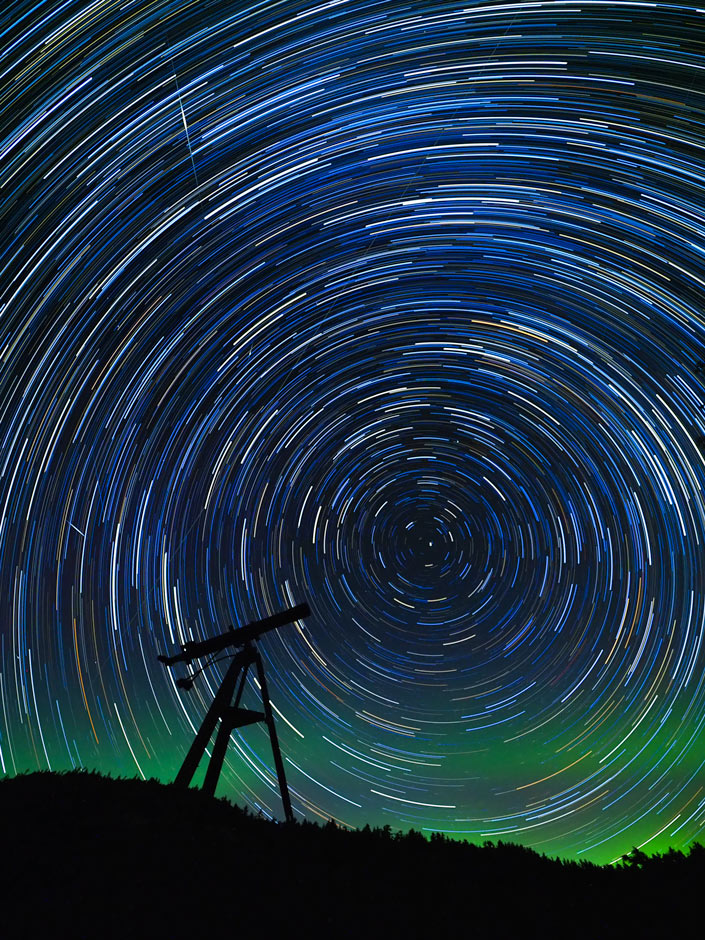 Live Composite dramatically simplifies the process of creating star trail images like this one, but can be used for a number of different purposes as well. The purpose of this post is to illustrate more earthly pursuits that involve live composite including capturing fireworks, lightning, traffic trails, moving clouds and light painting. Rather than go through a step-by-step process (if you need that check out that link above) I thought I would show some specific examples of photos that use live composite and how that image was achieved. Some of the photos below are my own, but I have also engaged the help of three fellow Olympus Trailblazers; Mike Boening, Frank Smith and Jamie MacDonald.
When Olympus released their flagship E-M1 model back in 2013 it made quite a splash. Reviewers and photographers of all stripes were thoroughly impressed with its feature-packed design. Three years later it is still a highly-regarded camera, but alas, it's time for an upgrade. After spending some time working with the new OM-D E-M1 Mark II, I have no doubt that Olympus has another success on their hands.
First Impressions
Before I get into any details, I must provide two important qualifiers. First, this is not a technical review. It is a 'first impressions' write-up with a few supporting details and a lot of comparison to its predecessor, the E-M1. Secondly, all of the information in this post is based on a pre-production model of the camera.
If you would rather watch a quick summary of the E-M1 Mark II, check out my video description below.
Every autumn, in the forests near my home, a massive reproductive event takes place that I just can't ignore. It starts during the warm days of summer when long tendrils of mycelium digest their way through the rotting corpses of fallen forest detritus. When autumn arrives, an asexual explosion erupts from the earth, as the fruiting bodies strive to spread their genetically identical spores throughout the forest floor. We're talking mushrooms here, people! And I love to photograph them. Mushrooms grow remarkably quickly and decay even quicker. But if you time it right they can be quite photogenic. Many species are so small that a macro lens is an absolute necessity. Anyone who has worked with a macro lens recognizes that it can be a real challenge to achieve a sharp subject from front to back and still maintain a nice, soft, defocused background. In fact, with most subjects it's an impossible task. Enter focus stacking or focus bracketing. 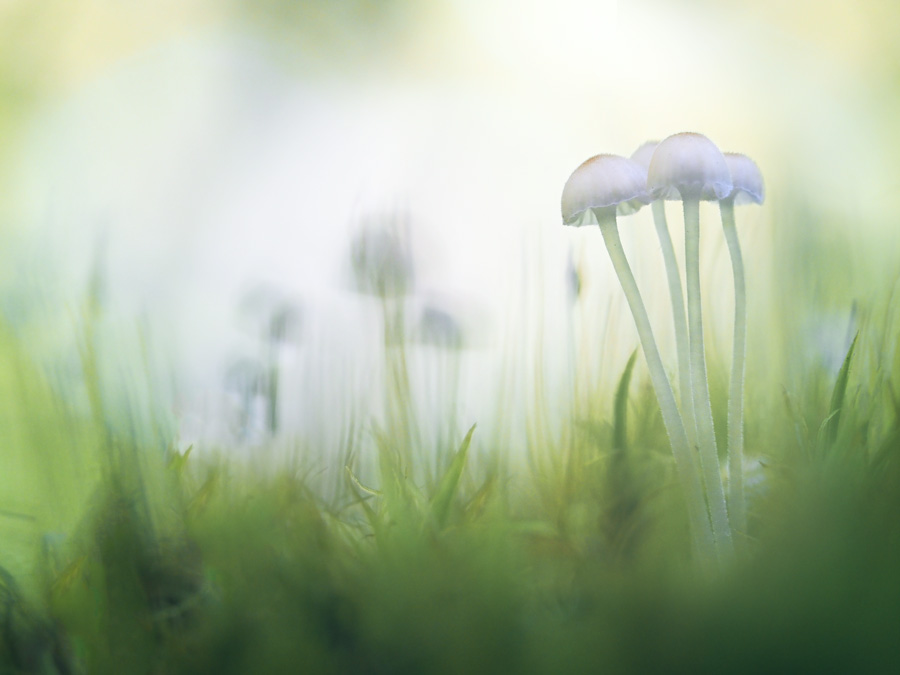 Olympus OMD E-M1 Mark II, 60mm f/2.8 macro, ISO640, 1/200s, f/3.5, +0.3EV, focus differential 4
If the camera was invented for only one of the four seasons, it would have to be autumn. The colours, cooler weather and threat of the long winter ahead inspires countless photographers to get out and photograph the beauty of fall. If you are one of those photographers, here are a few tips and techniques that I use.
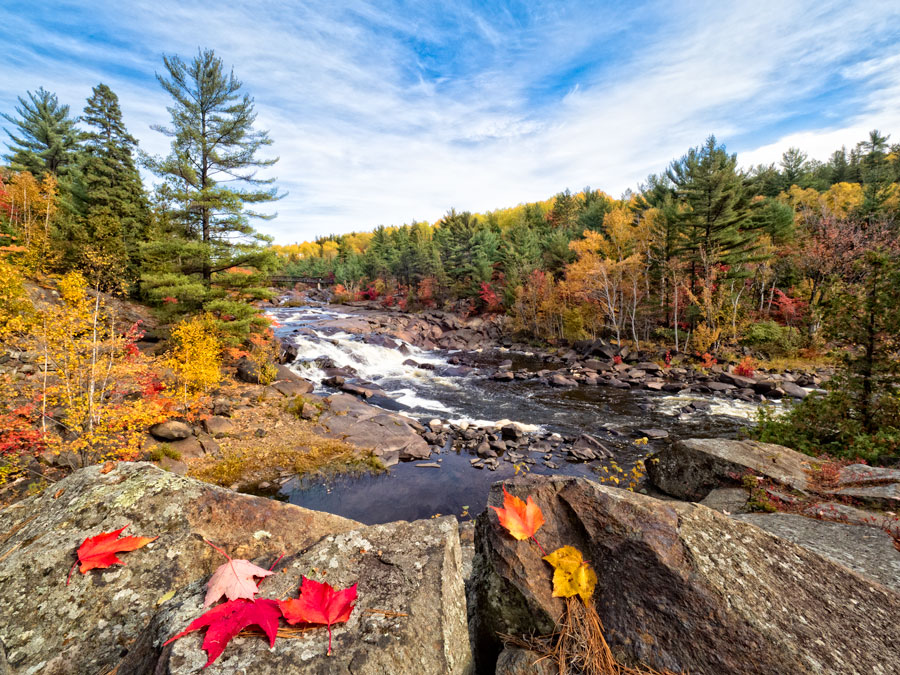
Autumn is perhaps the most picturesque time of the year. Get outside and capture it! (Camera: Olympus OMD E-M5 II, Lens: M.Zuiko 7-14mm f/2.8 PRO, ISO400, 1/80, f/16)
It's a Small Thing with a Big Difference It sounds cliché to say, "it's all a matter of perspective", but in photography a slight change in your camera's position can make a big difference to the overall look of your final image. Let me take you on a recent expedition to a local field to show you what I mean. Each spring, the hay fields in my area are inundated with thousands of daisies. It's a wonderful sight to see and undoubtedly draws me in to try and capture a few images. This past spring was no different. One particularly pleasant evening I hopped in my car and drove down a local side road until I reached one field that was still nicely lit by the rapidly setting sun. I grabbed my Olympus OMD E-M1 and, since I wanted to capture the expanse of this floral landscape, I attached my M.Zuiko 7-14mm PRO lens. I jumped the fence (yes, I am guilty of trespassing on occasion) and walked about 30 feet into the field. The daisies were everywhere, so finding the perfect spot was easy. I had already pictured the image - one large, photogenic daisy, set against thousands, and nicely lit by the orange glow of the sun. I checked my camera settings, composed a shot and... Click! 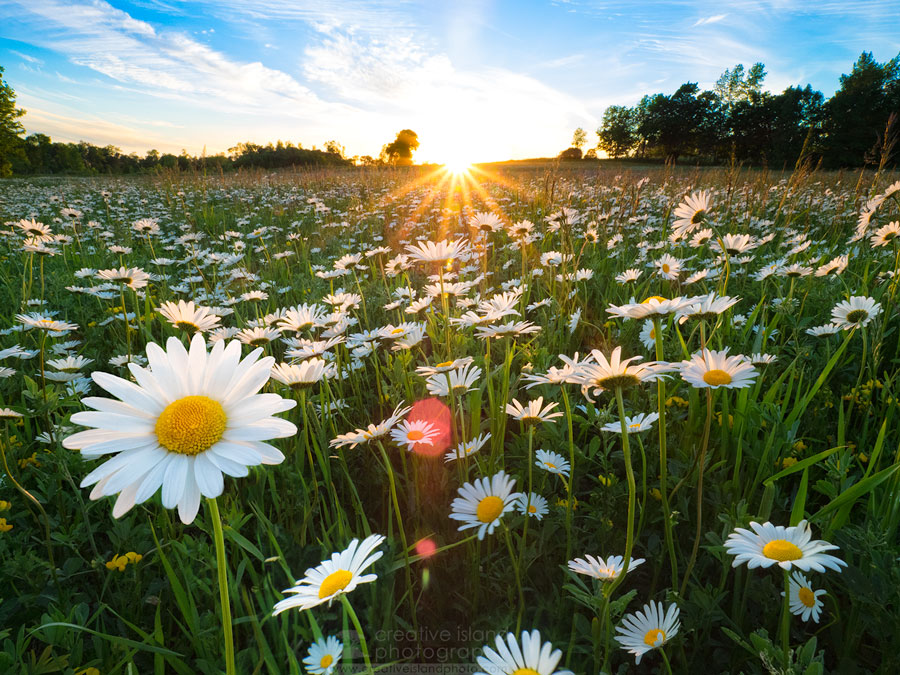 Olympus OMD E-M1, M.Zuiko 7-14mm f/2.8 PRO, focal length 10mm, ISO640, 1/20s, f/13
The OLYMPUS OMD E-M10 MARK II and 12mm F/2.0 LENS
As an Olympus Trailblazer I have the remarkable opportunity to shoot with practically any camera body and lens that Olympus makes. As a nature/landscape photographer I admit that I usually turn to one of the weather-sealed options from Olympus - either the E-M1 or the E-M5 II. After all, I often find myself in weather conditions that may not be favourable. So why am I writing a post on the E-M10 II and 12mm f/2.0? Quite honestly, more and more often I find myself reaching for this exceptional combination.
All of the images in this post were shot with the Olympus OM-D E-M10 Mark II and the M.Zuiko 12mm f/2.0 lens.
|