|
When Olympus released their flagship E-M1 model back in 2013 it made quite a splash. Reviewers and photographers of all stripes were thoroughly impressed with its feature-packed design. Three years later it is still a highly-regarded camera, but alas, it's time for an upgrade. After spending some time working with the new OM-D E-M1 Mark II, I have no doubt that Olympus has another success on their hands.
First Impressions
Before I get into any details, I must provide two important qualifiers. First, this is not a technical review. It is a 'first impressions' write-up with a few supporting details and a lot of comparison to its predecessor, the E-M1. Secondly, all of the information in this post is based on a pre-production model of the camera.
If you would rather watch a quick summary of the E-M1 Mark II, check out my video description below.
Let's Get Physical
I clearly recall my first glance at the Mark II and thinking, "Hmm, it's not much different than the E-M1". I suppose that is to be expected. After all, they share the same lineage. Then I picked it up and discovered just how physically different it is. Although its overall height and width are about the same (within about 1mm of the E-M1), the Mark II has a thicker body by about 6mm. That may not seem like much of an increase but it actually makes the Mark II more comfortable to hold. I don't have particularly large hands, but the new grip fits perfectly. The original E-M1 always felt a little loose in my hands. Not anymore! Time for a tour. Let's take a walk around the E-M1 Mark II and see what design features have been included.
Front
The face of the Mark II looks almost identical to its older sibling. Except for the beefier grip you could easily be forgiven if you mistake one for the other. The two function buttons beside the lens mount are still completely programmable - the top is dimpled, while the bottom one is rounded so it is easy to feel the difference. The bottom button defaults to the Preview function which is where I like to keep it, but both can be programmed from a large variety of functions. 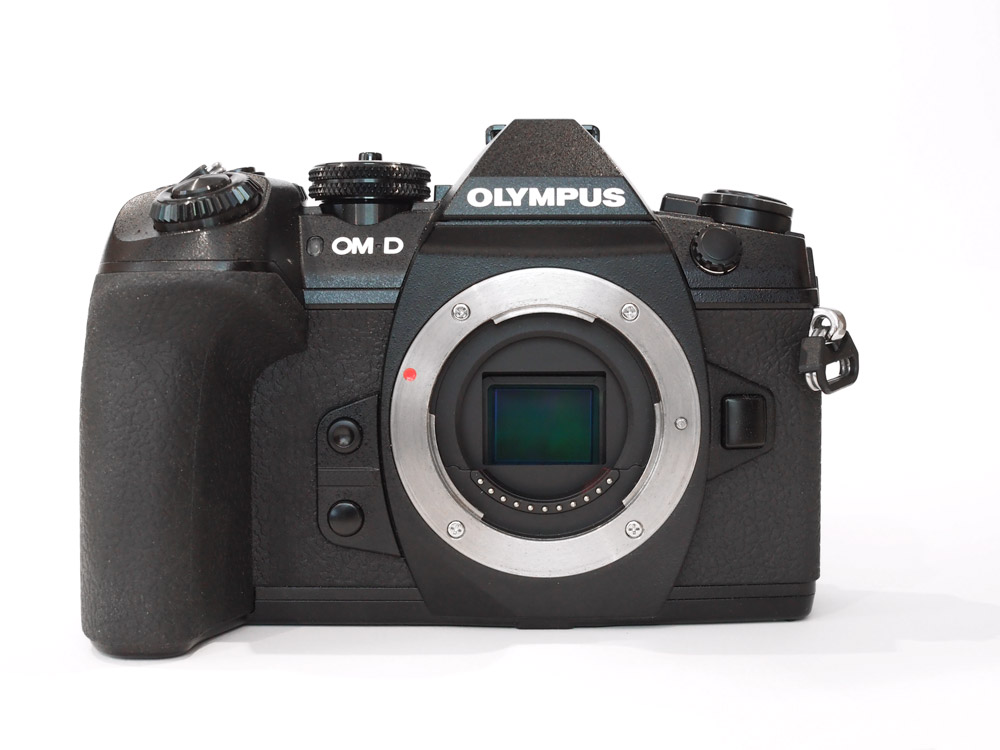
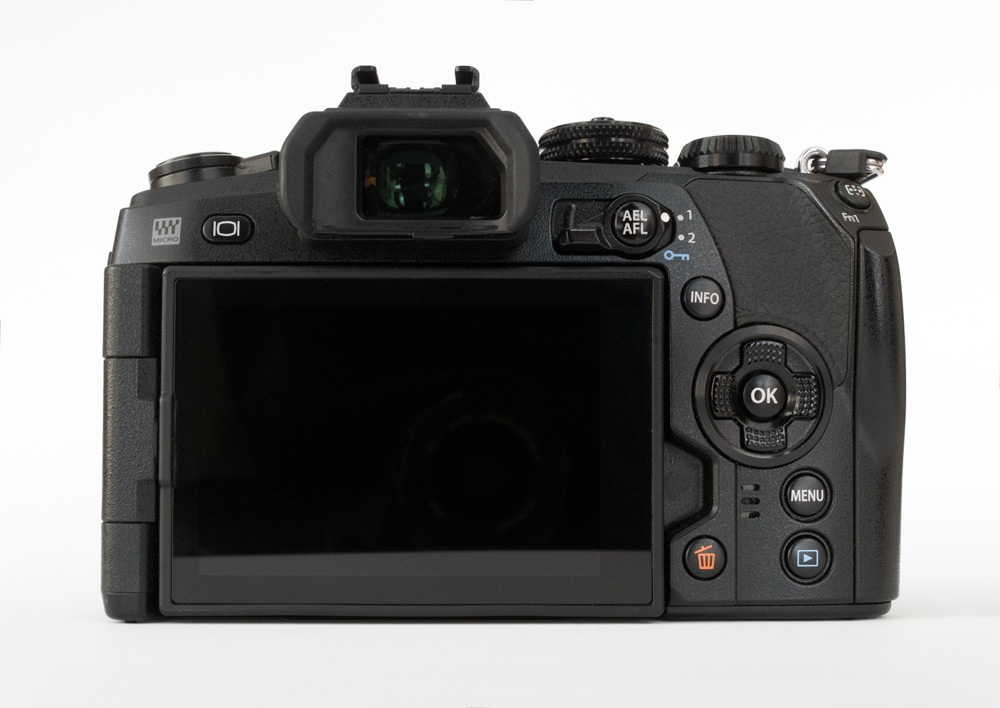
Rear
The rear of the MII has several significant changes from its predecessor;
Top
The layout of buttons, dials and switches on the top of the MII hasn't changed. But one important thing has. Gone are the Myset Presets that were accessed through the menu. They are now replaced by three customizable settings on the mode dial. They are pre-programmed as follows; C1 - Moving Subject AF C2 - Pro Capture Mode (just wait to read about this amazing innovation below) C3 - Low-light AF 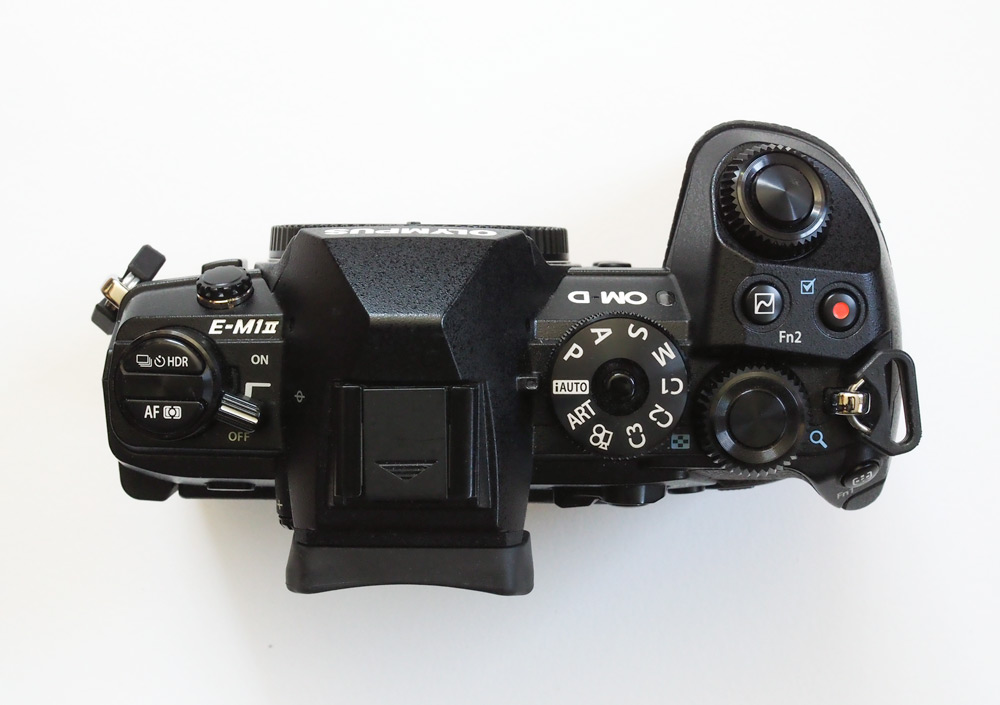
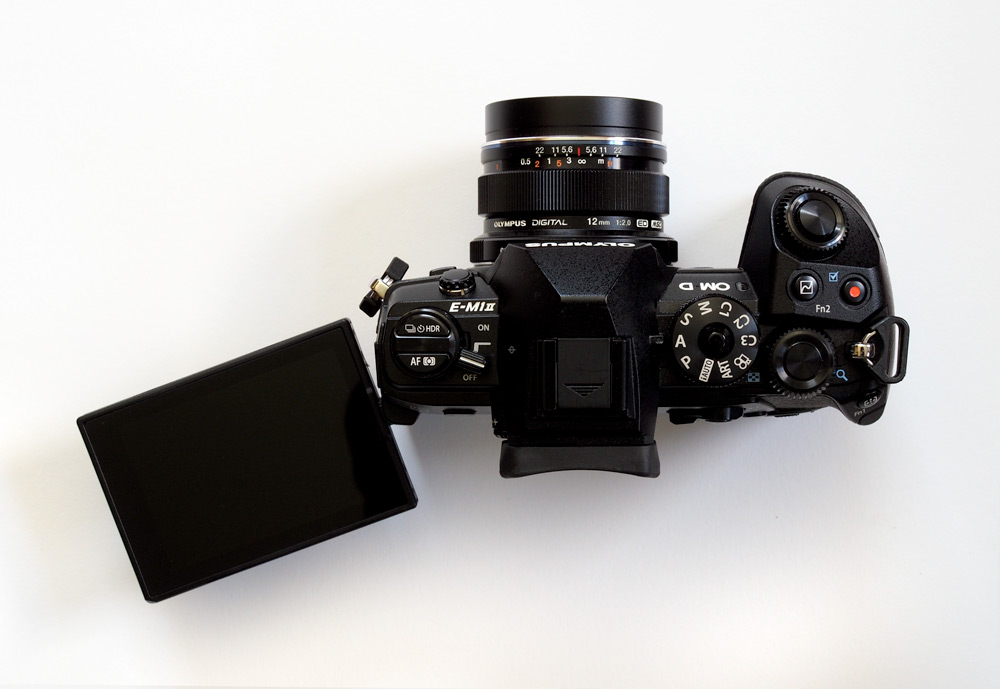
Top view showing the articulating screen. 12mm f/2.0 lens attached.
Right Side
Dual Card Slots (I can hear the cheering from here!) And the card labels face you! Within the gear menu there are several ways of recording onto the cards;
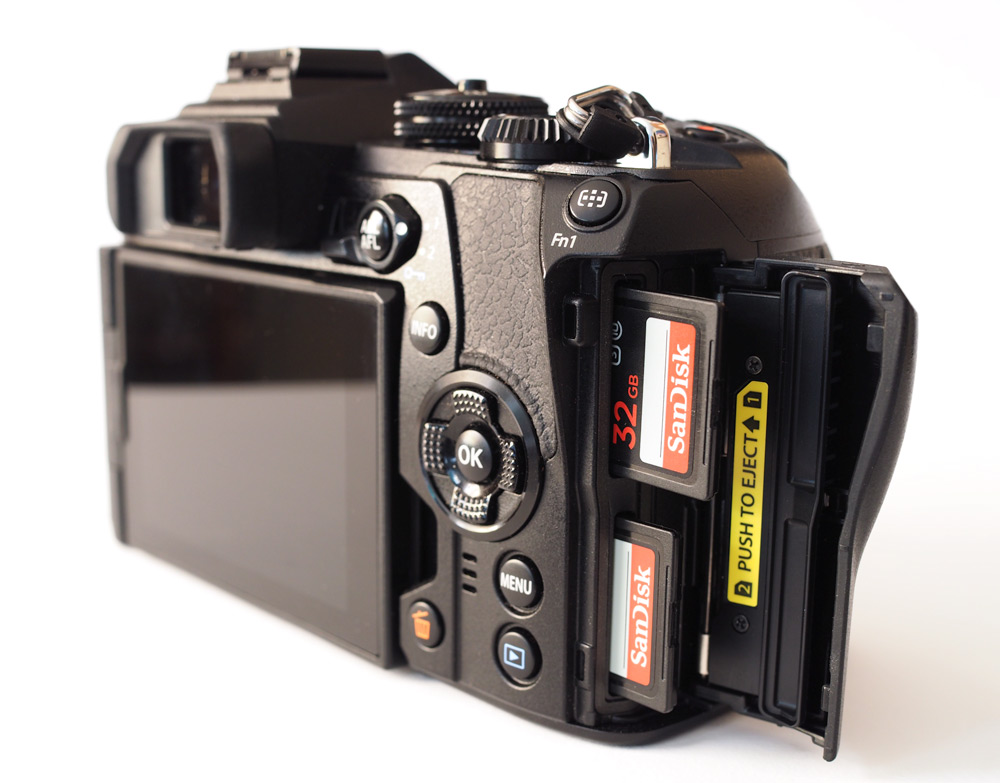
The dual card slot is a very welcome feature on the new Mark II.
Left Side
Three port covers can be found on the left - a dedicated 1/8 inch mic port, headphone port, HDMI and USB ports. You no longer have to move the LCD screen in order to access any of the covers. 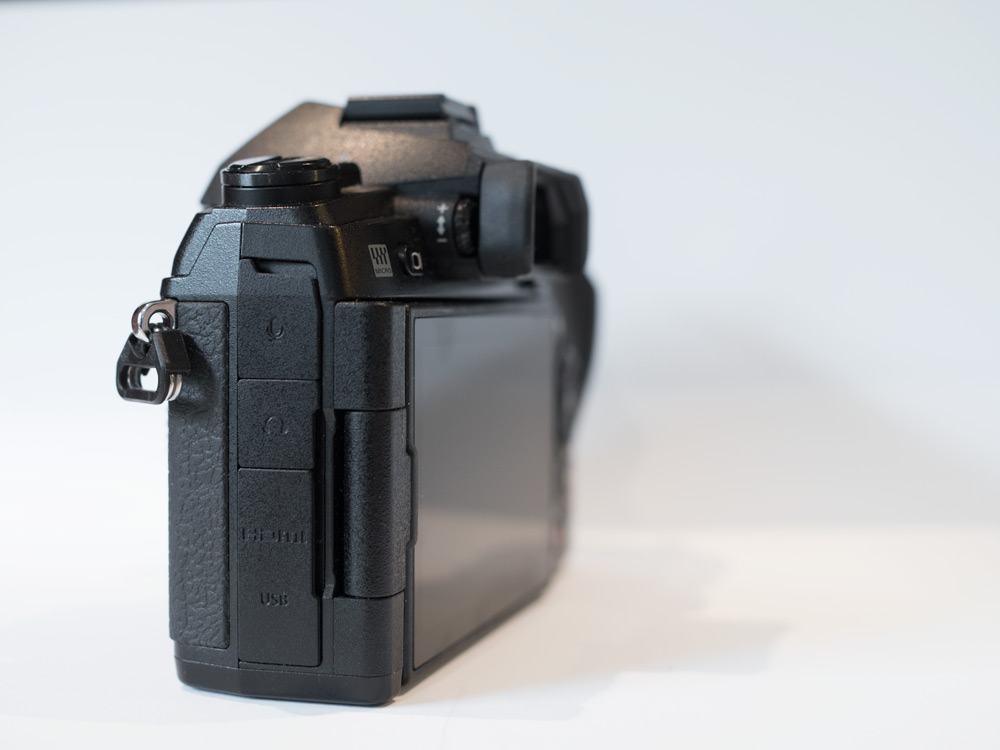
The rubberized access flaps are easy to open and close and help maintain the exceptional weather-sealing on the Mark II.
A Side-by-Side Comparison
The images below provide a sense of how Olympus has squeezed more body into the same overall footprint. The MII is on the left, the E-M1 is on the right. 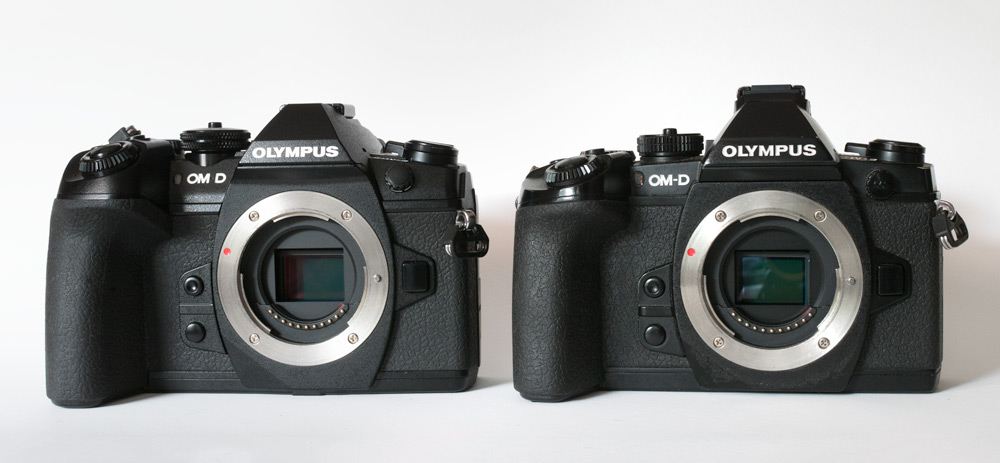
The Mark II (left) squeezes more camera body into the same overall footprint.
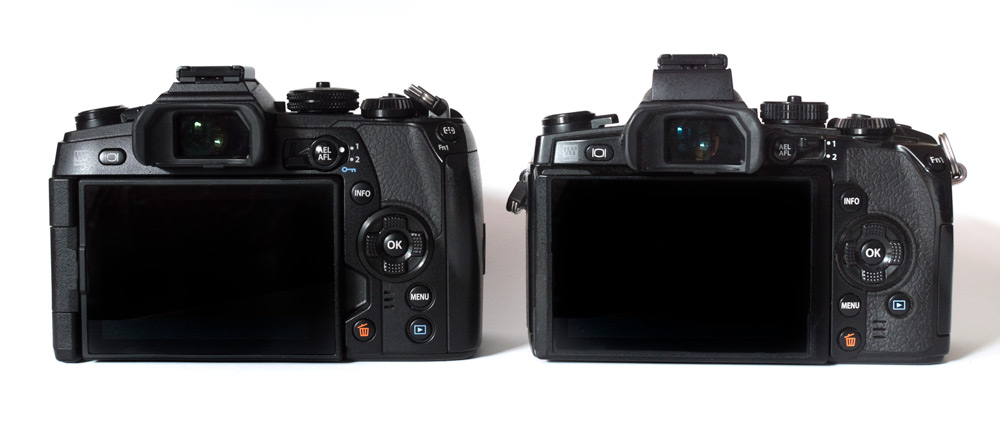
A look at the back of the camera shows a difference in button placement, the 2x2 switch and the new fully articulating LCD.
I Need More Power!
...and now you have it. The Mark II comes with a significantly larger battery. I haven't done any formal testing, but on average I have been able to take considerably more photographs per charge than with the E-M1. The battery also charges significantly faster. A welcome addition is the new battery life indicator on the LCD. It provides an estimated percentage of power left. Once the indicator gets down to 20% it turns red and begins blinking. 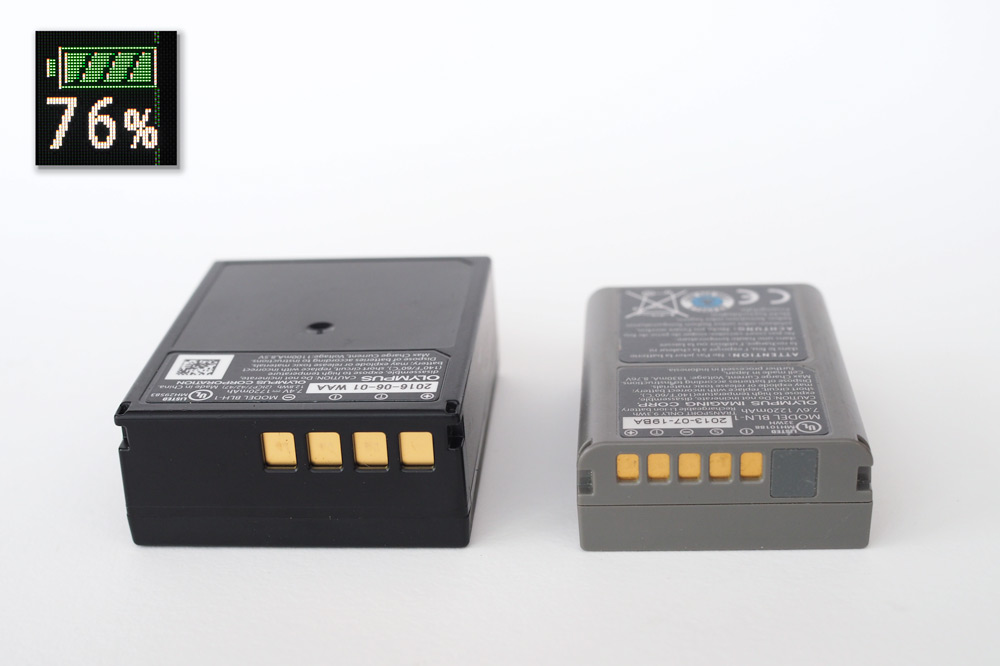
The new battery for the E-M1 Mark II is significantly larger, lasts longer, and charges more quickly. Inset: battery life indicator on the LCD.
New Battery Grip
With a new battery design comes the need for a new battery grip. Like the body of the MII, the new HLD-9 power battery holder sports an improved, more comfortable grip. Its most important feature however, is the inclusion of its own arrow pad. This makes changing settings far more convenient when shooting vertical format images. Like its predecessor, it also includes front and rear dials, two programmable function buttons and a lock switch. 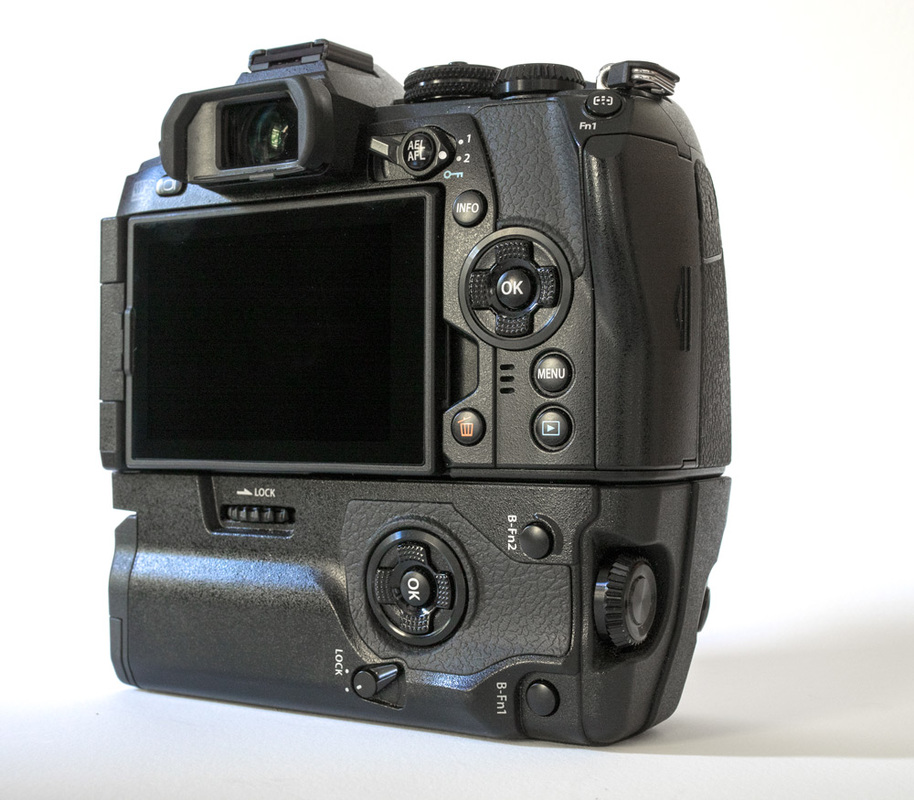
Ergonomics - A Summary
The E-M1 MarkII is perhaps the most comfortable camera I've held. It has gotten a little thicker around the middle (kinda like me) and with the new, larger battery grip is about 160g (or 18%) heavier than the E-M1. However, the camera is so nicely balanced and comfortable to hold that the weight gain isn't noticeable (unlike mine). The dials and switches feel solid and move crisply. All buttons are within easy reach and are not too soft to the touch. The rubberized flaps and access doors open and close easily and maintain the exceptional weather-sealing that Olympus is known for. When you pick up the E-M1 Mark II you instantly recognize that you are holding a camera with top-quality engineering and construction behind it.
A Look Inside
Okay, so it's a marvel to hold. But it's what's under the hood that counts. Let's have a look. I can't possibly detail all of the specs, so here are the basics.
In every one of the specs listed there is a marked improvement, and a couple of them are downright astounding! The E-M1 Mark II has a new, higher resolution sensor, improved IS by an extra 1.5EV over the E-M1, more focusing points (and each one has both phase and contrast detection), and improved ISO performance. But the most impressive change is with the new shutter. If you read through the list and had to do a double-take, so did I initially. The mechanical shutter can now shoot at 15fps when shooting in sequential high. The electronic shutter can shoot 60fps at a maximum of 1/32000 of a second. That's amazing!
Faster Auto-Focus
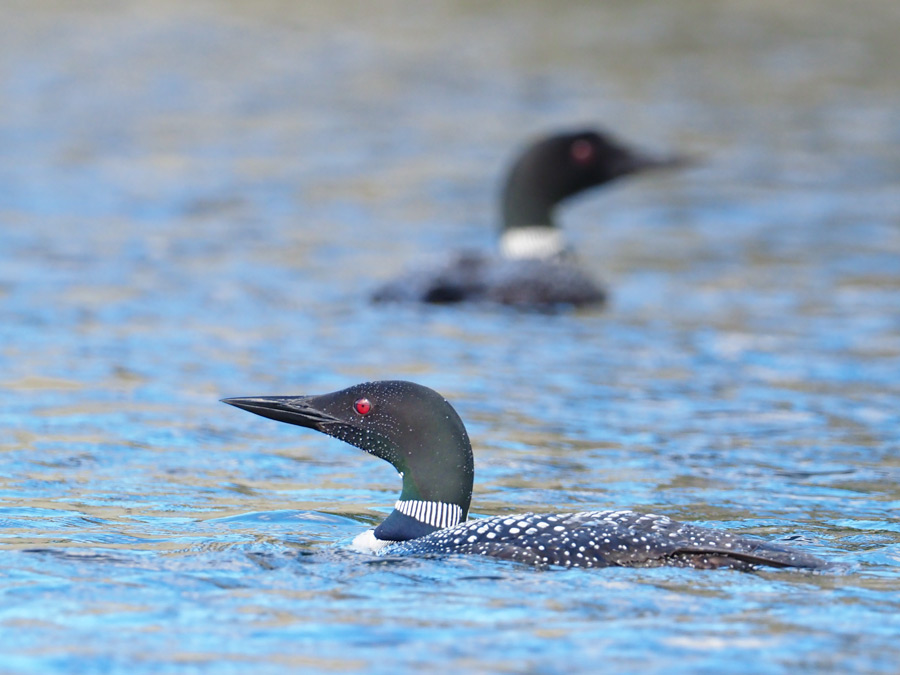
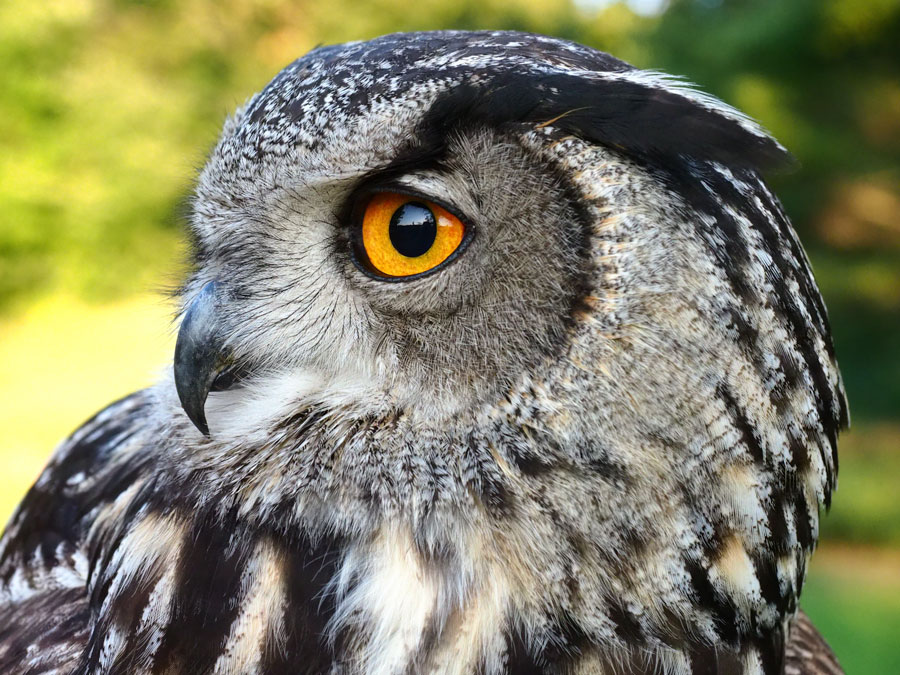
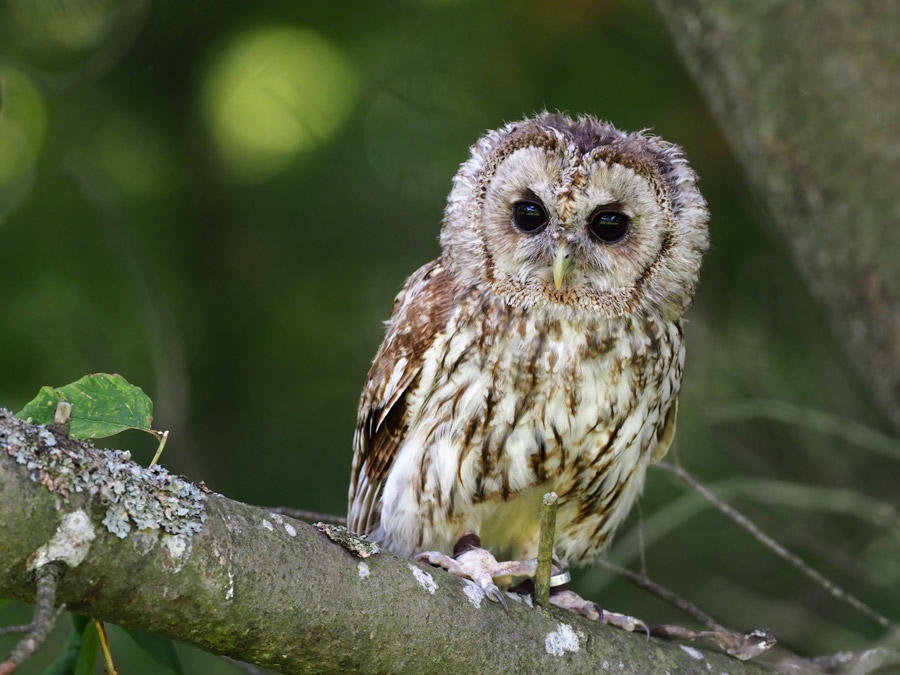
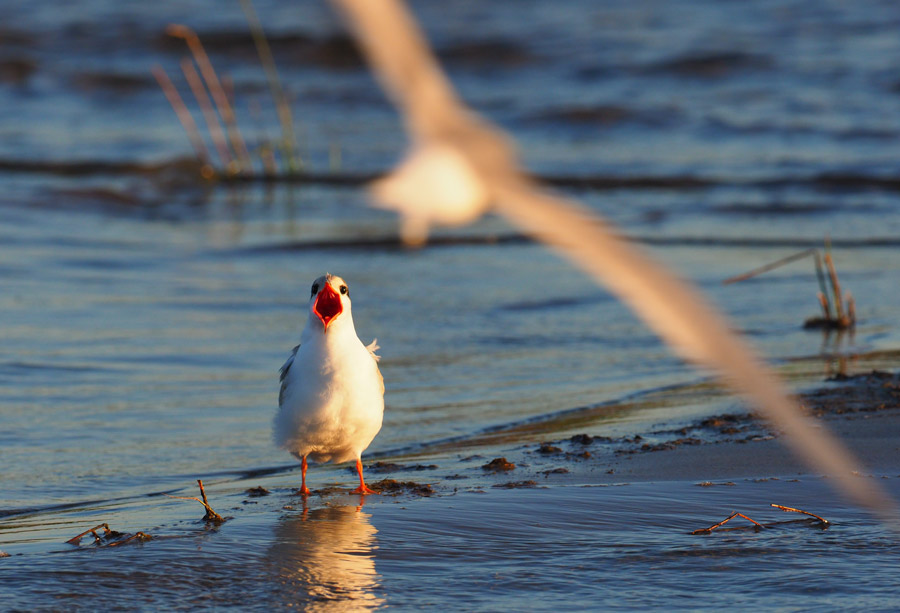
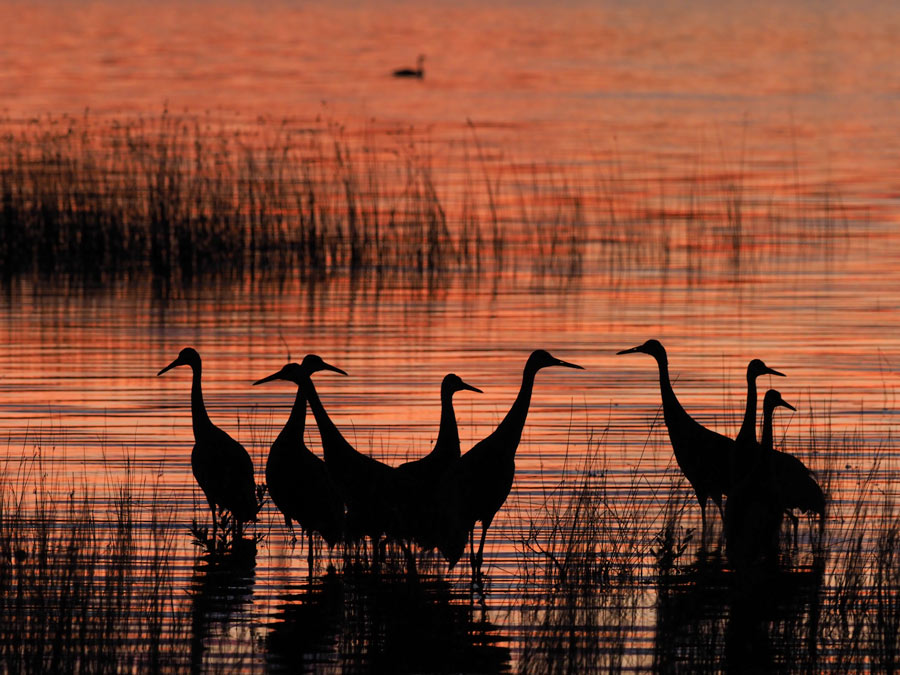
One feature that was definitely expected for the new Mark II is faster auto-focusing. Since this isn't a technical review, nor do I have the equipment to quantify the difference between the autofocusing speeds of the original E-M1 and the new Mark II, you'll just have to believe that there is a noticeable improvement in speed between the two cameras. Here is a real-life situation to illustrate it. On a recent canoe trip I came across a pair of loons (the birds, not the crazy people down the street). I attached the 300mm lens and the 1.4x teleconverter. Even with the amazing image stabilization of the body and lens it can be incredibly difficult to keep a subject in the frame, let alone focus on it while you yourself are bobbing and drifting around in a canoe. I chose the new 5-point cross in order to improve my chances of locking onto my subject. I also selected S-AF since there was enough contrast on the water to make C-AF a little too risky considering both me and my subject were moving. I used high sequential shooting and released the shutter in short bursts. I took over 500 images in about 15 minutes. Over 95% are tack sharp, locked onto the loon's eye. Incredible! I say that because I have tried this before on numerous canoe trips with the E-M1 and never had this type of success. 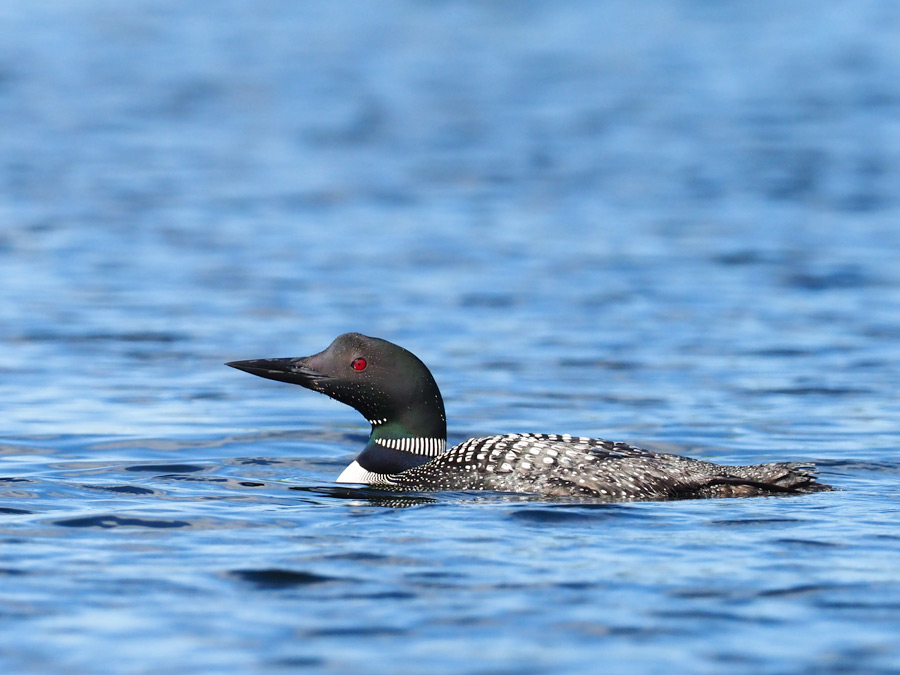
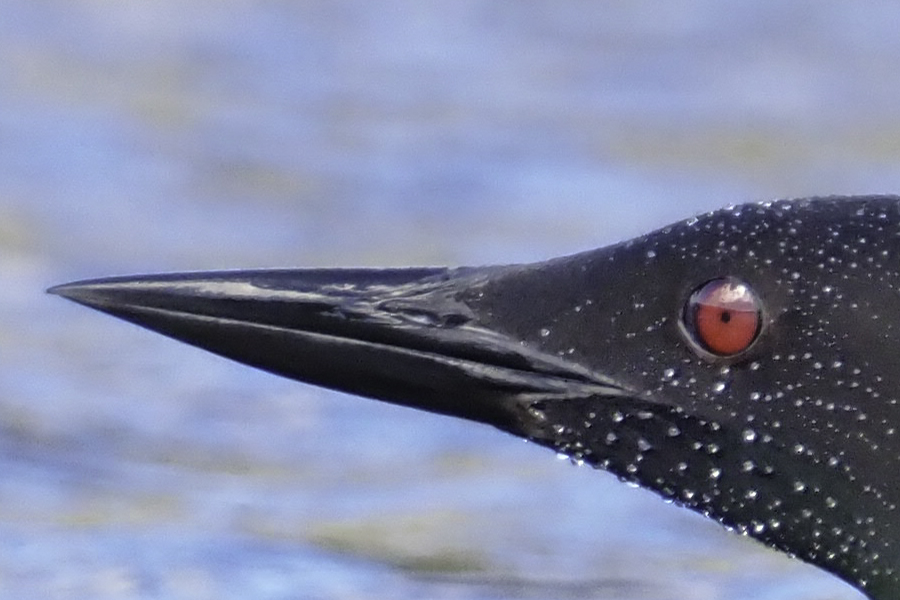
A 100% crop of the image above.
The image below illustrates the 121 focus points on the Mark II and the four available options. It is also very easy to cycle through them if you need to make a quick change.
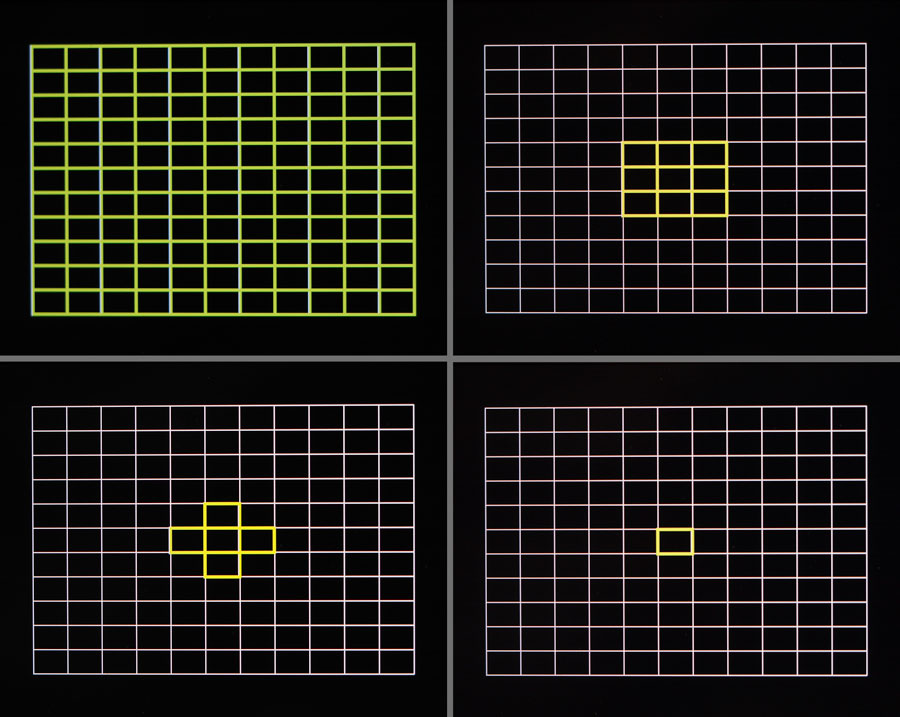
With 121 active focus points you have a choice between four autofocus options - All, 3x3, 5-point cross, and single.
Menu
A look through the menu will highlight the many features available on the E-M1 MarkII. Of course, the layout of the menu is very likely to change somewhat once the final version of the firmware appears, but for now, if you are interested you can check out the Menu Settings as they appear on the pre-production model.
Video
There is no doubt that previous cameras in the OMD lineup could not compete when it came to video. Olympus has definitely been listening to the criticisms and has delivered a dramatic improvement in video options and quality. I am not a videographer so perhaps it is best if I just list a few of the specs.
The sample video below was shot, hand held in 4K.
Innovation
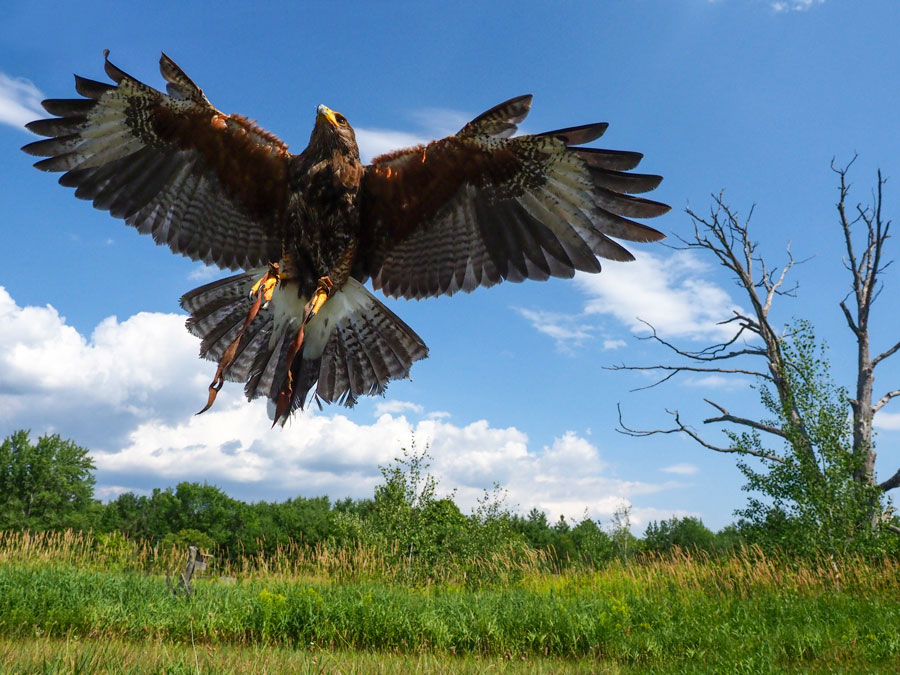
Olympus engineers are innovators. From the original (and highly effective) dust-reduction system, to Live Composite, to built-in focus stacking, Olympus keeps pushing the envelope of what a camera can do. It would be disappointing if there wasn't a new, game-changing innovation in the E-M1 Mark II. Don't worry, there is. Pro Capture: Faster than the Speed of Sight Imagine a camera that can actually take a photo before you press the shutter release. That's what Pro Capture does. Here is a simple scenario. You are photographing the bees in your garden and one has landed on a bloom. You quickly frame the shot, but what you really want to photograph is that moment when it takes off. The problem is, with most us, our reflexes are too slow to actually capture that moment. You could use Sequential High burst mode and hope that the bee takes off before the buffer fills up, or you test those reflexes and hope you time it perfectly. Up until now, those were your basic options. Not anymore! In Pro Capture mode the camera begins buffering images the instant you press the shutter release half way. It only records those buffered images on the memory card if you fully de-press the shutter release. This means that even if you missed the moment when the bee took flight, the camera didn't. Does this mean that if you hold the release halfway down for a full minute and then finally snap the shot, it would record a full minute's worth of images (that's a lot of photos at 60 fps)? No. The maximum number of images that can be buffered is 14. Anything above that is dumped. This provides you with that extra bit of time in case your reflexes were just a bit too slow. As well, the maximum number of images that can be taken after the shutter is fully pressed is 99. That allows for just over 1.5s worth of shooting if you have the fps set at 60. 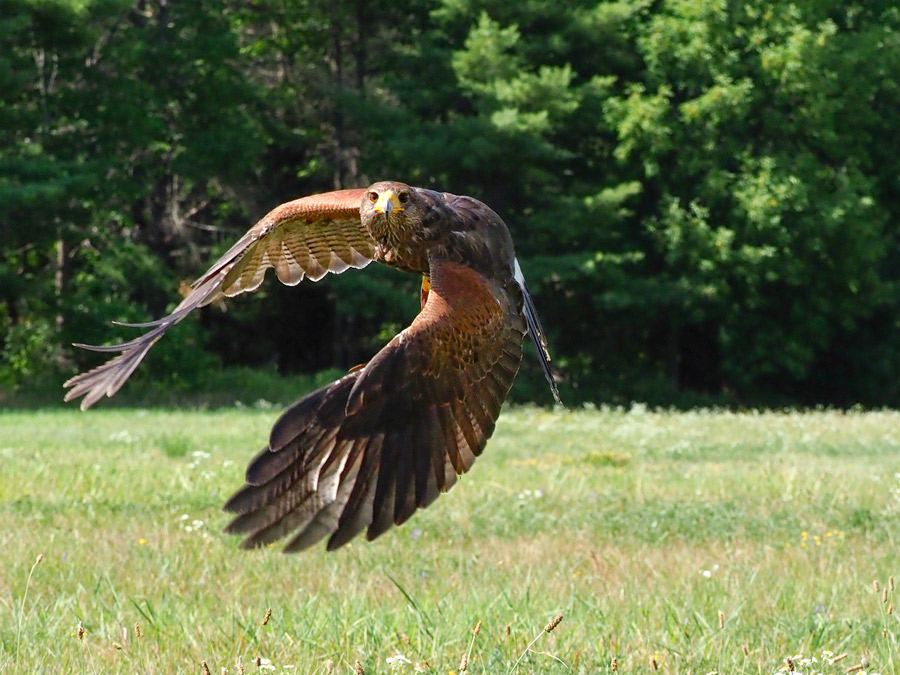
This hawk was standing in the grass prior to this shot. Knowing that it would take off at any moment I used ProCapture in order to freeze the action of its launch.
The Pro Capture settings can be changed from within the menu as illustrated below. The important thing to keep in mind is that the Frame Count Limiter sets the total number of shots, including the pre-shutter frames. With a default of 25 frames, only 11 of them will be recorded after the shutter is pressed. Again, this can be increased to a maximum of 99.

Pro-Capture is designed to aid in photographing those very brief "faster than the speed of sight" moments - those "you-know-it's-gonna-happen, but-you-don't-know-when" events.
An Experiment - ISO and IBIS
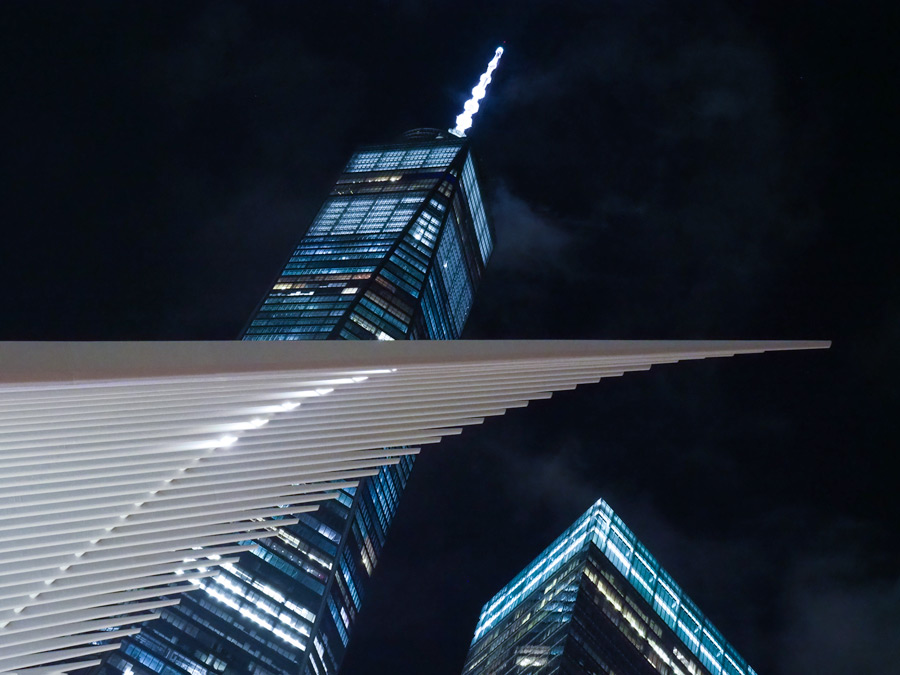
Recently I was in New York City with a couple of other Olympus Visionaries, Frank Smith and John Sterling Ruth and in the evening we headed down to the Oculus, the new transportation hub at the base of One World Trade Centre. After taking in the incredible architecture I decided there were two shots I wanted to get from the balcony - one that would freeze the action of the people down below, and the other to show their movement. I was shooting hand-held and had the 8mm f/1.8 fisheye attached. This meant leaning far over the balcony so that the railing didn't end up in the shot. In order to achieve the results I wanted, very different camera settings were required. Shot 1 - Motion Blur - ISO250, 1.3s, f/22 Shot 2 - Freeze the Action - ISO6400, 1/250s, f/6.3 The image below shows one-half of each photograph. Two things impressed me with this experiment. Firstly, how incredible the in-body image stabilization is. I was holding the camera away from my body with my arms fully extended for 1.3 seconds! Secondly, although you can see some noise in the second shot, it is remarkably clean considering it was shot at ISO 6400. Click on the image to see a high resolution version. 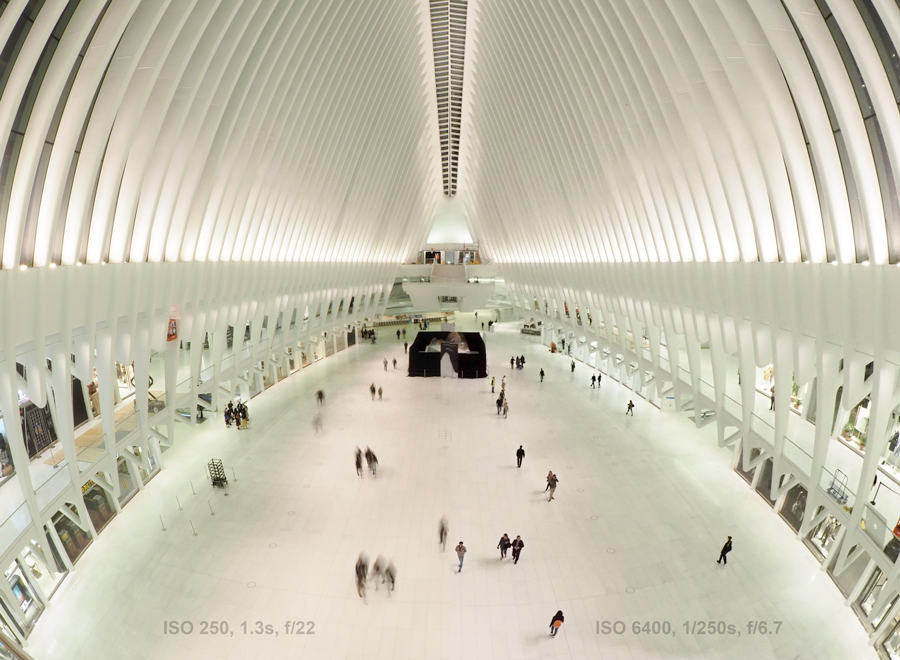
A side-by-side comparison image that tests ISO and IBIS performance. Click on the image for a high resolution version.
Overall Performance - My Experiences
I have yet to own a camera and take advantage of every single feature built in to it. Some features just don't suit my style of photography. I suspect that the same will apply to the E-M1 Mark II. That being said, the new updates and innovations are quite remarkable. Here are just a few of the performance improvements that I appreciate;
Summary
Given the amount of time that I have had to shoot with the Olympus OMD E-M1 Mark II, I can only draw one conclusion - there is no doubt that the Mark II is a worthy successor to its older sibling. It is comfortable to hold, with solid, high quality construction. The new 20.4 megapixel image sensor provides incredible high-quality images with better noise-handling capabilities and improved dynamic range. As well, having two card slots and longer battery life means you can shoot all day. Olympus definitely has a winner on its' hands.
Gallery
In order to provide a better sense of the true image quality you can achieve with the E-M1 Mark II, all of the photos below are the jpeg files straight out of the camera. Of course, they have been compressed and reduced from 350dpi to 72 for web display unless stated otherwise. 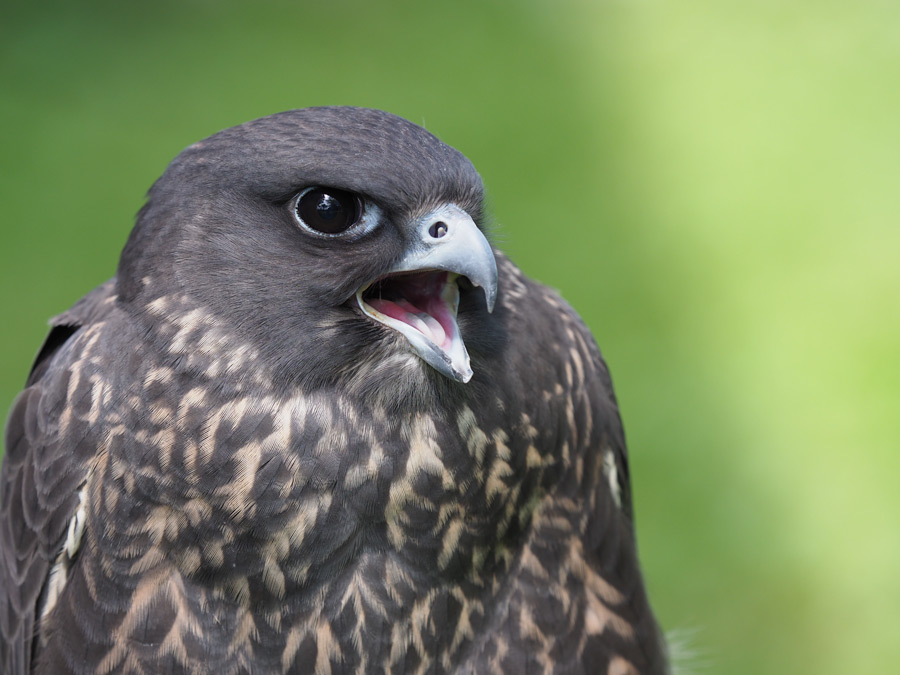
Lens: 40-150mm, ISO200, 1/400s, f/3.5 (Click on the image for a high resolution version.)
Lens: 300mm f/4.0 PRO, ISO4000, 1/1250s, f/5.0
Lens: 300mm f/4.0 PRO, ISO 1000, 1/400s, f/4.0
Lens: 12-40mm f/2.8 PRO, ISO 1600, 1/6400s, f/7.1, +0.3EV
Lens: 300mm f/4.0 PRO, ISO 400, 1/1000s, f/5.6, -0.3EV
Lens: 300mm f/4.0 PRO, ISO800, 1/50s, f/6.3, -0.7EV

Lens: 12-40mm f/2.8 PRO, ISO640, 1/100s, f/6.3, -0.3EV

Lens: 8mm f/1.8 fisheye, ISO 800, 1/640s, f/13

Lens: 40-150mm f/2.8 PRO, ISO 200, 1/1250s, f/10, -1.0EV

Lens: 12-40mm f.2.8 PRO, ISO 200, 1/250s, f/9.0

This is a panorama of three images stitched together in Photoshop. Lens: 12-40mm f/2.8 PRO, ISO 200, 1/8s, f/10, -0.3EV

Focus Stacked, 8 images, differential of 3 (Lens: 60mm macro, ISO400, 1/80s, f/4.5)
Vintage Art Filter (Lens: 40-150mm f/2.8 PRO, ISO200, 1/500s, f/4.0)

The E-M1 Mark II handles low-light conditions quite well. This image was hand-held. Lens: 12-40mm f/2.8 PRO, ISO3200, 1/13s, f5.0
A 100% crop of the image above.
Lens: 12-40mm f/2.8 PRO, ISO6400, 1/6s, f/7.1 (handheld shot)
Lens: 12-40mm f/2.8 PRO, ISO200, 13s, f/8.0, -1.7EV
Live Composite image shot over the course of 75 minutes. Lens: 7-14mm f/2.8 PRO, ISO1600, 25s base exposure, f/2.8

Lens: 12mm f/2.0, ISO 2500, 13s, f/2.0
14 Comments
12/7/2016 02:32:02 pm
Excellent down-to-earth and practical first impressions on the E-M1 II. I like the rest of your website too!
Eric
12/20/2016 12:37:15 am
Thanks for a very informative review. I have been wondering about high ISO performance and appreciate your comments in that regard. Excellent pictures too!
Peter
12/20/2016 08:33:56 am
Hi Eric,
Rosa
2/26/2017 07:59:44 pm
Thank you so much for the great review and images. I am new to Olympus and this is wonderful!
Hendri
4/29/2017 02:17:00 pm
EUREKAAAAAA.... I'VE FOUND YOUUUUU 11/16/2017 07:05:52 pm
Заработок в интернете это просто!
Заработок в интернете это просто!
11/23/2017 08:50:32 pm
Ad1Game файловая и игровая партнёрка проверенная годами. profit.
Peter
2/6/2018 08:39:33 am
Thanks, Tom. I'm glad you found the explanation useful. Cheers! 12/10/2019 09:43:18 pm
The design is somewhat in-line with the overall design of the current Zunes on the market. On the reverse side(not shown in the image) there are dual-volume controls to allow individual listening levels.
Lorne
1/20/2020 04:49:16 pm
Wonderful contribution on the em 1mkII Leave a Reply. |