|
Looking for an interesting indoor photography project? Then break out the bubbly! Soda water, that is. Back in my youth, I was the kid who would stare at the glass of soda and watch the bubbles form on the side of the glass and rise in an endless stream to the surface. I was fascinated by it. How did the gas get into the soda in the first place? What caused the bubbles to form on the smooth glass? Why did they create this constant stream of bubbles? (We only had two television stations back then and no Internet, so it was easy to be fascinated by simple things.) As an adult (soft of), I now understand the scientific principles behind my fascination. I'll explain it in a moment, but first, let's have a look at how you can create your own bubbly photos.  (ISO 800, f/4.5, 1/100s, -0.3 EV) This project requires very simple materials and can yield some interesting results.
 The basic setup is fairly simple. For me, the most important part was rigging up a way to hold my subject in place which left both hands free - one to operate the camera, the other to wipe the excess bubbles off the glass with the spatula.  The final shot from the setup above. You can't tell from this image, but because of all the bubbles, these two cherries wanted to float apart. In order to keep them together, I ran a small toothpick through the back of them. (ISO 800, f/4, 1/160s, -1.3EV) Creating the Shot - Challenges Just the fact that you are photographing your subject in a liquid that is separated from you by a piece of glass adds a whole new dimension to this project. There are two important challenges to be aware of.
Camera Settings For all of these photos I used my Olympus OMD E-M1 Mark II and the m.Zuiko 60mm f/2.8 macro lens attached to my Manfrotto tripod. Since the bubbles will move, you will need to be aware of your shutter speed. I have found that I can go as slow as 1/60s with good results. As well, I was using a macro lens at close distances, so I also needed to be aware of how much depth of field I was achieving. All macro lenses have notoriously shallow depths of field. An aperture of f/8 should be adequate for most subjects. With your shutter speed and aperture in mind, adjust your light source and/or ISO in order to maintain those settings. To help guarantee better sharpness throughout the image I used the focus stacking feature built into the E-M1 Mark II. This provided me with 1 stacked image and 8 separate shots from the sequence that I could choose from if I needed to. Because of this I used a larger aperture setting than the f/8 recommended above. The dark background will effect your camera's attempt to properly expose the shot. It will try to lighten the image making your subject look overexposed. As such, you may need to adjust the exposure compensation by stopping it down. For the images here I brought down the exposure value between -0.3EV to -1.7EV. The reverse would be true if you are using a lighter backdrop. You would likely have to bump up the exposure value.  (ISO1000, f/5.6, 1/60s, -1.7EV) 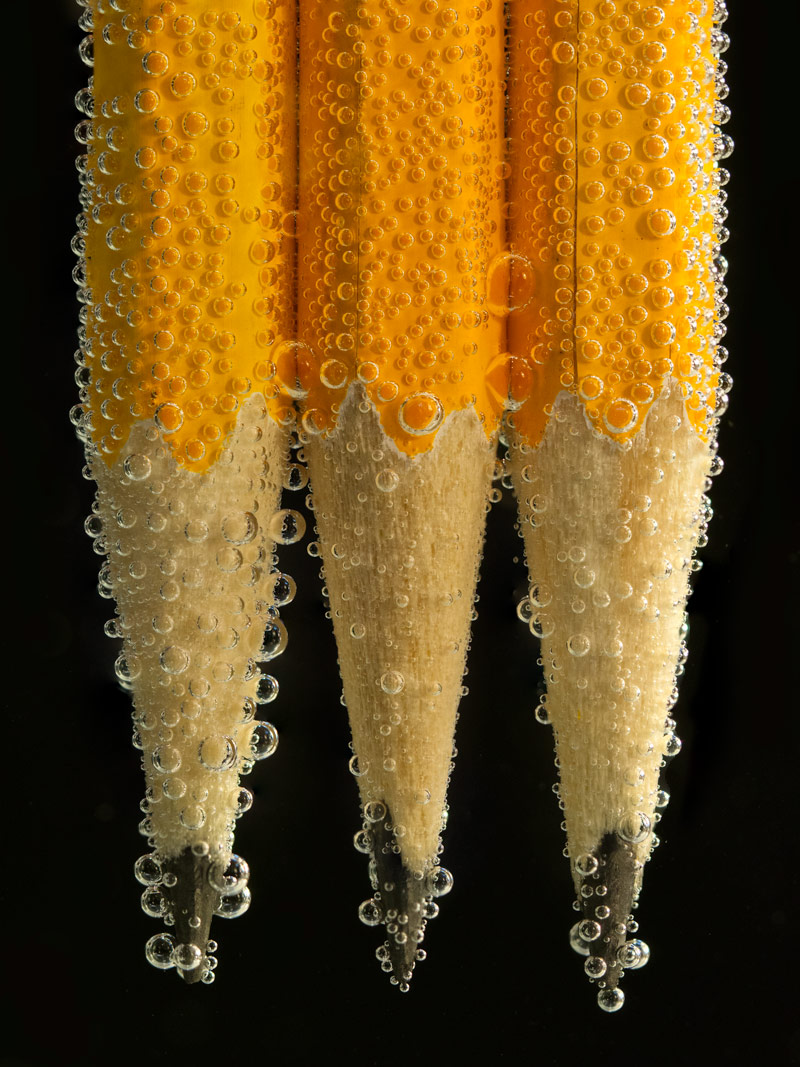 (ISO 800, f/3.2, 1/160s, -0.3EV) Post-processing The amount of post work required will largely be a matter of choice. I typically add a slight curves adjustment from within Lightroom and may bump up the vivid slider to enhance the colours of my subject. The tool that gets the most use however is the healing brush and/or the clone tool. The bubbles can form so quickly on the glass that it's quite likely there will be a few unwanted ones in your image. In the photo below I opted to leave the bubbles as part of the composition. Since I was using the focus stacking feature on the E-M1 Mark II, I had 8 RAW images to select from along with the final stacked shot. For some of the images I selected 3 or 4 shots and used Photoshop to stack them. This allowed for more control over the final image.  (ISO 800, f/4.5, 1/320s, -1EV)  (ISO 640, f/3.2, 1/125s, -1.7EV) The Science Behind It Now, back to my childhood curiosity. How does the gas get into the soda in the first place? The gas in soda is CO2 (yes, the climate change gas). As it floats around in our atmosphere it naturally dissolves in water. There's lots of it floating around in the oceans right now. If water is cooled it can hold even more CO2. Add some pressure and it holds even more. That's what they do in bottling plants - cool the water and inject the CO2 under lots of pressure. When you open your bottle of soda, you are releasing that pressure and the gas comes out of solution. Shake it or warm it, and it comes out quickly because you've added some energy. What causes the bubbles to form on the smooth glass? Well, the glass isn't all that smooth. At least not at the microscopic level. Dust, dirt or tiny imperfections in the glass create a point where a change of state can occur - in this case from a liquid to a gas. These are called nucleation sites. This is the same process that causes frost on windows or raindrops to form. It's also why my beer foams so much if I didn't clean the glass well enough. Why do they create this constant stream of bubbles? When the buoyant force of the tiny bubble is stronger than the hold against the nucleation site the bubble is released and a new one starts to form at the site. This happens very quickly and so you end up with a stream of bubbles.  (ISO 800, f/3.5, 1/640s, -0.7EV)
103 Comments
Wes
2/11/2017 12:13:59 pm
Great article.
Amanda Strozeski
2/22/2017 12:04:50 pm
This tip is SO FUN! :)
Linda Tommasulo
9/30/2017 03:13:25 pm
Your "bubbly" photography is a great indoor winter sport! I would love to include this in a winter edition of my photo club's newsletter. I am a member of the Schenectady Photographic Society, a board member and editor of the newsletter. You can check us out at www.spsphoto.org. I will only reprint the article with your permission and will, of course, give you credit and include your website. Let me know! Thank you. 10/18/2018 01:25:04 pm
I'd have to check with you here. Which is not something I usually do! I enjoy reading a post that will make people think. Also, thanks for allowing me to comment! 10/23/2018 11:44:01 am
My sister, Jordan and I love to take some random photos in our house when we are bored, especially on Saturdays and Sundays. We love to pose and capture some great photos, but we want something new. We want to enhance our skill in photography without showing our faces in the picture. It is a great thing that I found this post, and this photography project looks fun! Thank you for this helpful tip and I am sure that we will enjoy doing this. 4/17/2019 04:24:07 pm
I finally got around to trying this type of photograph. 7/6/2019 03:22:45 pm
Thanks so much for posting this extremely helpful tutorial! I'm just getting started with macro photography and enjoyed playing around with your fizzy technique yesterday. The instructions are totally clear. 8/4/2019 10:35:37 pm
Thanks for these tips! I've always been interested in trying out photography and eventually make it as a hobby. But I didn't know how to take better photos. This post helps a lot. :D I'm sure you'll find great opportunities in the industry, you just need to put these in your portfolio and improve your CV. If you need help with writing your resume, here are the best resume writing services in the U.S.: https://www.best10resumewriters.com/ 8/5/2019 12:06:17 am
Thank you, Peter! I'm an aspiring photojournalist and I can see myself using these tips. Thanks so much! This'll help my career. 8/10/2019 03:42:04 pm
I am happy to find your distinguished way of writing the post. Now you make it easy for me to understand and implement the concept. Thank you for the post. 8/15/2019 04:26:26 am
Thank you for posting this very informative article. I have been trying to determine when large, flat concrete gravestones were first used in New Orleans cemeteries. I have found two for 1905 burials but I don't know if the stones were laid at the time of burial. They are slab-like with small marble name plaques attached. Have you run across any similar gravestones in your New Orleans research? Your pictures are so great, I love taking pictures, especially photo of my house. Because of that hobby, I always keep my house clean with sanitary equipment like <a href="https://allofvacuums.com/">all of vacuums</a> , I often use a vacuum cleaner to clean the house because they are very convenient. 9/24/2020 03:19:35 am
Greetings to each one, it's really a particular for me to visit this website page, it comprises of helpful Information. 6/22/2021 08:22:14 am
Therefore, Tencent mobile has launched PUBG Lite. It is nothing but the light version of the game which can run on devices having a slightly. 8/8/2021 02:20:52 am
This is really a nice and informative, containing all information and also has a great impact on the new technology. Thanks for sharing it, 9/4/2021 11:05:33 pm
Awesome, this is a new photography suggestion for me. The fruits look so fresh and eye-catching. It makes the viewer feel hungry. Thanks for sharing the blog. 1/17/2022 04:11:47 am
Great article! Thank you for sharing this informative post, and looking forward to the latest one. 1/28/2022 12:24:20 am
I trust all of you are having an incredible end of the week. I added another rundown. This one is more modest, yet at the same time valuable. I think the following one will be greater. 1/28/2022 01:57:52 am
Posing inquiries are truly critical thing in case you are not understanding something totally, with the exception of this post offers great agreement yet. 1/28/2022 04:00:27 am
1/29/2022 05:25:19 am
Xpertscm construction Company is leading construction Company and ranking at the top most position in the list of construction companies in Bihar. They are involve in many commercial and residential projects. 6/29/2022 03:13:37 am
zee interior is a renowned name in the field of Interior designing Patna, they successfully created a niche in the Interior designing industry by providing the best-placed Interior designing services patna. 7/26/2022 03:27:44 am
interior designer in patna Interior designers are responsible for a wide variety of tasks. They must have a keen understanding of every stage of a project. They should also be able to incorporate client feedback on proposed designs. Interior designers work closely with clients to 10/2/2022 05:26:26 am
Useful information on topics that plenty are interested on for this wonderful post.Admiring the time and effort you put into your b!.. 10/2/2022 05:41:00 am
This is a great inspiring article.I am pretty much pleased with your good work.You put really very helpful information... 10/12/2022 06:23:09 am
At Ace Capital Group, we are Financial Advisers Gold Coast who owns and operates private Financial Advisory firm - we’re local. Our evolution started out 30 years ago, with the formation of a consultant monetary planning firm, however our experience precedes this by way of a few years. We provide Wealth Management, Self-Managed Super Fund (SMSFs), Retirement Planning, Insurance and Corporate Advisory. 11/8/2022 11:04:50 am
I trust all of you are having an incredible end of the week. I added another rundown. This one is more modest, yet at the same time valuable. I think the following one will be greater. 12/17/2022 12:39:22 pm
Hello There. I found your blog using msn. This is an extremely well written article. 12/18/2022 08:49:33 am
Thanks for any other informative blog. The place else may just I get that type of info written in such a perfect approach? I have a mission that I’m just now operating on, and I have been at the look out for such information. 1/16/2023 11:42:49 am
Thanks for taking the time to discuss this, I feel strongly about it and love learning more on this topic. If possible, as you gain expertise, would you mind updating your blog with more information. 1/16/2023 12:02:25 pm
Thanks for your insight for your fantastic posting. I’m glad I have taken the time to see this. 1/18/2023 08:17:50 am
There are several ordinary circumstances that various based daters over the long haul knowledge, and each one can give off an impression of being an obstruction, hindering the way to a more blissful, more marvelous love life. 1/19/2023 11:16:55 am
Nice post. I was checking constantly this blog and I am impressed! Extremely helpful information specially the last part I care for such info a lot. 1/19/2023 12:38:16 pm
This is a good post. This post gives truly quality information. I’m definitely going to look into it. Really very useful tips are provided here. 2/11/2023 05:56:52 am
Normally yellow spots are brought about by pets peeing on the grass or from bugs. Pee is an extraordinary manure, however when it isn't weakened, it can kill the grass. 2/14/2023 02:00:20 am
I have read all the comments and suggestions posted by the visitors for this article are very fine,We will wait for your next article so only.Thanks! 2/17/2023 11:05:58 am
Does the raiser offer a guarantee or potentially merchandise exchange? Is clinical documentation accessible? You may likewise need to get some information about safeguarded Beagles. 2/22/2023 06:49:04 am
I am incapable of reading articles online very often, but I’m happy I did today. It is very well written, and your points are well-expressed. I request you warmly, please, don’t ever stop writing. 4/13/2023 05:04:16 am
AZCB top Real Estate company in Abu Dhabi, UAE. Buy and Rent villas, apartments, offices best prices with Al Zaeem Commercial Brokers in abu dhabi. 5/29/2023 05:52:32 pm
Wow! Such an amazing and helpful post this is. I really really love it. It's so good and so awesome. I am just amazed. I hope that you continue to do your work like this in the future also 7/4/2023 09:44:51 am
Pretty good post. I have just stumbled upon your blog and enjoyed reading your blog posts very much. I am looking for new posts to get more precious info. Big thanks for the useful info. 9/6/2023 01:32:34 pm
I truly appreciate you giving this helpful information <a href="https://onlinemedic.pk/product-category/mens/timing-tablets/">Vega 100 timing tablet in pakistan</a> 9/7/2023 04:14:45 am
I would like to say that this blog really convinced me to do it! Thanks, very good post. 9/7/2023 05:58:41 am
Thank you because you have been willing to share information with us. Awesome information once again! I am looking forward to your next post. 9/11/2023 07:06:57 am
A great lifeguard knows how to grab the reins when needed, leading and helping his or her team through tough situations or everyday work. 2/17/2024 07:04:27 am
2/18/2024 07:43:28 am
Our team of seasoned analysts at mtpolice.kr leaves no stone unturned in dissecting the intricacies of each sporting event. Through meticulous research and data analysis, we provide you with unparalleled insights into team dynamics, player performance, historical trends, and more. Armed with this knowledge, you can approach your betting endeavors with a strategic mindset, maximizing your chances of success in an ever-competitive landscape.
4/9/2024 12:43:30 pm
ทางเข้า ufa789 เว็บพนันครบวงจร แทงบอล บาคาร่า สล็อต ครบจบที่เดียว 4/9/2024 12:44:48 pm
หากคุณกำลังมองหาสินค้าจากจีนที่ติดเทรนด์ ขายดี ต้นทุนต่ำ กำไรสูง แนะนำ THE ONE CARGO ผู้ช่วยมืออาชีพที่จะทำให้ทุกธุรกิจง่ายขึ้น ผู้เชี่ยวชาญการนำเข้าสินค้าจากจีนโดยตรงเข้าใจ และเข้าถึงทุกความต้องการของธุรกิจ ช่วยคิด วางแผน คุมต้นทุน สร้างผลกำไรสูงสุด สนับสนุนทุกความสำเร็จให้กับธุรกิจของคุณ 4/17/2024 05:13:18 am
I can't speak highly enough of Kimcartoon. Their website offers a vast collection of cartoons and animated series, making it a paradise for cartoon lovers of all ages. The streaming quality is top-notch, and I appreciate the variety of shows available, from timeless classics to modern favorites. The user-friendly interface makes it easy to navigate and find exactly what I'm looking for. Thanks to Kimcartoon, I can indulge in my love for cartoons anytime, anywhere.
Buy Jiu Jitsu Gis From Playwell today, Full range of BJJ uniforms Held in stock, Purchase online or visit our shop in london for all your ju jitsu suits, we also stock Tatami And Venum Jiu Jitsu gis along with tatami bjj rashguards, full range of gis available from Kids to adult sizes. 5/7/2024 12:20:44 pm
ExpertRA is an intelligent software that guides companies to conduct their bizSAFE documentation & risk assessments systematically. 5/8/2024 07:35:12 am
Tattoos have long served as expressions of identity, artistry, and personal narratives. However, as time passes, perspectives may change, and the once-beloved tattoo may no longer align with one's present self. <a href="https://www.ufabec.com/">วิเคราะห์บอล</a> UFABEC to use the best service in football betting You can start betting with just 10 baht. The water fee is 4 baht more than other websites and there is also a commission return for you to receive a discount of 0.5%-1%. 5/14/2024 01:49:08 am
Token Sniffer, a powerful and innovative tool, is revolutionizing the world of cryptocurrency and blockchain technology. Designed to monitor and secure digital assets. 5/17/2024 01:25:07 am
Thanks for the blog post buddy! Keep them coming... 5/18/2024 04:56:27 pm
I discovered your web site very informative maintain up the superior work Aw, this became an exceptionally nice post. In idea I have to set up writing like this additionally – taking time and actual effort to make a good article… but so what can I say… I procrastinate alot and also by no means manage to go accomplished. 5/26/2024 09:56:03 am
I am constantly surprised by the amount of information accessible on this subject. What you presented was well researched and well written to get your stand on this over to all your readers. Thanks a lot my dear. 6/11/2024 11:57:53 pm
"UsaMagazineNews is a reliable source for understanding the pulse of the nation." 6/29/2024 02:45:11 am
"Their social media presence makes it easy to stay informed on the go." 6/29/2024 06:48:01 am
Shop our men's leather jackets and coats. Buy real leather jackets and coats for men with custom-made to-measure options. Free shipping in USA & worldwide. 123movies has become my favorite site for watching movies online. The variety of films available is impressive, covering all genres and interests. The site loads quickly, and the streaming quality is excellent, with clear, high-definition video. The interface is user-friendly, making it easy to find and watch movies. Best of all, it's free to use, making 123movies a fantastic resource for movie enthusiasts. 7/1/2024 10:03:13 pm
I wish more authors of this type of content would take the time you did to research and write so well. I am very impressed with your vision and insight. 7/3/2024 11:45:16 am
This is my first time i visit here. I found such a substantial number of interesting stuff in your blog especially its examination. Really its inconceivable article. Keep it up. 7/4/2024 12:50:05 pm
. Störsender bieten eine effektive Möglichkeit, unerwünschte Signale zu blockieren. 7/6/2024 05:15:36 am
We partnered with one of the top NODE.JS development companies in 2024 and couldn't be happier. Their expertise and innovative approach transformed our project. The team was responsive, professional, and delivered high-quality work on time. Highly recommend them for any NODE.JS development needs. 7/6/2024 11:18:42 pm
"Has anyone done a fact-check on the stories from usapicnews.com?" 7/13/2024 06:34:05 am
I see the best substance on your blog and I incredibly love understanding them. AE Bathrooms and Kitchens Fitters Ltd provided exceptional service for our kitchen and bathroom renovations. Their professionalism and expertise were evident from start to finish. The project was completed on schedule, and the quality of work is outstanding. We are very happy with the results and would highly recommend them. Leave a Reply. |