creative   island   photography
  • Home
  • About
  • Portfolio
  • Order
  • Blog
  • Events
  • News
  • Contact

photographing meteor showers

1/11/2018

7 Comments

 
At any time of the year, it is not uncommon to look into a clear night sky and see the occasional meteor streaking through the heavens. However, with each orbit around the sun, our little blue planet passes through several meteoroid streams that can produce upwards of one hundred meteors per hour - a meteor shower. These streams are created by orbiting comets that shed cosmic particles as they approach the sun. Photographing these celestial events can be a challenge, but with a bit of knowledge you can improve your chances of success.    
Picture
Knowing where and when a meteor shower will occur is the first step to a successful night shoot. These particles generally run parallel to the comet from which they came, and as such will appear to spread out from a single point in the sky. They are named for the nearest constellation or bright star from which they radiate. This 'fixed point' will track across the sky over the course of the night similar to the way that the stars do. 
​The chart below lists the major meteor showers throughout the year, the best viewing dates, and their location in the sky.
Name
Peak Viewing Dates
Location - Early Evening (Direction / Altitude)
Location - Early Morning (Direction / Altitude)
Quadrantids
January 3 - 4
333° / 10°
63° / 60°
Lyrids
April 22 - 23
41° / 1°
143° / 80°
Eta Aquarids
May 6
Not good for viewing
100° / 10°
Perseids
August 9 - 13
21° / 17°
43° / 64°
Orionids
October 20 - 21
70° / 2°
185° / 63°
Leonids
November 17
66° / 7°
125° / 60°
Geminids
December 13-14
43° / 1°
265° / 60°
Notes
  • The Perseids and Geminids are considered to be the best meteor showers to view with upwards of 100 or more meteors per hour. Of course, the Perseids will be the most comfortable to watch given the warmer summer temperatures. 
  • Meteor showers generally move south and gain altitude over the course of the night making the pre-dawn hours the best for viewing.
  • Although most meteors during an event may appear to emanate from a particular fixed point they can be seen all across the sky. 
  • For more detailed information, check out the meteor shower library at dateandtime.com 
Picture
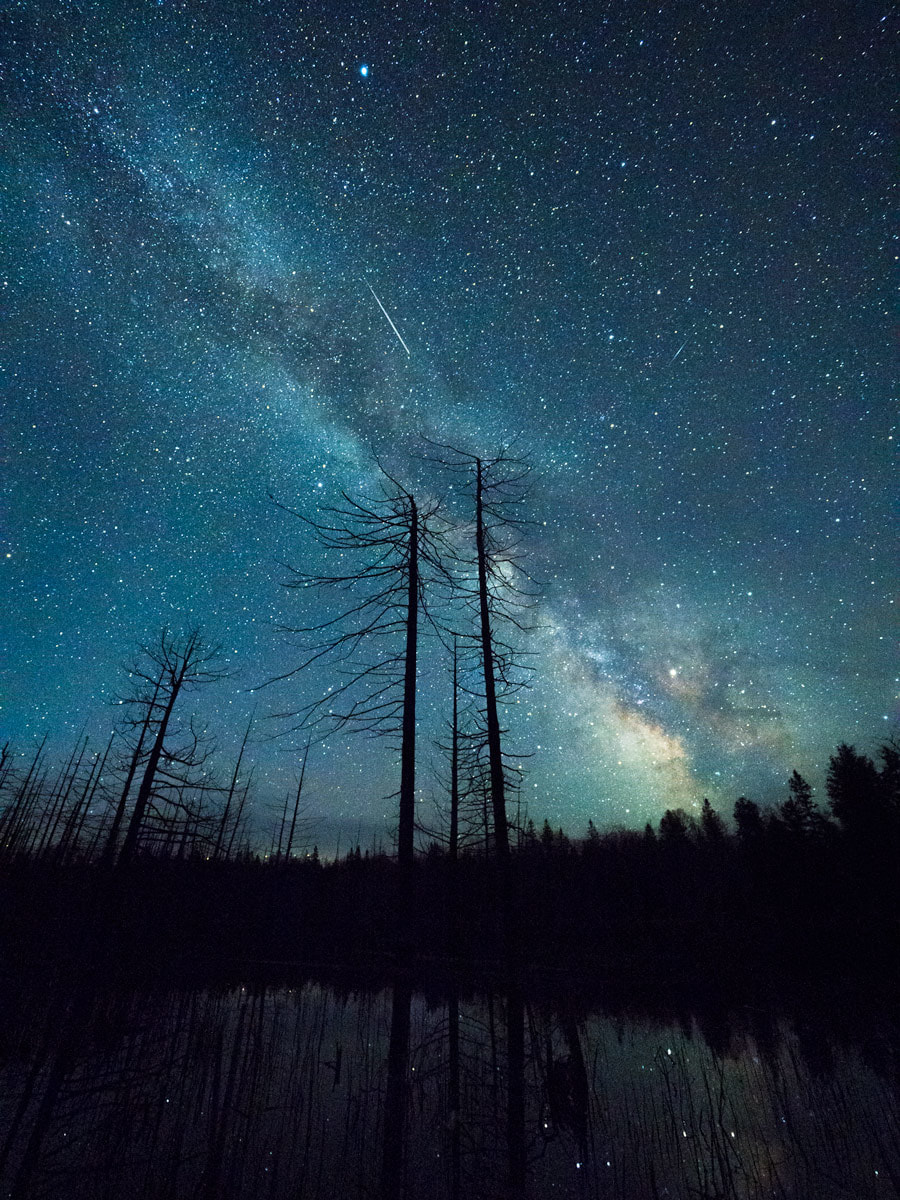
Olympus EM1 Mark II, 7-14mm f/2.8 PRO, ISO 3200, 25s @ f/2.8
Picture
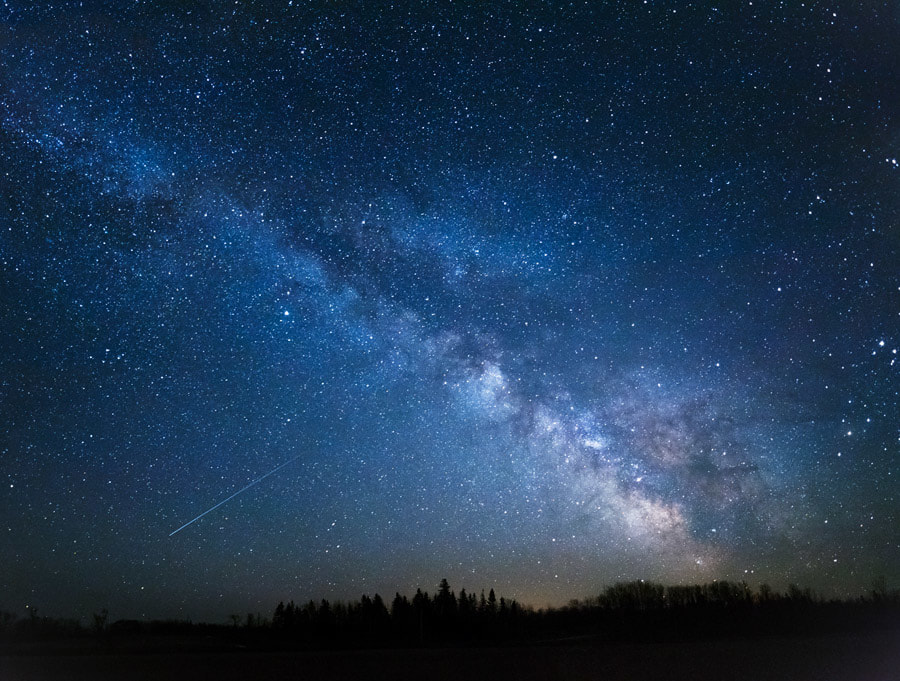
Photographed during the Lyrids (Olympus E-M1, 12mm f/2.0, ISO1250, 20s @ f/2)
Tips for Viewing a Meteor Shower
  1. Stay away from the light - Ambient light from the city can put a serious damper on your ability to see meteors so find a dark sky area that will improve your chances. Unfortunately the moon can be the brightest light source and if the meteor shower you are interested in photographing is also timed with a full or gibbous moon you will likely only be able to photograph the brightest meteors. Use an app like Photo Pills or a website such as timeanddate.com to see how the moon will impact your attempts to capture a meteor shower.
  2. Check the weather - Before heading out check the forecast and make sure clear skies are predicted for where you are viewing. Typically I will check out an infrared satellite image to ensure that there is no cloud cover approaching for the next few hours. Clear Sky Charts can be very helpful since they predict viewing conditions for hundreds of specific sites across North America.  
  3. Get comfortable - The term "meteor shower" might give you the impression that the sky will be inundated with a constant stream of shooting stars. Sorry, not happening! Even the most active meteor showers only produce 1 or 2 meteors per minute so be patient and be prepared to stare into space for a good length of time. Bring along a chair or blanket, and some bug spray (unless it's December) and dress in layers since even summer months can bring a chill once the sun sets.  
  4. Don't forget the headlamp - Even a familiar area can be difficult to navigate in the dark. Bring along a headlamp or flashlight and ensure you've got enough battery power. Ideally, use a headlamp with a red light option since this is easier for your eyes to adjust to. 
  5. Know your shower - Review the best viewing direction and altitude for the particular meteor shower you are  watching, keeping in mind that both will change during the course of the night. 
Tips for Photographing a Meteor Shower
Okay, so you found a great spot, the conditions are perfect, and the meteors are flying. Let's photograph! Many of these tips apply to most types of night sky photography. If you are new to astrophotography check out my blog post that will get you on your way. 
  1. Point your camera in the right direction - We might as well start where we left off in the previous section. Your likelihood of capturing a meteor will increase greatly if you know the area of sky where the meteor shower is emanating from.
  2. Composition counts - It's always exciting to see that you have captured a meteor on your LCD, but the final photograph will always be more impressive if you include an interesting foreground. That may include a few trees, an old building, or some mountains off in the distance.
  3. Use a tripod - Since long exposures are the order of the day (or night) use a solidly built tripod and ensure that all knobs and cranks are well tightened. Even slight movement will create unwanted blur in the final image.
  4. Shoot wide and open - Select a wide-angle lens and the largest aperture possible. My favourite astro lens is the Olympus m.Zuiko 12mm f/2 (equivalent to 24mm in full frame). Keep in mind that the wider the lens the smaller the meteors will appear, however if you move to a narrower field of view you are also capturing a smaller amount of sky and will likely miss many of the meteors. 
  5. Get your exposure right - Determine the maximum shutter speed you can use by following the 500 Rule (500 divided by the true focal length of the lens). In the example above with the 12mm lens the math would work like this;  500 / 24 = 20.83s. Therefore the maximum shutter speed I can use before the stars start to blur is 20 seconds. As for ISO, start with 1600 and adjust as necessary. Check your histogram and try to ensure that the peak is about 1/3 of the distance from the left. If it's not, bump up your ISO to 3200 or 6400. 
  6. To NR or not NR? All long exposures will create some digital noise. You can reduce this by enabling your camera's built-in noise reduction. Unfortunately this doubles the amount of time between shots - a 20 second exposure adds a 20 second noise reduction sequence. Any meteors during that time will, of course  be missed. If you are comfortable with reducing noise during post-processing with a program like Lightroom then you may want to turn NR off, otherwise leave it on. 
  7. Take test shots - With your camera settings locked in and the scene nicely framed take a number of test shots. Check for overall exposure and composition. It is surprisingly difficult to compose a shot in the dark so you may need to adjust the camera position several times before you are happy with it. 
  8. Automate your shooting - Once I am happy with the setup I enable the time lapse feature so that I don't have to press the shutter release after every exposure. I will set it up to take several hundred shots with a 1 second delay between each shot. This way I can sit back and watch the show while the camera does all the work. If you are not familiar with time lapse photography check out my blog post. If you prefer to use the shutter release for each shot, enable a time delay of one or two seconds to prevent any camera shake from accidentally blurring the photo. Or use a remote trigger like the O.I.Share app for Olympus cameras. 
Picture
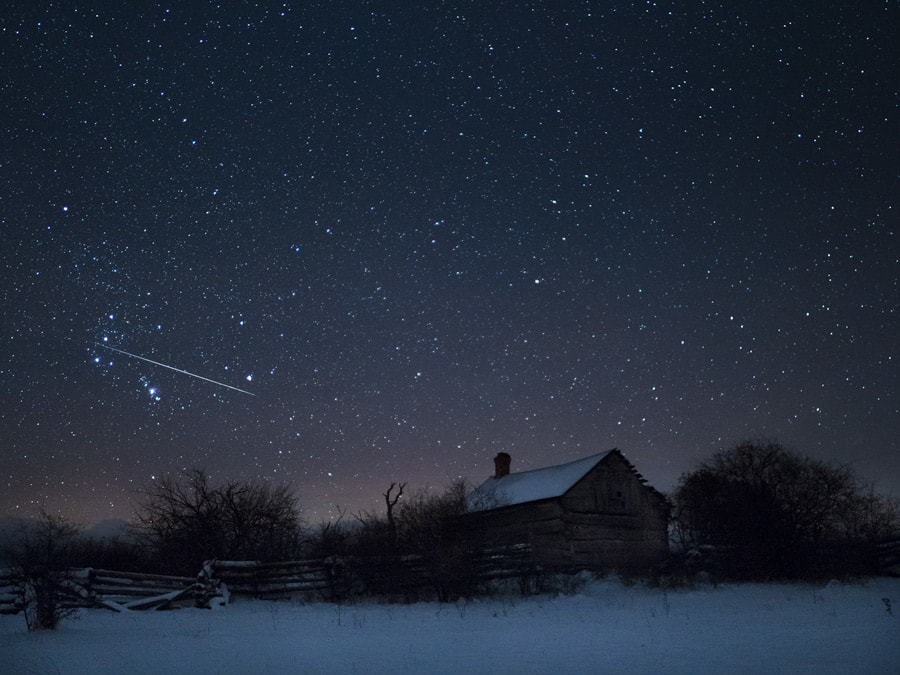
Photographed during the Geminids in mid-December. (E-M1 Mark II, 17mm f/1.2 PRO, ISO2000, 13s @ f/1.2)
When is a Shooting Star Not a Shooting Star?
With the naked eye it's difficult to confuse a meteor with any other activity in the night sky. Meteors move fairly quickly across the sky and usually only last for a second - sometimes more, sometimes less. They also increase in brightness and then fade out. But in a static image it can be difficult to tell what created the streak of light. Planes have strobes that create a characteristic connect-the-dot look in your image so there is usually no trouble identifying that in your photo. Satellites on the other hand reflect light from the sun and therefore create a streak of constant brightness from tip to tail. The photo above clearly shows the light increasing in intensity  from left to right and then fading out quickly. Satellites don't do that, with one exception - iridium flares. The Iridium series of satellites have very reflective surfaces that create a brief, buy very noticeable flare as they pass overhead. They move slower than a meteor so are not likely to be mistaken for one to the naked eye, but in an image they can look quite similar. 
Picture
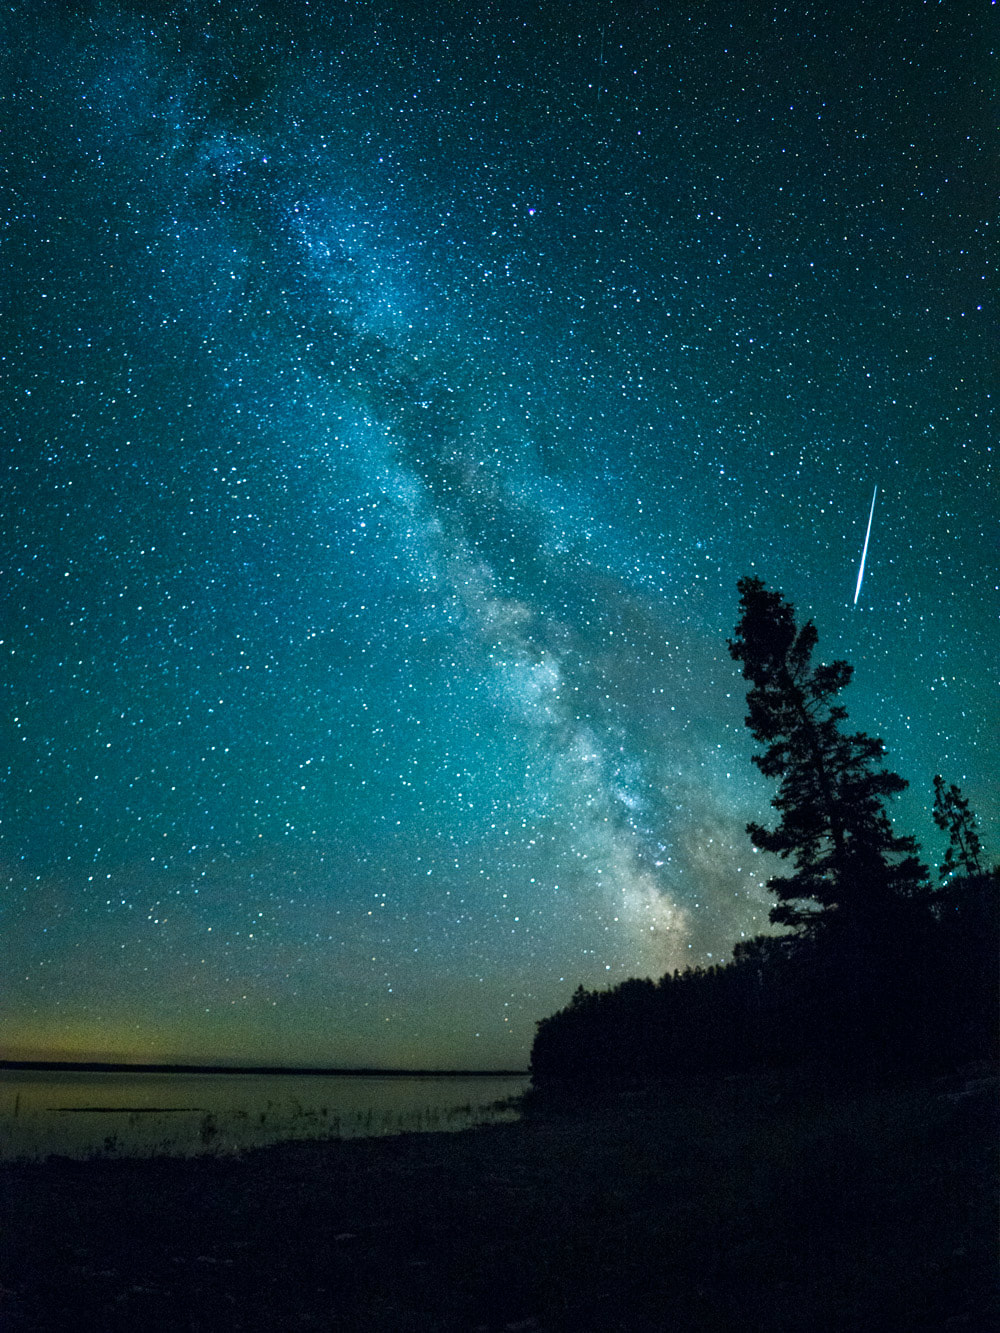
I didn't see this "meteor", but considering its brightness I suspect that it might be an iridium flare. (Olympus E-M1 Mark II, 8mm f/1.8 PRO, ISO 2000, 20s @ f/1.8)
Using Live Composite
If you are an Olympus shooter, your first inclination might be to use the Live Composite feature since it will capture all changes in light over the course of many minutes or hours. This will allow you to capture up to 3 hours of night sky activity in a single image. I would actually advise against this since the star trails will overlap any of the meteors that you capture, unless this is the effect you are looking for. 
Picture
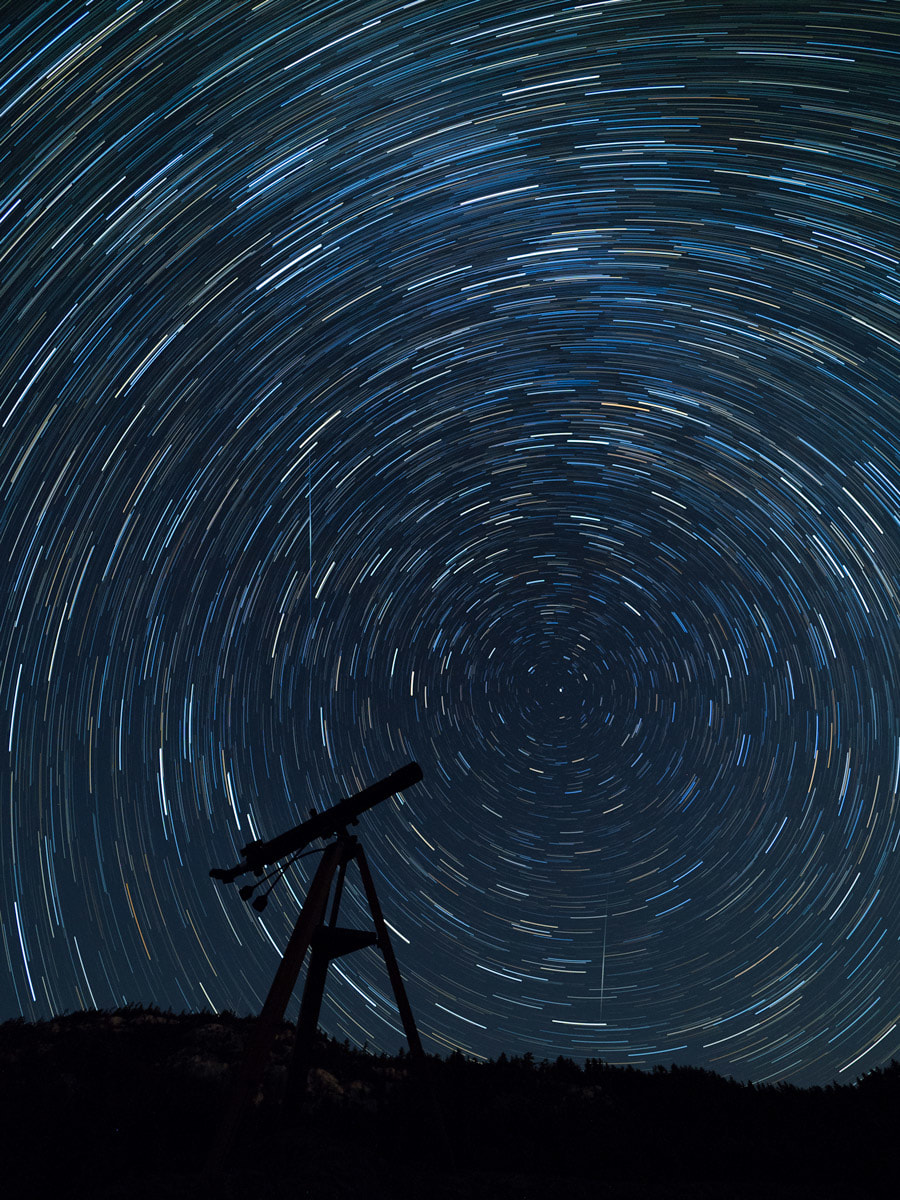
Using Live Composite is great for capturing star trails, but those trails can interfere with the meteors that occur. (Olympus E-M1 Mark II, 7-14mm f/2.8 PRO, ISO1600, Base Exposure of 25s over 45 minutes at f/2.8)
Is there a way to photograph a bunch of meteors in one single shot? Sorry, but no. Over the course of a 25-30 second exposure it would be extremely unlikely that you would see more than two shooting stars. Those photos where you have seen a dozen or more meteors are composite images of several shots blended together. The image below is an example of one. This is a blending of 12 images using Photoshop and layer masking. 
Picture
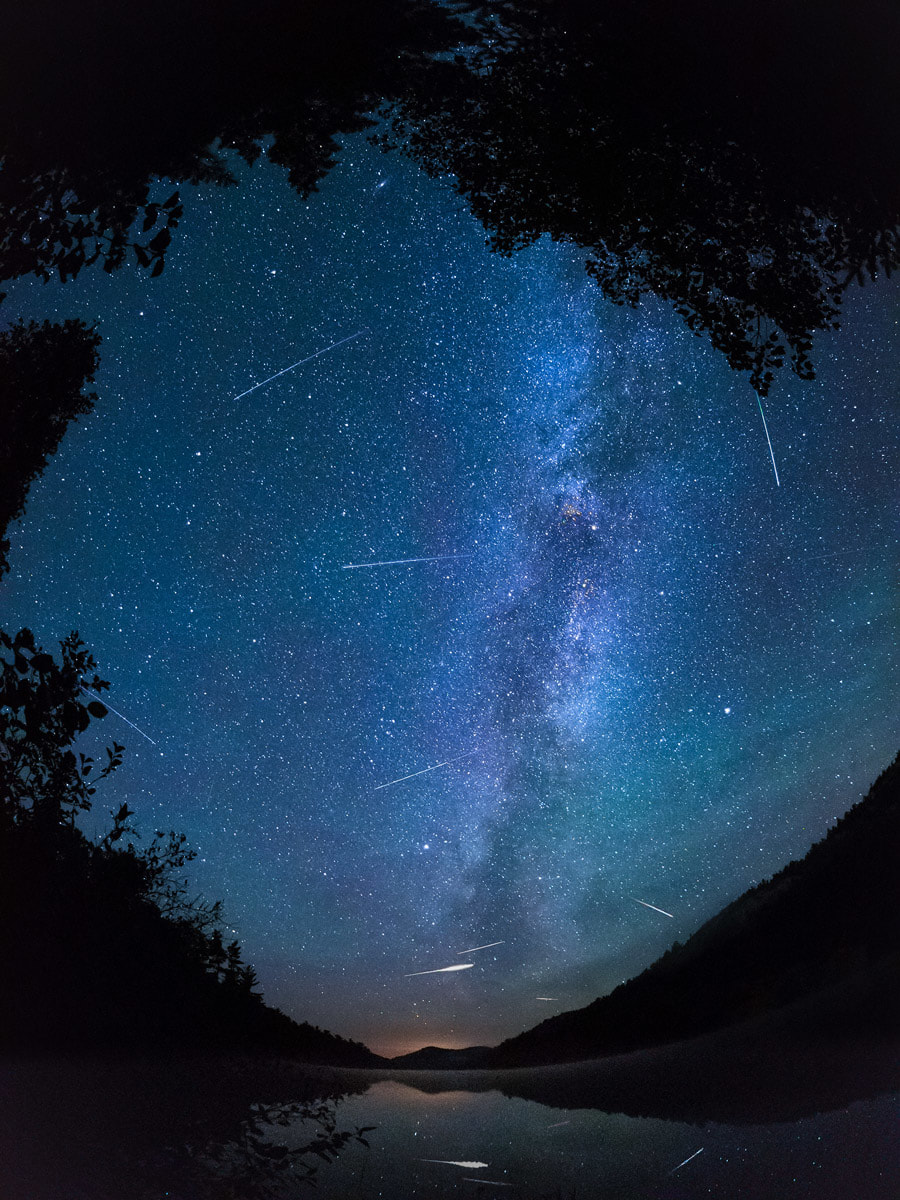
Final Thoughts
With a bit of planning, and a bit of luck it is quite possible to capture numerous meteors over the course of an hour or so of shooting. Just remember to make a wish after each one.

Useful Links
Here are all the links referred to in the body of this post, plus a few others;
  • Astrophotography 101 - an introductory tutorial on how to photograph the night sky
  • Live Composite - Learn the basics to creating your own live composite images
  • Time Lapse - step-by-step instructions on using the time lapse feature
  • timeanddate.com - further details on each of the major meteor showers
  • Clear Sky Charts - find the sky conditions for hundreds of locations in North America
  • Heavens Above - Find lots of great astronomical information including exactly when and where you can see Iridium flares for your location.
  • Iridium Flares in Real Time - YouTube video of Iridium flares.  
7 Comments
EE link
1/23/2018 05:13:39 am

Thanks for the calendar! And beautiful amazing photos once again!

Reply
Ashley Wallis
4/18/2018 03:20:22 am

Hi Peter,
Do these dates, directions and altitudes apply to the Northern Hemisphere, if so do you have any advise for me in Australia !
Take care ! Great article mate !
Regards, Ashley

Reply
Peter
4/19/2018 09:14:08 am

Hi Ashley,
This information is written for a North American audience, but the dates apply to the whole world. As for location in the sky I'm not certain about that. I found an article with an Australian focus that you might be interested in - http://theconversation.com/look-up-your-guide-to-some-of-the-best-meteor-showers-for-2018-86053
Cheers!

Reply
Carol Sheppard link
4/18/2018 01:42:29 pm

Excellent article, great writing style and organization! I appreciate that you shared this information with us.

Reply
Peter
4/19/2018 09:09:53 am

Thanks for taking the time to comment. Glad you found the article useful.

Reply
Arnaud link
11/17/2019 02:22:01 pm

Hi,thanks a lot for this article!
I have a question about pro capture mode,did it works with long
exposures?I mean few secondes to catch some lightnings for exemple,and how long can we stay on the button (half pressure)?

Reply
Debra
4/24/2020 10:11:54 am

Thank x 100. I live in the mts, in NM at high altitudes. The sky is incredible. However seems like i am always setting camera at last minute....always a 3 -stooges affair. Will follow all your sage advice. Head lamp is a great logical purchase.

Reply


Leave a Reply.

    Author

    Peter Baumgarten is a professional photographer and educator. He is also an Olympus Visionary and NiSi Official Photographer. 

    Categories

    All
    Astrophotography
    Behind The Photo
    Personal-thoughts
    Photo Projects
    Reviews
    Tips And Techniques

Proudly powered by Weebly
  • Home
  • About
  • Portfolio
  • Order
  • Blog
  • Events
  • News
  • Contact