|
One of the most common questions that I get as a photographer is how to properly shoot the moon. That question seems to pop up quite regularly - once per month in fact, when the moon is full. People love photographing the full moon, but once the event is over there seems to be far less interest in capturing our closest neighbour. I certainly understand this thinking. The full moon, especially when it is rising, can be an impressive (and somewhat challenging) subject to photograph. 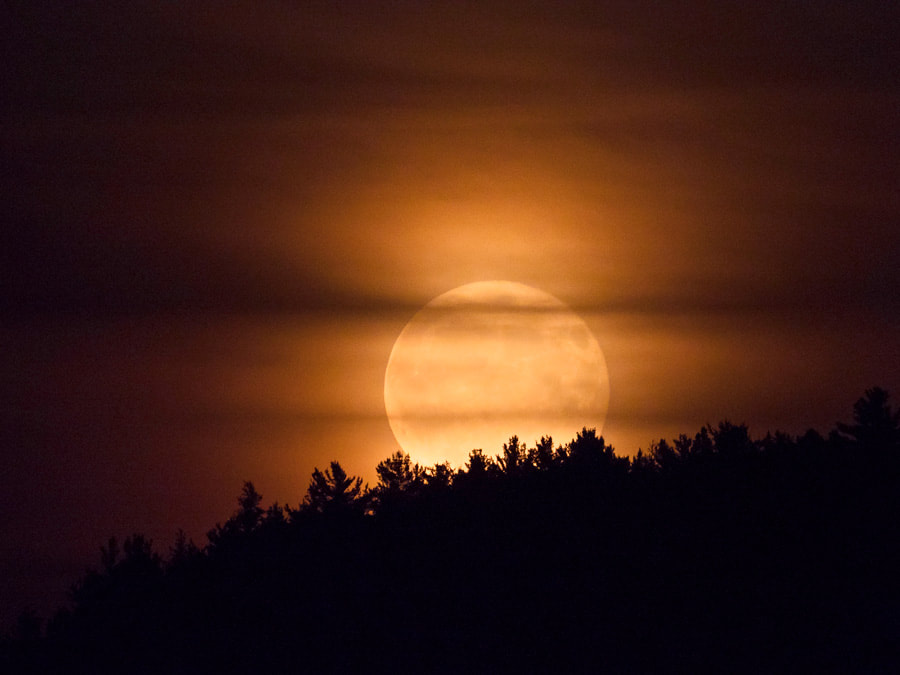 Zooming in to photograph a great moonrise can be quite rewarding, but the light of that moon can also be used to capture some great landscape images. (Olympus E-M1 Mark II, M.300mm f/4, ISO800, 1/13s @ f/5.6) As a landscape photographer I am always looking for interesting ways to present a scene. And like most, I work primarily during the two bookends of the day - the golden hours. But, as someone who also enjoys astrophotography, I have discovered that I can extend my landscape opportunities by shooting under the light of the moon. The following tips might help with your own 'after-hours' landscape photography. 1. Know the Moon Let's start with the obvious. It's difficult to photograph in the moonlight if the moon isn't even up in the sky. As a kid, I would see the phases of the moon printed on calendars and wonder why anyone would really care about that. Well, I care now. Of course, I'm not using a printed calendar anymore. There are far better websites and apps available that will not only identify the phase of the moon, but also moonrise, moonset and the time and direction of each. I tend to use timeanddate.com as my main reference. Anything from half to full will provide ample light for nighttime landscape photography. 2. A Bit of Planning Goes a Long Way Don't be fooled by the images in this post. For most of them it was quite dark. This means that planning a shot is even more important than for daylight shooting. As I prep for a late-night outing I consider the following;
3. Go Wide If capturing all the details in the moon is your objective then using a long lens would be the natural choice. But, since the primary goal is to capture a landscape image, stick with your landscape lens. Within my kit there are several great lenses that are perfect for this style of low light photography - the M.Zuiko 7-14mm f/2.8 PRO, 8mm f/1.8 PRO, 12mm f/2, 12-40mm f/2.8 PRO and the 17mm f/1.2 PRO. I tend to lean towards the 7-14 for most of my moonlit landscapes. It is fast enough for low light and has the perfect field of view of most situations.  Olympus E-M5 Mark II, M.12-40mm f/2.8 PRO, ISO1250, 6s @ f/6.3 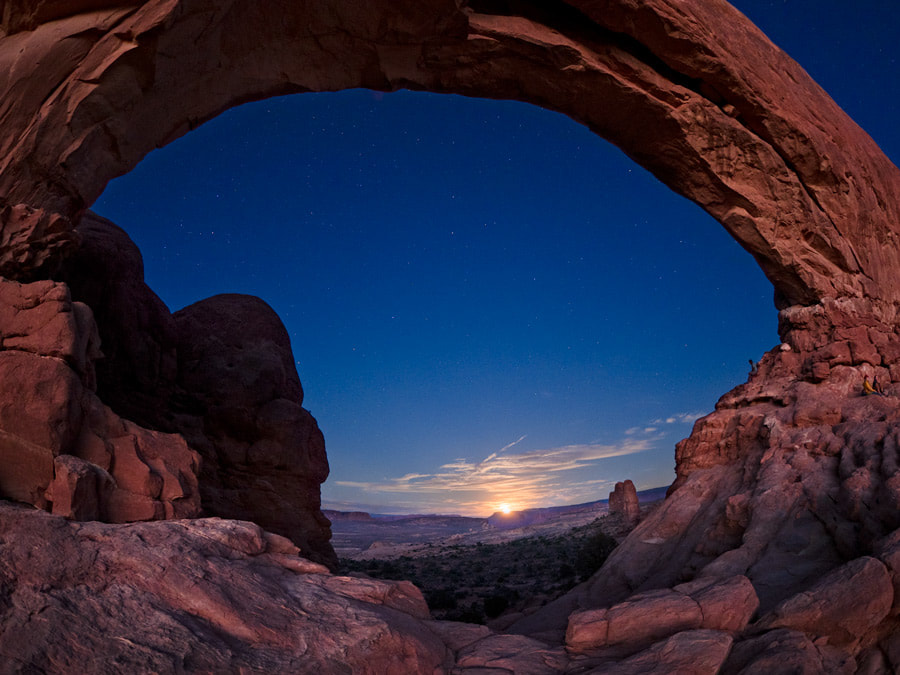 While the three photographers beside me used longer lenses to photograph the moon, I put on my trusty 8mm fisheye lens in order to include as much of the arch as possible. (Olympus E-M1 Mark II, M.8mm f/1.8 PRO, ISO800, 4s @ f/1.8) 4. Turn your Back on the Moon Including the moon in your image can make for a nice point of interest, but by turning your lens away from the moon you can capture a scene with far more even lighting. It's during these exposures that you realize just how much sunlight is being reflected by our moon. Since our eyes are not capable of seeing colour in such dim light it is also a bit surprising to see all the daytime hues pop up on your LCD. 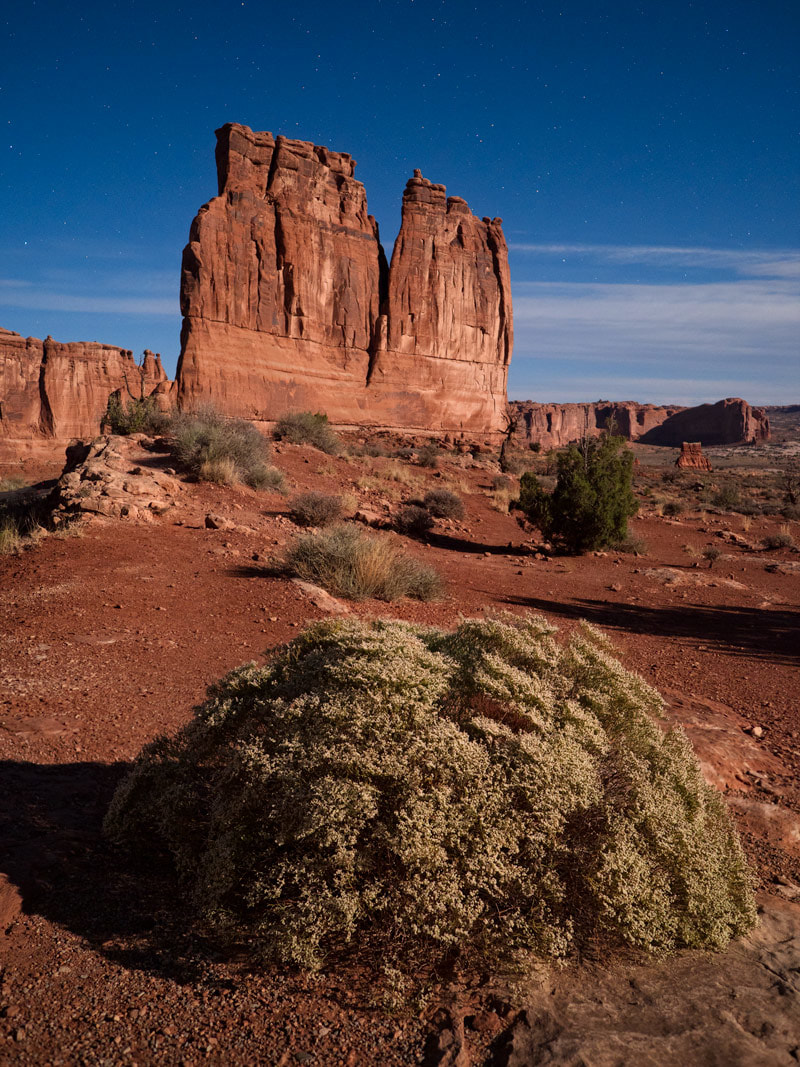 In order to capture more depth in this shot of 'The Courthouse' in Arches National Park, I focus bracketed three shots. (Olympus E-M1 Mark II, M.17mm f/1.2 PRO, ISO640, 5s @ f/1.2) 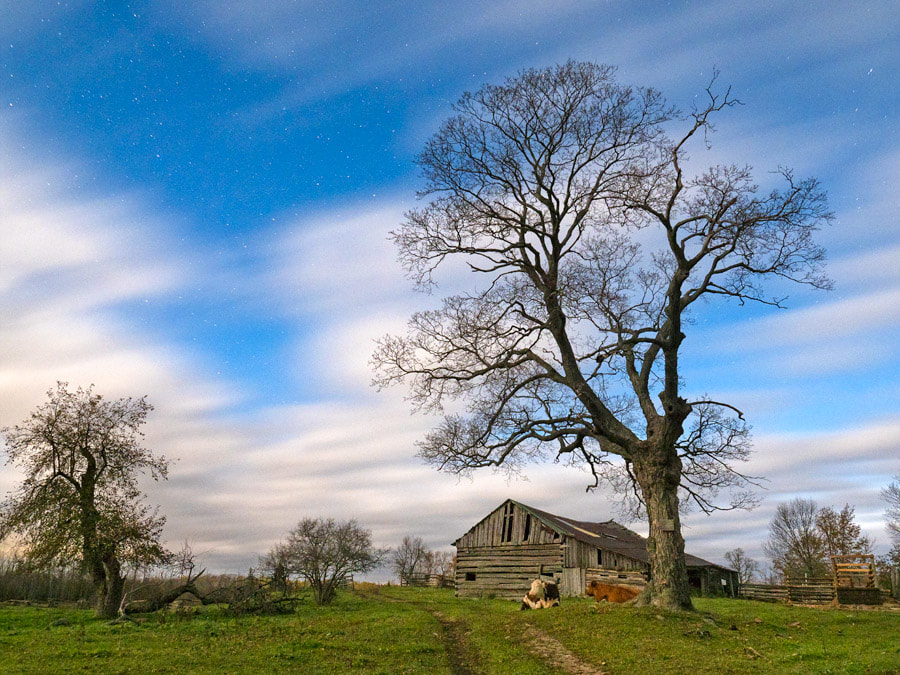 With a longer exposure, the light of the moon can turn night time into day. While shooting this scene it was dark enough that I didn't even notice the cows lying under the tree. Thankfully they remained still during the exposure. (Olympus E-M1 Mark II, M.7-14mm f.2.8 PRO, ISO800, 30s @ f/2.8) 5. A bit of cloud cover will work in your favour. For my regular astrophotography I definitely try to avoid any type of cloud cover, but for a moonlit landscape, bring it on! Just not too much. As with sunset photography a bit of cloud can make or break the photo and the same applies here. If you are driving to a location, check out a satellite image for cloud cover or use a clear sky chart for the area you are heading to. 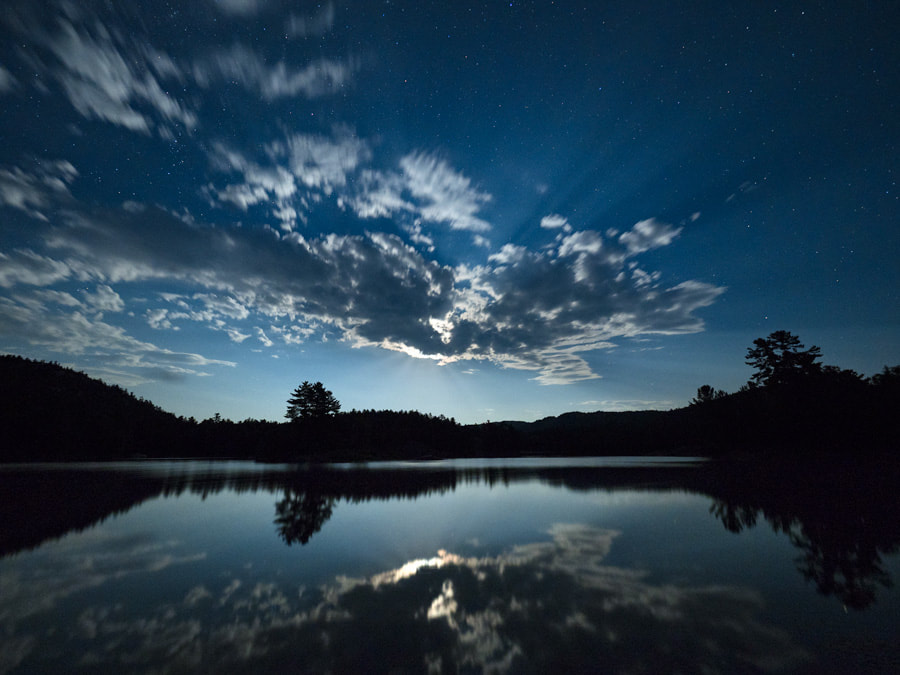 Olympus E-M1 Mark II, M.7-14mm f.2.8 PRO, ISO1000, 15s @ f/2.8  Even a bit of cloud can add interest to your composition. (Olympus E-M1 Mark II, M.7-14mm f.2.8 PRO, ISO1000, 20s @ f/2.8) 6. Perfect for Winter Winter is the perfect time to photograph some moonlit landscapes. I have three main reasons for this;
 Olympus E-M1, M.12mm f.2, ISO500, 13s @ f/2 7. Use Live Composite For the same reasons given in the previous tip, I like to shoot live composite images during the winter as well. I will take a few test shots first to check for composition and proper exposure and then will initiate the live composite feature on my Olympus camera and watch those star trails build. If you are not familiar with this feature you can check out my step-by-step instructions.  The test shot with the full moon over my left shoulder. (Olympus E-M1 Mark II, M.7-14mm f.2.8 PRO, ISO1000, 20s @ f/2.8) 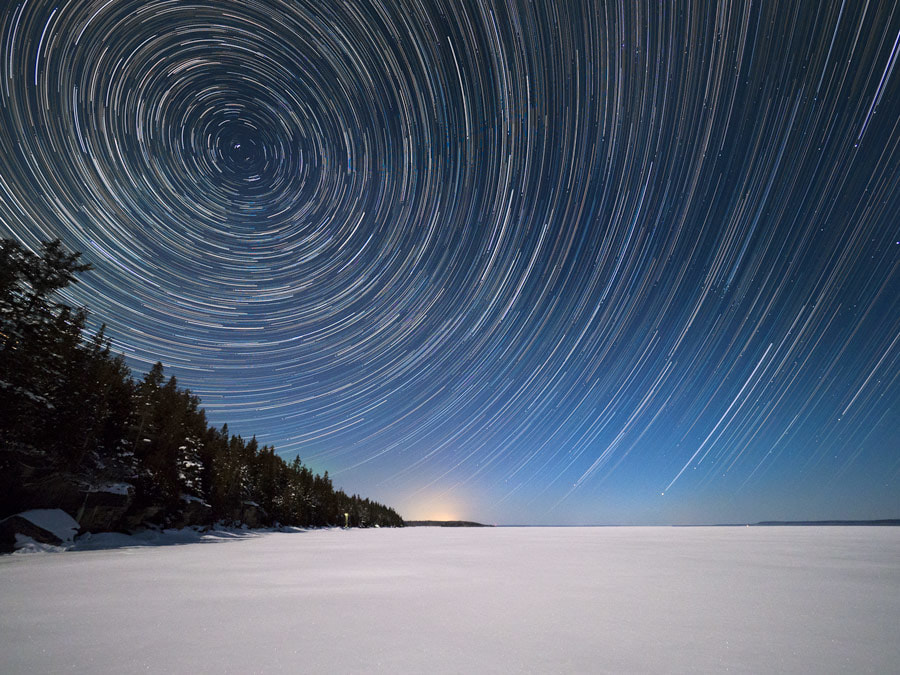 The camera's shutter remained open for about an hour in order to capture the movement of the stars through the night sky, yet didn't blow out the well-lit foreground. 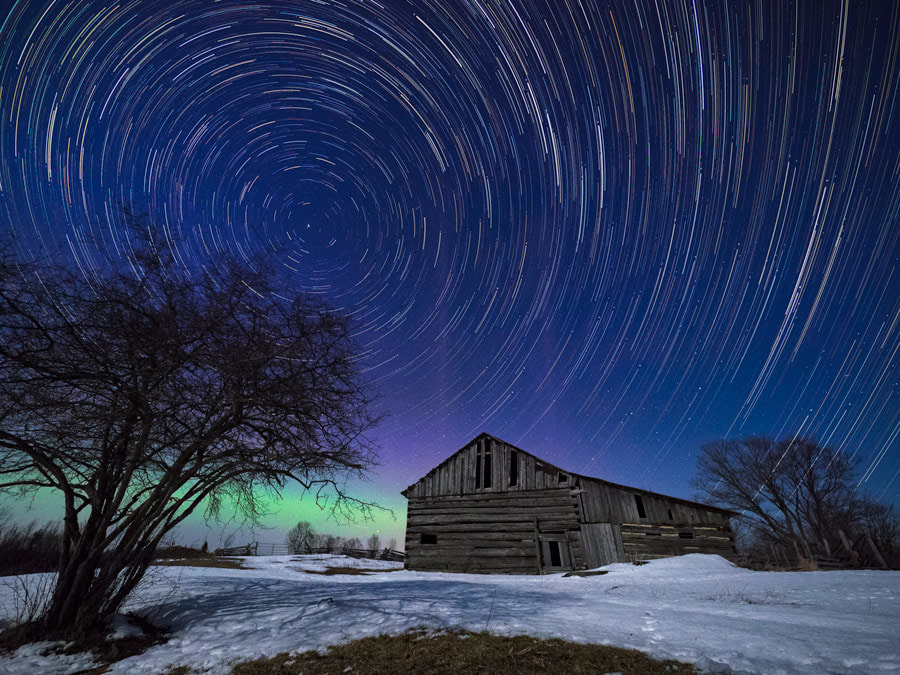 A bit of moonlight helped create some great foreground illumination in this shot. (Olympus E-M1, M.7-14mm f/2.8 PRO, 15s @ f/2.8) 8. Settings Matter Each situation is different and will require different camera settings, but there are a few generalizations we can make that will apply to most photos of this type;
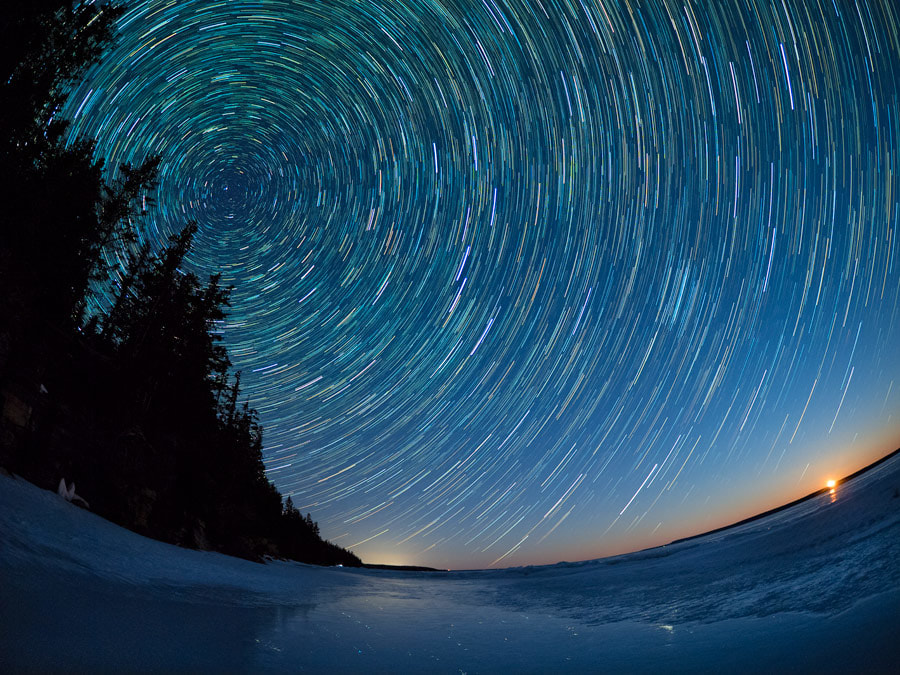 This photo almost doesn't qualify for this article since for most of this live comp exposure the moon was below the horizon. I timed it such that I would capture the moon just as it was cresting. This also explains why the camera settings are more typical of regular astro shot. (Olympus E-M1 Mark II, M.8mm f/1.8 PRO, ISO1600, 25s @ f/1.8) Final Word As a landscape photographer I am always looking for ways to expand my repertoire. A location you are quite familiar with can look quite different under a moonlit sky and add a completely different mood to the scene. This post makes reference to several photography techniques that you might be interested in reading;  Olympus E-M1 Mark II, M.7-14mm f/2.8 PRO, ISO1000, 13s @ f/2.8
13 Comments
John Hazell
2/12/2019 08:41:45 pm
Peter, 7/5/2019 09:32:29 am
Your Photography is amazing... Thanks for Tips...Keep Sharing 10/27/2019 08:58:32 am
It is correct that your lens choice will also have a major impact on the settings you choose. A faster lens will allow you to use lower ISOs or faster shutter speeds. I often search some <a href="https://www.jazzyjoy.com">online shopping deals</a> with reasonable price to get many lens to catch the right moment I would like. 10/27/2019 08:59:38 am
It is correct that your lens choice will also have a major impact on the settings you choose. A faster lens will allow you to use lower ISOs or faster shutter speeds. I often search some tools with reasonable price to get many lens to catch the right moment I would like.
Andrea
4/11/2020 02:57:04 pm
I am a bit puzzled with this amazing close-up photo of the moonrise photo (your credits: Zooming in to photograph a great moonrise can be quite rewarding, but the light of that moon can also be used to capture some great landscape images. (Olympus E-M1 Mark II, M.300mm f/4, ISO800, 1/13s @ f/5.6).
Ellen
9/26/2020 12:56:24 pm
Thank you so much for your article and the beautiful photography. With the moon moving as quickly as it does, I was surprised that you did long exposures. How do you avoid streaks or a blurred moon at these exposures 5/26/2021 12:39:17 am
Nice idea and advice on here! We have always used the best edgers we can find because having a clean line really does make all the difference. Good content! 6/13/2021 07:16:11 am
I always captured stars with the long exposure settings, but after seeing your landscape captures with long exposure settings under moonlight, I'm excited to try that one out ASAP. Thanks for sharing!
I love your images but just starting out in landscape photography at night I would love to know what white balance should be used? From a scientific perspective, moonlight has a CT around 4100K which produces very warm images when the camera is set to that value. 7/11/2022 07:09:27 pm
Thank you for explaining the aperture and how it affects light. I need to get a photographer for my sister. She is getting married on the beach.
Michael
7/12/2022 08:37:17 am
Under 'Preparation', I would also recommend bringing bug spray, at least for evenings in NS! Leave a Reply. |